

Open the Studio and Set Up the Runtime
Open Electromagnetics Studio
Open a scientific Session in GX-TXT. If the Studio reports Open a Session and reopen this Viewer to edit or solve a model., open the Session and reopen the tile. On the Viewers tab, under Simulation & Modeling, choose the Electromagnetics Studio tile. On first launch, Opening Viewer… may appear while GX-TXT prepares the window. In Help → About Module…, check that the module is viewer.electromagnetics_studio and the viewer is electromagnetics_studio. This guide covers version 0.3.4.
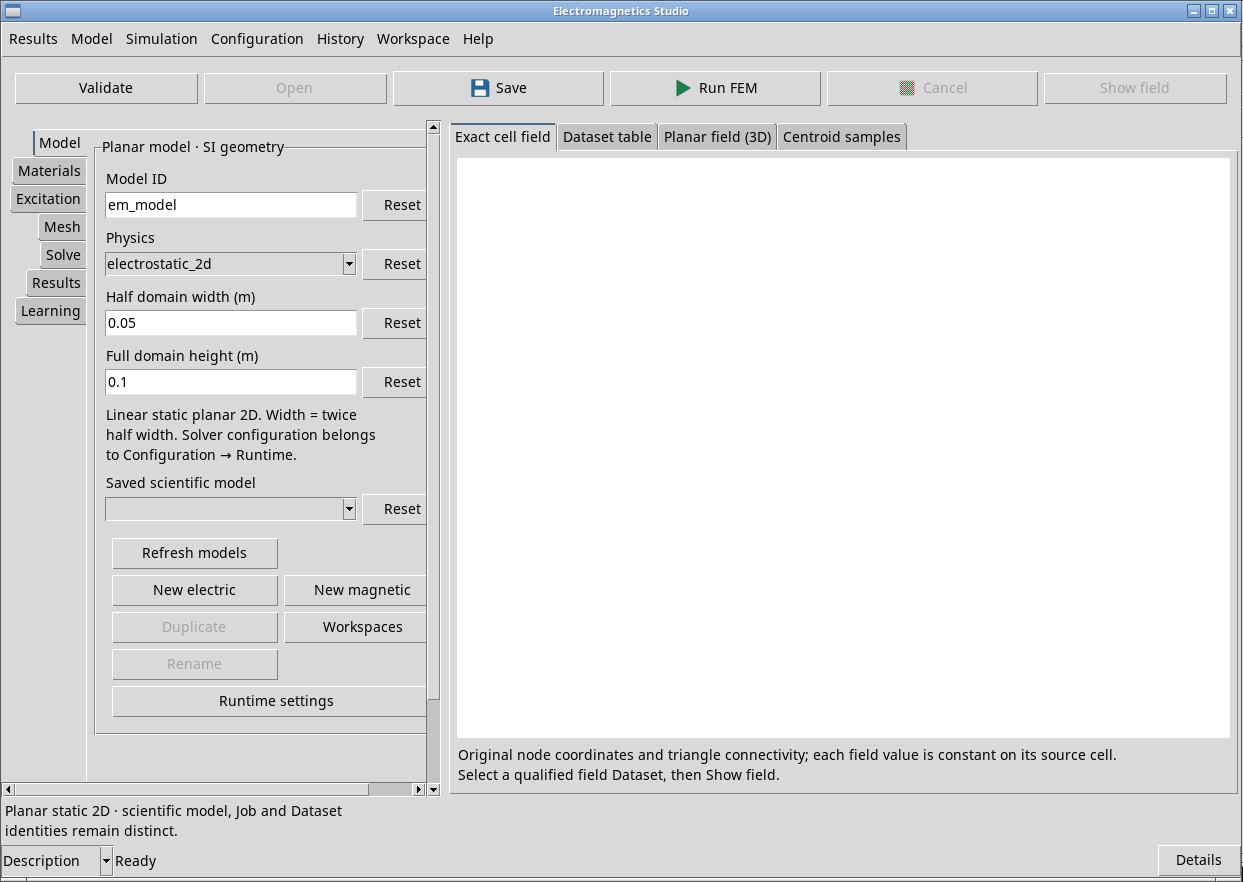
Find your way around the window
The top toolbar contains Validate, Open, Save, Run FEM, Cancel and Show field. The menu items with the same names perform the same actions. Drag the center divider to make more room for the controls or charts. If a panel clips text or controls, widen it or use its scrollbars when they appear.
On the left, Model sets the geometry and physics. Materials and Excitation set the material properties and source. Mesh sets the discretization. Solve displays status and logs. Results connects verified results to Datasets and views. Learning provides reference material.
On the right, Exact cell field displays the original cells. Dataset table shows the canonical rows. Planar field (3D) shows the same cells in the XY plane. Centroid samples displays samples at the cell centroids. You can switch tabs without running a calculation. Use the appropriate command first to populate the view.
In a narrow window, use the compact view selector to read the full titles. Open the list and choose a view. With the list open, press Ctrl + Home, then Invio, to select Exact cell field. The toolbar can wrap onto multiple rows. Widen the window to bring back the standard tabs.
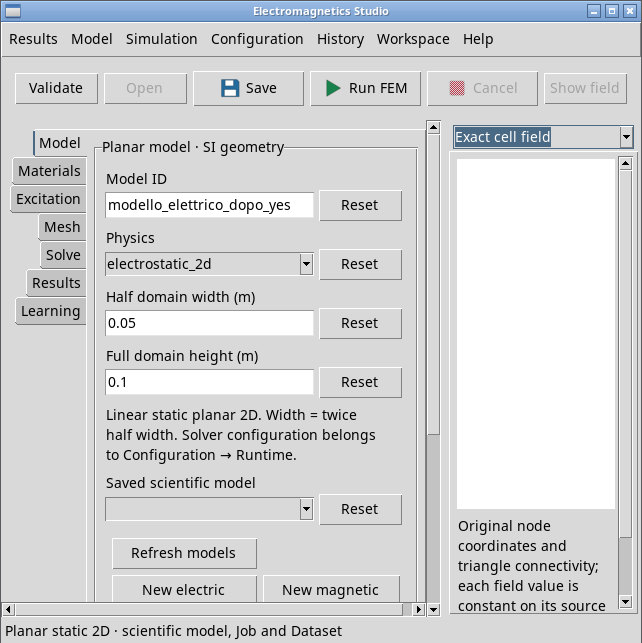
Check the status at the bottom after each action. Action '…': completed indicates that the window command finished. To check the solver outcome, look at the job status in Solve. Use the Description / History bar to switch between the action description and History.
Set up Gmsh and GetDP
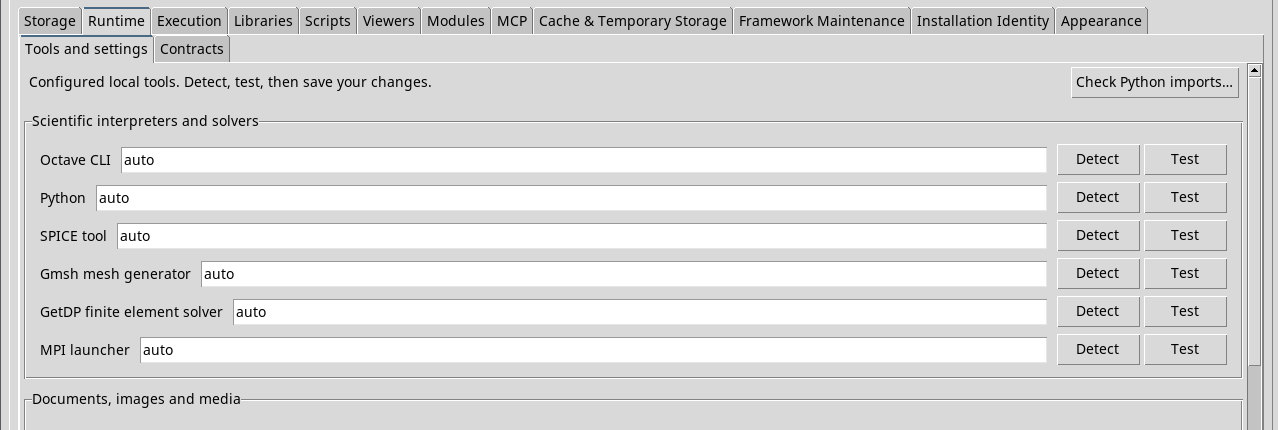
Open the runtime settings from Configuration → Runtime settings or the Runtime settings button in Model. The main window opens Configuration → Runtime. Under Scientific interpreters and solvers, find Gmsh mesh generator and GetDP finite element solver. Gmsh builds the triangular mesh. GetDP solves the system and produces the results.
With auto, GX-TXT looks for the executable. You can also specify a path from your local installation. Find it with Detect, verify it with Test, and press Save user defaults to save the runtime settings. The exercise logs recorded Gmsh 4.13.1 and GetDP 3.5.0.
Use Learning and the module manual
Read Learning for the electrostatic and magnetostatic references and guidance on interpreting the results. Help → User Manual… or F1 opens the module guide. Help → About Module… shows the name, version and provider. Use these details to identify the installation used for an exercise.