

Open Unified Documents and get to know the interface
Unified Documents is the GX-TXT viewer for opening PDFs and images, running OCR, reviewing text and tables, and publishing the results as Datasets in the Session. This chapter introduces the window, navigation, and main commands before you process a document.
The screenshots show Unified Documents 1.2.0 with a Session open and no PDF or image selected. This is the normal starting state. Some controls are visible before they become available. The command names in this guide match the English labels in the interface.
1. Before launching Unified Documents
Launch GX-TXT and open or create the Session you want to work in. Document sources and published outputs belong to the Session. Choose the right Session to find a particular document or Dataset.
Unified Documents is an optional module. It must be installed and enabled. Check the Viewers panel in the main GX-TXT window to see whether the module is available.
2. Open the Viewers panel
In the GX-TXT main window, select Viewers. Find the Unified Documents tile in Imaging & Documents.
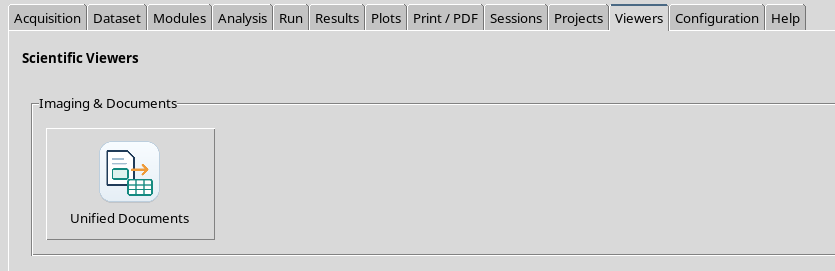
Click the Unified Documents tile to open the viewer. The screenshot shows where the tile appears in the Viewers panel.
3. Find the viewer with Search
If many viewers are installed, use Search at the upper right of the Viewers panel. Enter Unified Documents to filter the list. Use Refresh to update the list of viewers.
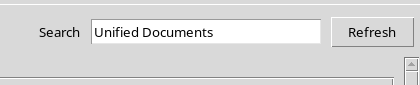
Search filters the list of viewers. It does not search the documents in the Session or the text inside a PDF.
4. Identify the main viewer window
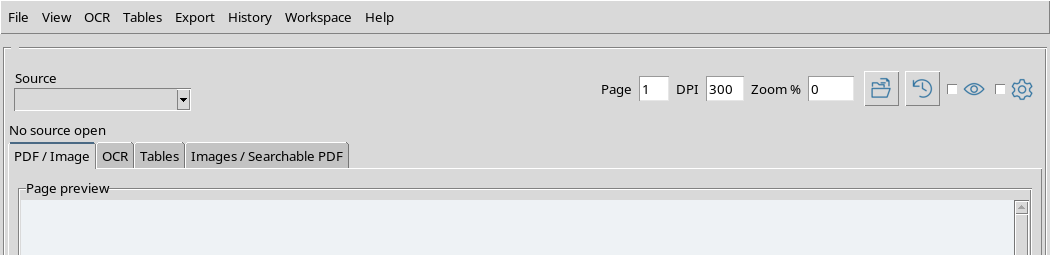
The viewer opens in a separate window titled Unified Documents. The window has a menu bar, a source selector, four tabs, and a lower area for status messages and shared controls.
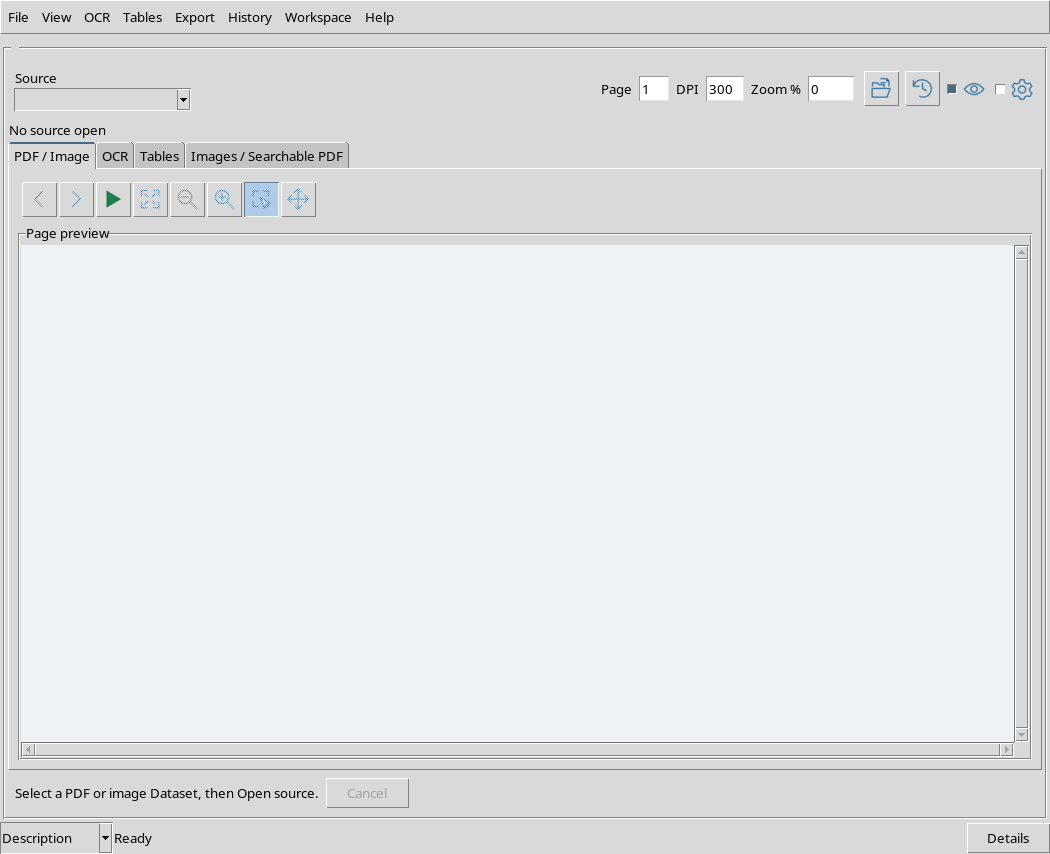
With no document selected, the viewer displays No source open and prompts you to choose a PDF or image Dataset and select Open source. An empty preview is expected at this point.
5. Understand Source and the shared buttons
Source lists the document Datasets in the Session. Open source opens the selected Dataset. Refresh sources updates the list of available sources.
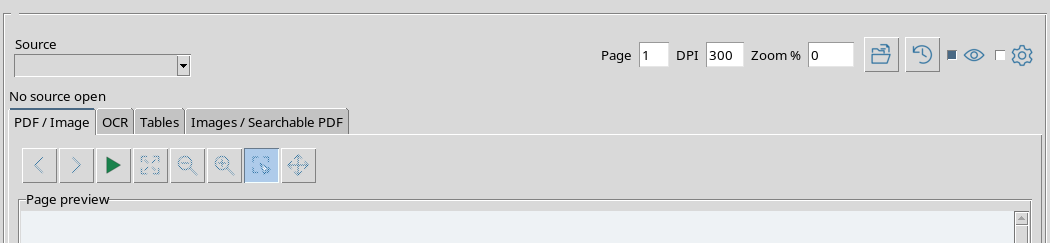
The selector is empty when the Session has no compatible PDF or image Dataset. The open command can be visible even before you select a source.
6. Read the Page, DPI, and Zoom % fields
Next to the source selector are Page, DPI, and Zoom %. The initial values shown here are 1, 300, and 0.
- Page identifies the current working page of the selected source.
- DPI sets the resolution requested for page rendering.
- Zoom % controls the display magnification.
These fields are present before a source opens. Their initial values do not indicate that a page has already been rendered or an image processed.
7. Identify the four main tabs
Below the source bar are four tabs: PDF / Image, OCR, Tables, and Images / Searchable PDF.
Switching tabs changes the available tools. The source selection is shared across the viewer. Start by identifying what each tab does, then open and check a source before using the publishing commands.
8. PDF / Image preview and navigation
The PDF / Image tab contains Page preview and a tools palette with Previous, Next, Render page, Fit page, Zoom −, Zoom +, Region, and Pan.
When no source is open, navigation and selection controls that need a document are disabled. Render page may still look enabled. Select a document before using it.
Later chapters cover page selection, region coordinates, and the differences between PDFs and images.
9. Recognize and review text in OCR
The OCR tab contains Run OCR, Publish text, Copy text, Options, and Editable text review.
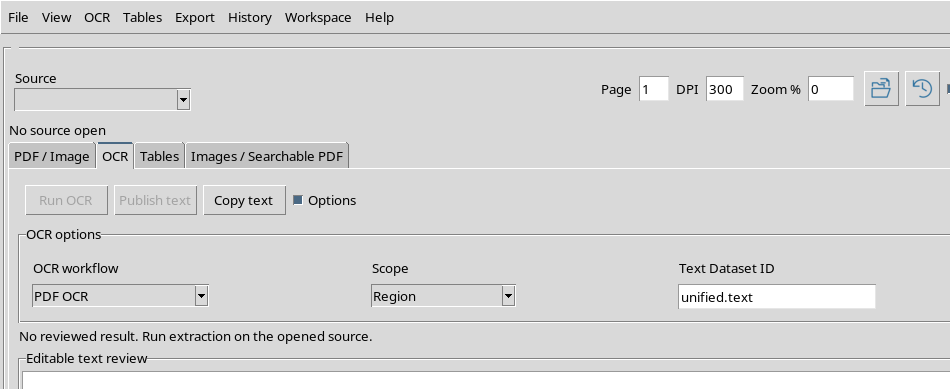
When no source is open, Run OCR and Publish text are disabled. Expand Options to see OCR workflow (such as PDF OCR or Document OCR), Scope (Region, Page, or Document), and the intended text Dataset ID. The review field is visible even when it contains no recognized text.
10. Extract and edit tables
The Tables tab contains Extract table, Publish table, Options, and Editable table.
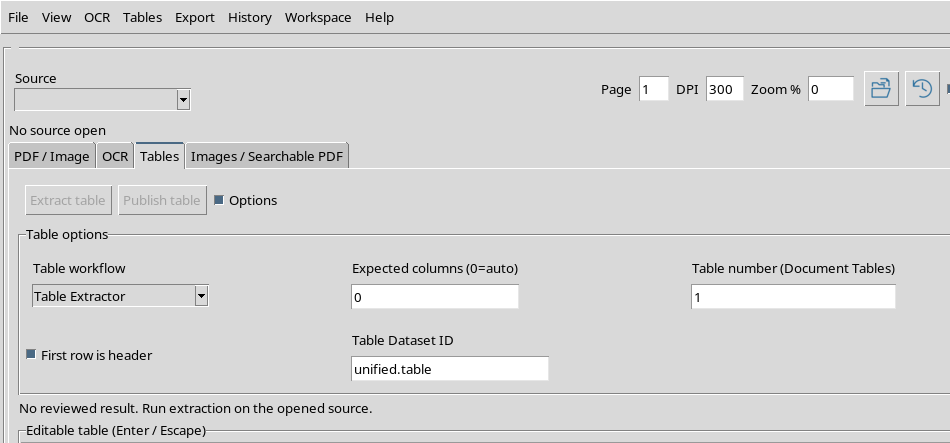
Under Options, choose Table Extractor or Document Tables. You can also set Expected columns (0=auto), the table number, First row is header, and the output Dataset ID.
Use the review area after extraction. Extract and publish commands remain disabled until a source is open. Later chapters explain editing cells and checking the extracted values.
11. Publish images or create a searchable PDF
The Images / Searchable PDF tab includes Image publication, Image Dataset ID, Publish region, Publish page, Searchable PDF Dataset ID, and Create searchable PDF.
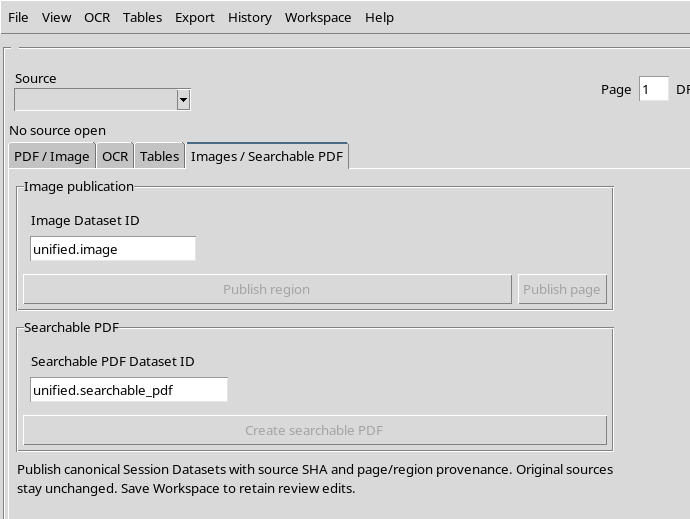
These actions can create new Datasets in the Session. Each becomes available once its source and any required intermediate result are ready. The outputs remain linked to their original document and have separate identities.
12. Show Recognition settings
Use Recognition settings in the shared bar to show or hide OCR languages, PSM, and PDF text method.
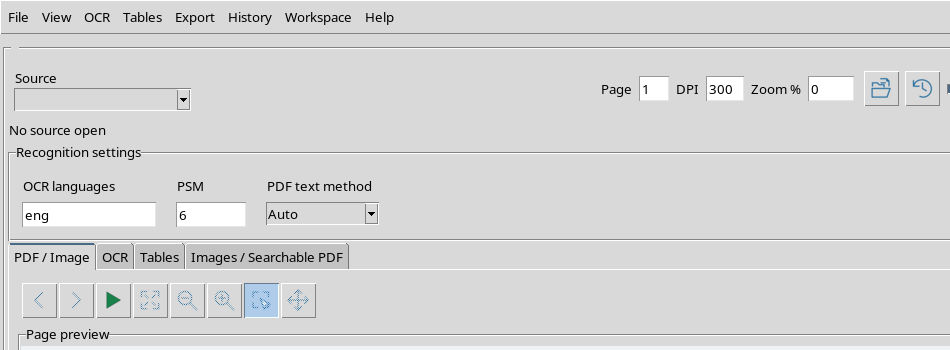
The initial values shown are eng, 6, and Auto. The PDF text method menu offers Auto, Native, and OCR. These fields set up recognition. The recognition settings chapter explains how each value is used.
13. Show or hide the Tools palette
Tools toggles the page navigation palette. This changes the view while preserving the document and its regions.
When the palette is hidden, the source bar and tabs are still available. If the tools seem to be missing, check the Tools toggle first.
14. The File menu
File contains the main source commands, Open source and Refresh sources.
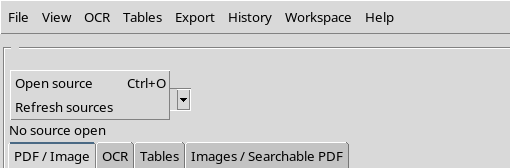
To open a document, first select a PDF or image Dataset from the Session in Source. This keeps the document linked to its entry in the GX-TXT catalogue.
15. The View menu
View contains page navigation and display commands, including Previous, Next, Render page, Fit page, Fit width, Zoom +, Zoom −, Apply zoom, Region, Pan, Clear region, and Select page.
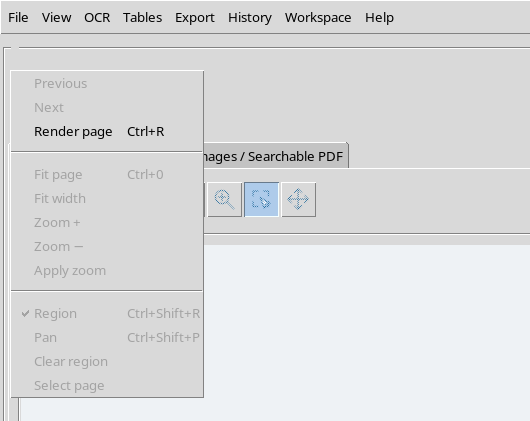
The menu shows keyboard shortcuts where available. Commands for a specific page are generally disabled when no source is open.
16. The OCR menu
OCR gives access to Run OCR, Publish text, and Copy text.
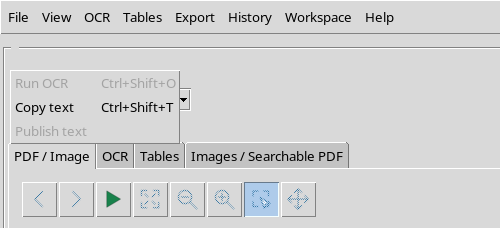
Run OCR recognizes text. Copy text copies the text in the review area. Publish text registers the result as a Dataset. In the initial state, Run OCR and Publish text are disabled. Copy text can still appear enabled even when there is no text to copy.
17. The Tables menu
Tables offers Extract table and Publish table.
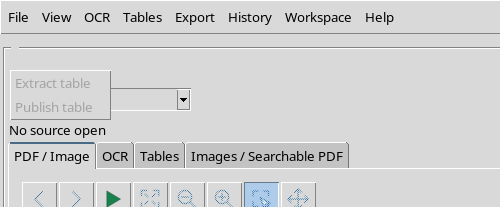
Extraction prepares a result for review. Publishing registers the table once it is available. Both commands appear disabled when no source is open.
18. The Export menu
Export contains Publish region, Publish page, and Create searchable PDF.
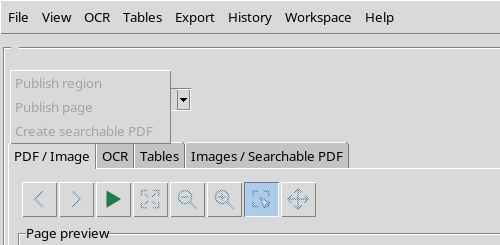
These commands correspond to the actions in Images / Searchable PDF. An image Dataset stores the pixels of the selected region or full page. A searchable PDF adds a text layer that you can search.
19. The History menu
History contains Undo and Redo, a control to show or hide Description / History, and commands to view history details, save, and work with named histories.
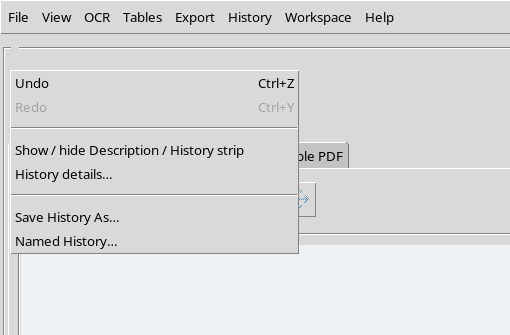
History is shared across GX-TXT. Undo can appear enabled even when you have not made a change to the current document. Which actions can be undone or redone depends on the state of the work.
20. The Workspace menu
Workspace contains New workspace, Open workspace, Save, Save As, Session Workspaces, Close, Import, and Refresh. Some commands are disabled in particular states.
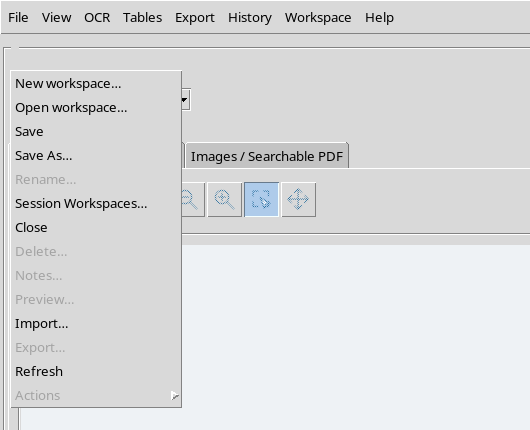
The Workspace is a shared GX-TXT feature. Use it to consult or save your working state. Later chapters demonstrate what is restored after saving, closing, and reopening a Workspace.
21. The Help menu
Help provides User Manual and About Module.
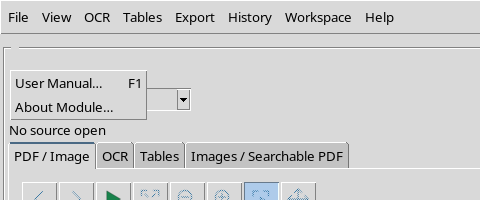
The menu lists F1 for User Manual. About Module shows information about the installed module. If a feature looks different from this guide, check the version of the viewer you have installed.
22. Keyboard shortcuts shown in the interface
The following shortcuts are displayed in the menus of this version.
| Shortcut | Menu command |
|---|---|
| Ctrl+O | File → Open source |
| Ctrl+R | View → Render page |
| Ctrl+0 | View → Fit page |
| Ctrl+Shift+R | View → Region |
| Ctrl+Shift+P | View → Pan |
| Ctrl+Shift+O | OCR → Run OCR |
| Ctrl+Shift+T | OCR → Copy text |
| Ctrl+Z | History → Undo |
| Ctrl+Y | History → Redo |
| F1 | Help → User Manual |
Shortcuts have the same prerequisites as the menu commands. For example, open a source before using the OCR shortcut.
23. Read the status and messages
The bottom of the window shows status messages, Cancel, and the shared bar with Description, the Ready status, and Details.
No source open means no document has been opened for viewing. Cancel is disabled while there is no job to stop.
To verify an operation, read the final message and check any result it published in the Session.
24. Work in a compact window
Unified Documents can be resized. The observed minimum size of the window content is 760 × 582 pixels, excluding the window menu bar.
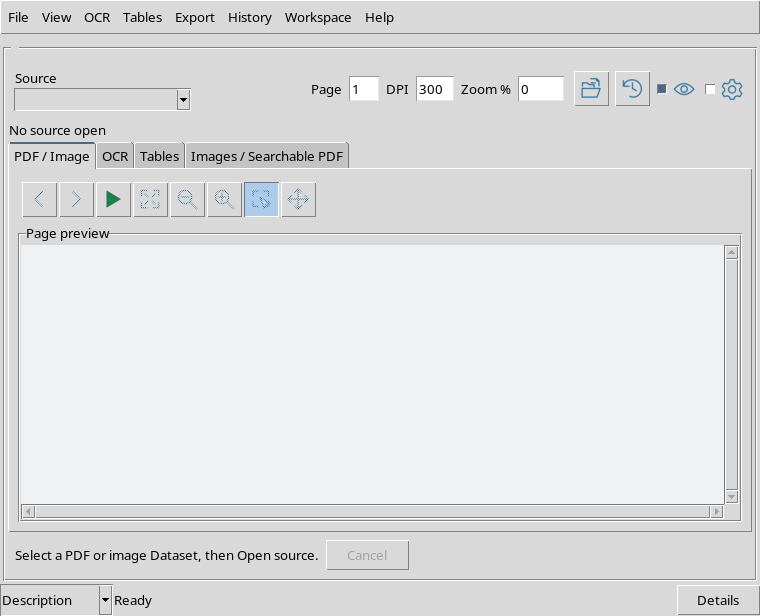
The compact layout still gives access to Source, Page, DPI, Zoom %, the main tabs, and shared controls. Enlarge the window if a label or icon is too small to read before working on the data.
25. Enlarge the window
A larger window gives more room to the page preview and the review tools.
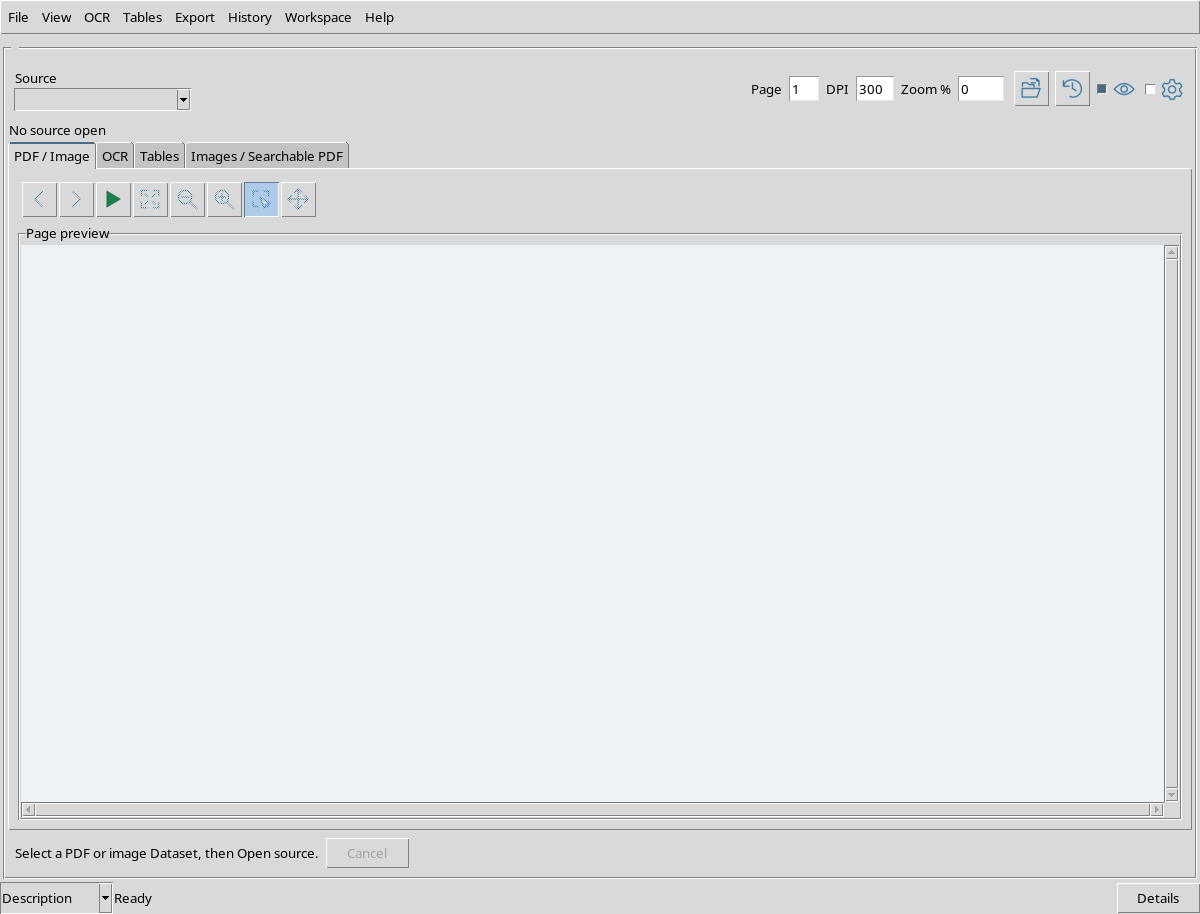
Resizing the window changes the layout and preserves the original source coordinates. Use Zoom % to change the scale of the displayed content.
26. Start a document workflow
- Open the right Session in GX-TXT.
- Select Viewers and open Unified Documents.
- In Source, select a PDF or image Dataset already registered in the Session.
- Use Open source and wait for the status confirmation.
- Check PDF / Image before choosing OCR, Tables, or Images / Searchable PDF.
- Before creating an output, check the document, the options, and the intended output Dataset ID.
If Source is empty, import a document into the Session first. The OCR and export commands need an open source.
27. Recap and next step
Use PDF / Image to view and navigate documents, OCR to recognize and review text, Tables to extract and review tables, and Images / Searchable PDF to publish images and searchable PDFs. File and View help you open and view the source. History, Workspace, and Help provide shared GX-TXT functions.
The next chapter shows how to select and open a PDF or image source. With a source open, you can test rendering, recognition, edits, and publishing on a specific document.