

Create and verify a searchable PDF
With GX-TXT Unified Documents 1.2.0 you can generate a PDF with a searchable text layer from a PDF consisting of images, using Create searchable PDF in the Images / Searchable PDF tab. The result is recorded in the Session as the new canonical Dataset document.pdf, without replacing the source.
For this guide we will use a real datasheet of electronics in English and Chinese. It is important to distinguish three aspects: the original document of the manufacturer, the image-only copy that requires OCR and the PDF produced by the viewer. We will also show which values the recognition can read and which ones still require scientific control.
1. What makes a PDF searchable
A PDF can contain actual text, images, or a combination of the two. If a page is just an image, selecting text with the mouse or searching for a word in the content may not work.
A searchable PDF obtained with OCR preserves the visual representation of the document and adds a text layer that can be extracted, selected or interrogated by compatible programs.
2. A result different from the Dataset document.text
The Create searchable PDF command produces a PDF file, published under the document.pdf contract. It should not be confused with Publish text, which creates a document.text Dataset containing only text.
Publish page and Publish region are also different operations: they generate canonical PNG images, not a PDF with text search level.
3. The electronic reference document
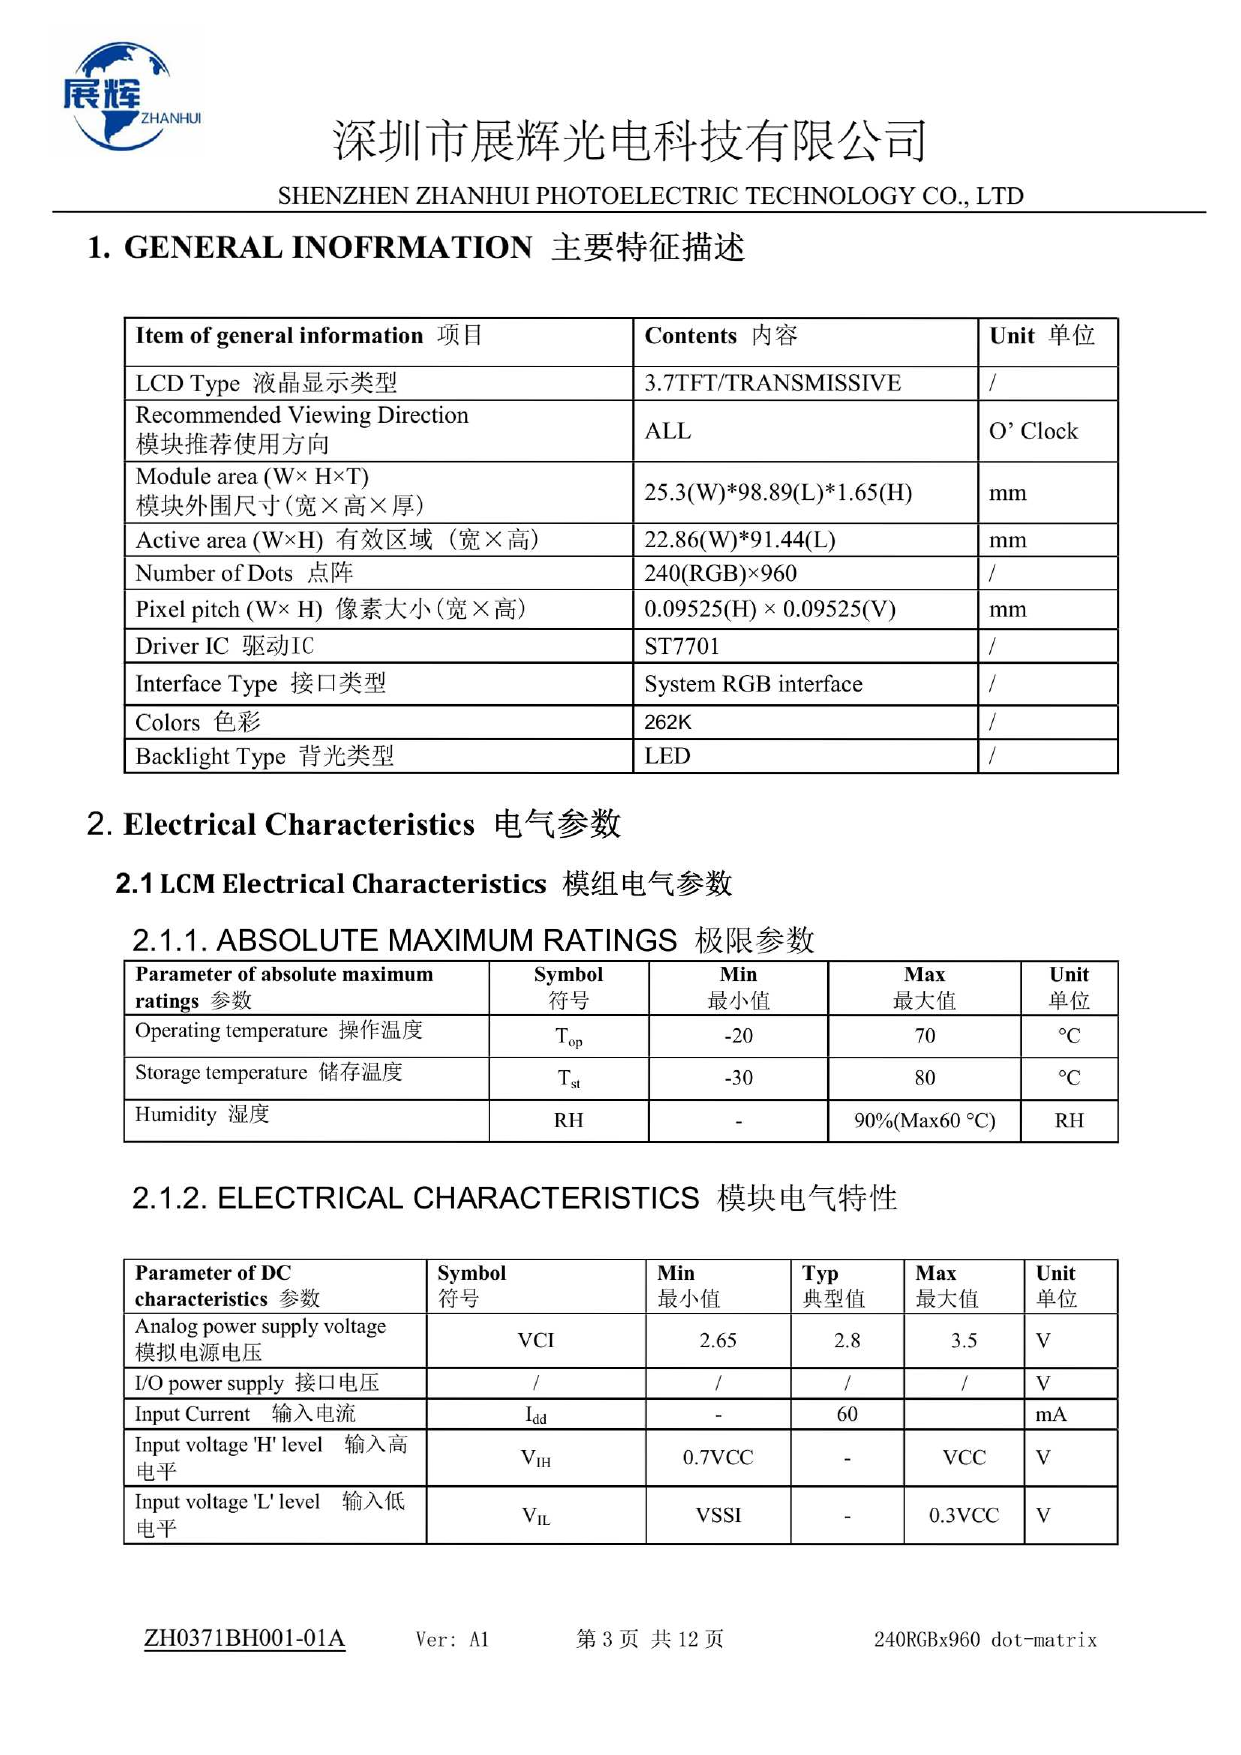
Our example starts from the manufacturer’s datasheet ZH0371BH001-01A, with 13 physical pages, English and Chinese labels, electric values, tables and electronic acronyms.
The physical page 4 contains, among other things, the electrical characteristics of the display, the ST7701 driver and the parameters of the supply voltage. It will be the page used in the OCR test.
4. Open the original PDF
Import the document with the normal Acquisition Handler PDF, select Viewers → Unified Documents, then use Source and Open source to open it.
On the PDF / Image tab, choose Page = 4, DPI = 200 and press Render page.
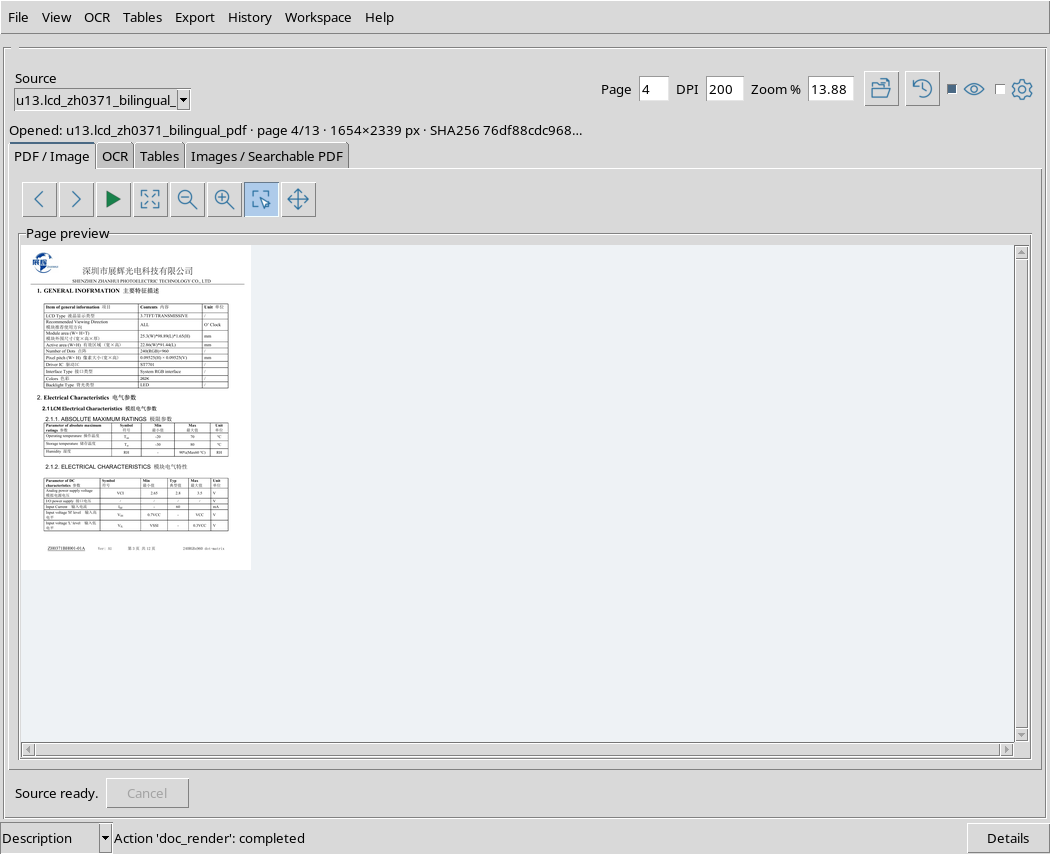
the viewer shows the page and source information. Preview rendering does not change datasheet bytes.
5. Check first if text already exists
Not all pages that seem scans need the OCR. The original datasheet of this guide already contains digital text embedded in the PDF.
On the physical page 4, a textual extraction from the original document returns words like VCI, Input Current and values like 2.65 and 3.5. Generating a new OCR layer without need can be useless and can introduce errors.
6. Where to find Create searchable PDF
Switch to the Images / Searchable PDF tab. In the Searchable PDF section you will find the Searchable PDF Dataset ID field and the Create searchable PDF button.
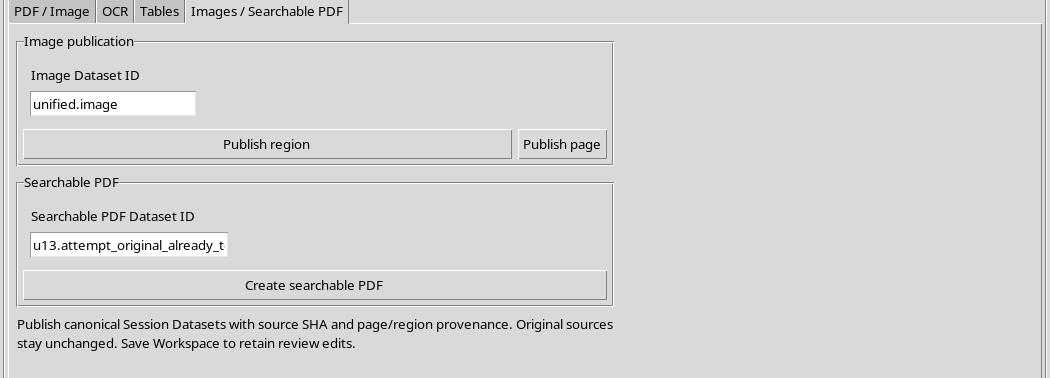
The top section Image publication instead contains Publish region and Publish page: these two commands do not add a text layer.
7. First test: PDF already equipped with text
If you press Create searchable PDF on the original, the current OCRmyPDF engine identifies the existing text and can stop the procedure with the message PriorOcrFoundError: page already has text.
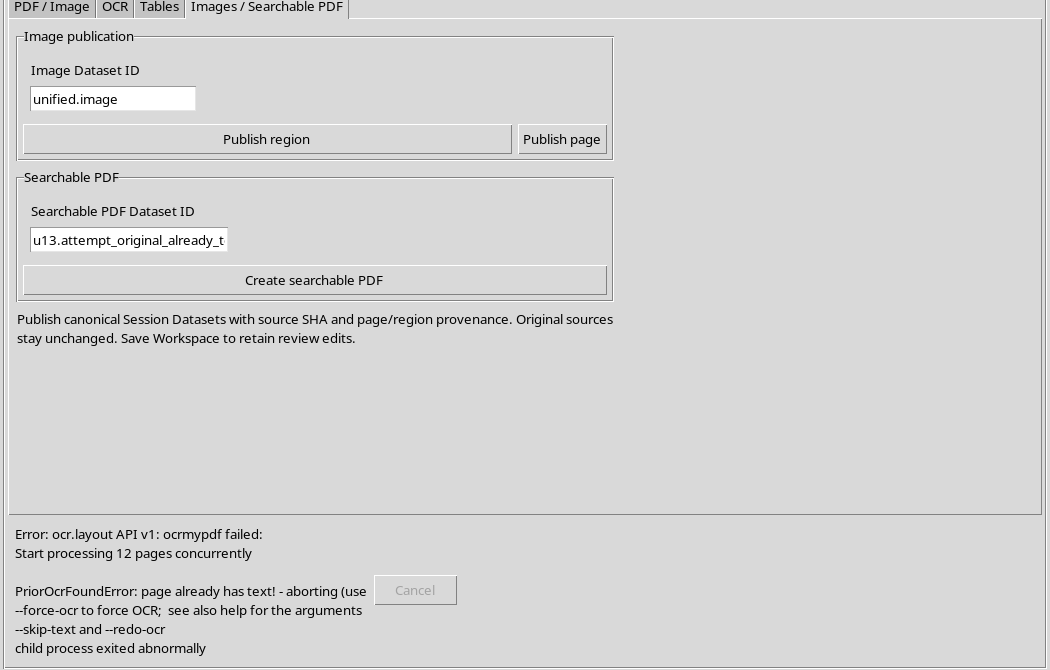
This test does not create a new Dataset. It is not a loss of the original content: the document remains available and already searchable for parts that possess digital text.
8. How to interpret rejection
The message does not mean that the PDF is unreadable. It means that the OCR operation, under the conditions used by the viewer, does not want to add a level of recognition where text is already present.
In the examined workflow, the GUI command does not set out options dedicated to selectively forcing or skipping pages with text. For an already searchable document, use the original preferably, unless specific needs are assessed separately.
9. Prepare a true image-only PDF
To verify recognition on an appropriate input, we made a raster copy of 4 page only: first converting the original page to PNG to 200 DPI, then inserting that PNG into a new PDF.
Those who wish to play the example can use, for example, these standard tools, after saving the original datasheet:
pdftoppm -f 4 -l 4 -singlefile -r 200 -png datasheet.pdf pagina4
img2pdf pagina4.png -o pagina4-solo-immagine.pdf
The second operation creates a PDF that contains the page as an image, without reconstructing its text. This is a derivative work copy, not a new original published by the manufacturer.
10. The authentic content of the PDF raster
This is the page used in the test, rendered from the original PDF to 200 DPI. The Chinese tables and writings are the same as the manufacturer’s document.
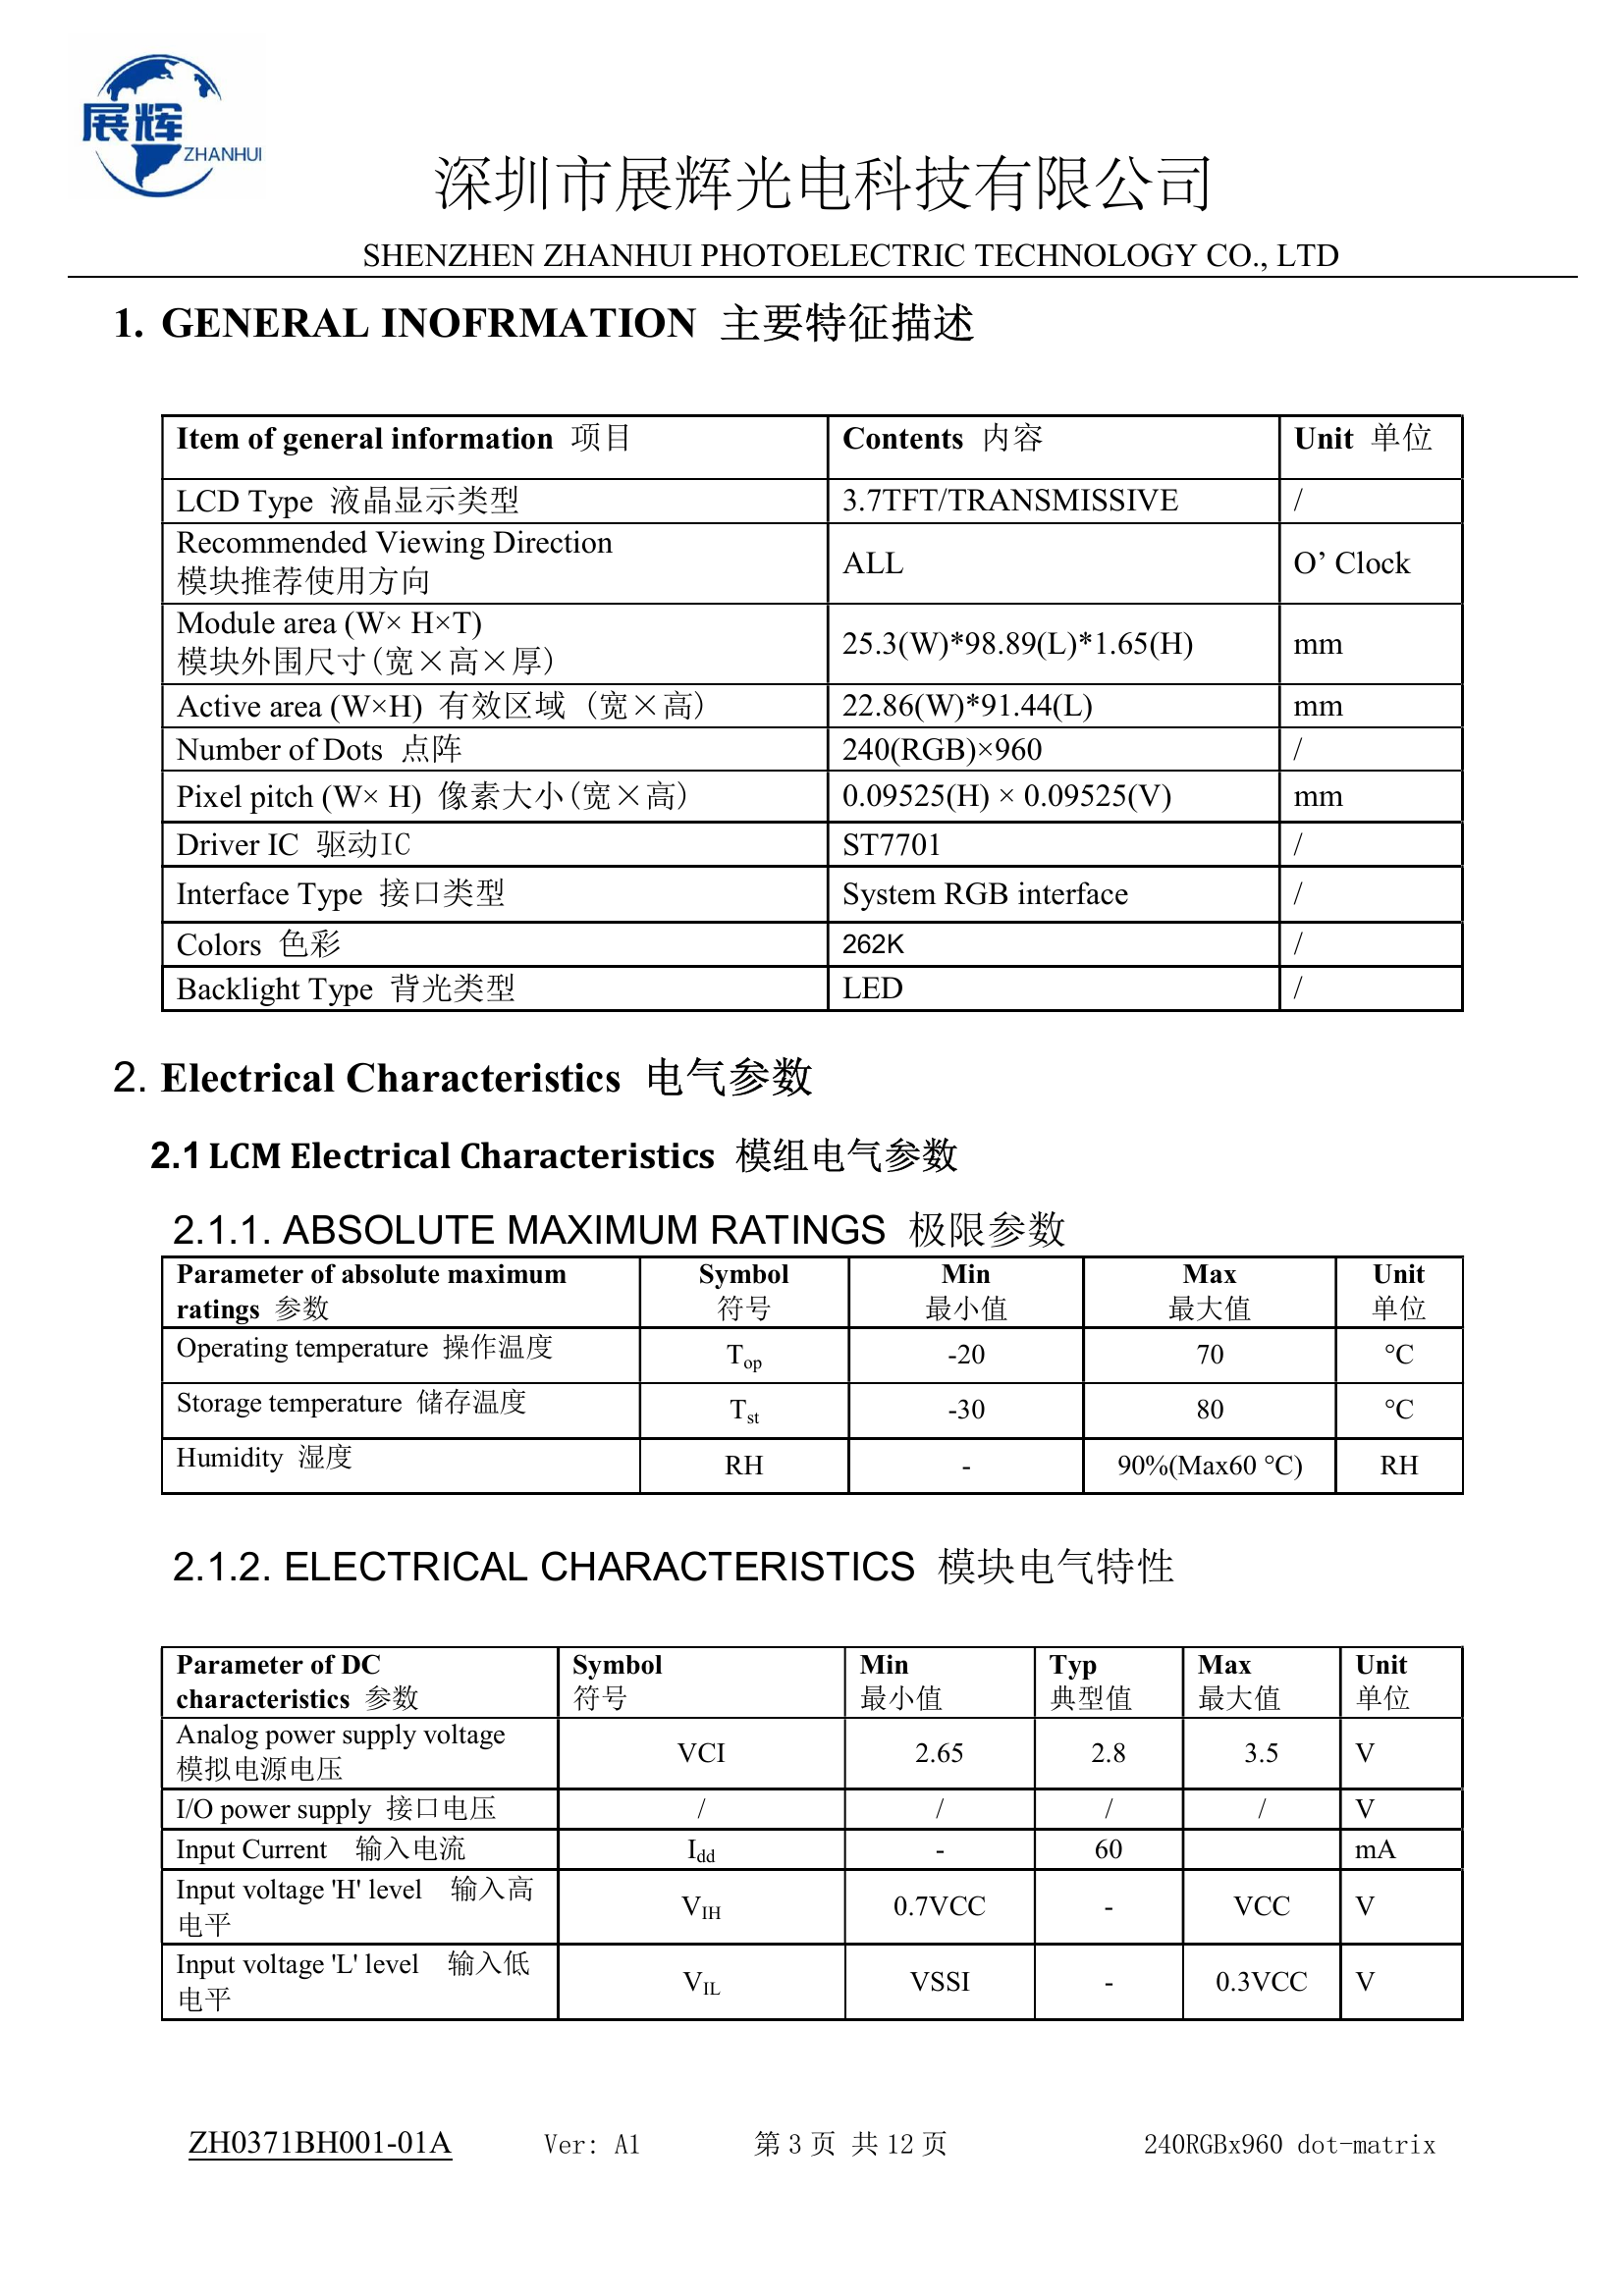
The image measures 1654 × 2339 pixels. It is an image actually obtained from the datasheet, not a screen designed to represent the interface.
11. Check that the PDF raster has no text
The new working PDF contains a single physical page and a single image. Before applying OCR, the extractable text is absent.
This verification is essential to compare the result before and after processing: if the raster copy already had a text layer, we could not correctly attribute the new text to the recognition just performed.
12. Import the PDF raster as a source
Import the new image-only PDF via the Acquisition Handler PDF. It will be recorded as another Dataset document.pdf, distinct from the complete datasheet of 13 pages.
In the Source field select the raster copy and press Open source. the viewer will show Page = 1 and a total page, because the new file contains only the 4 page extracted from the original document.
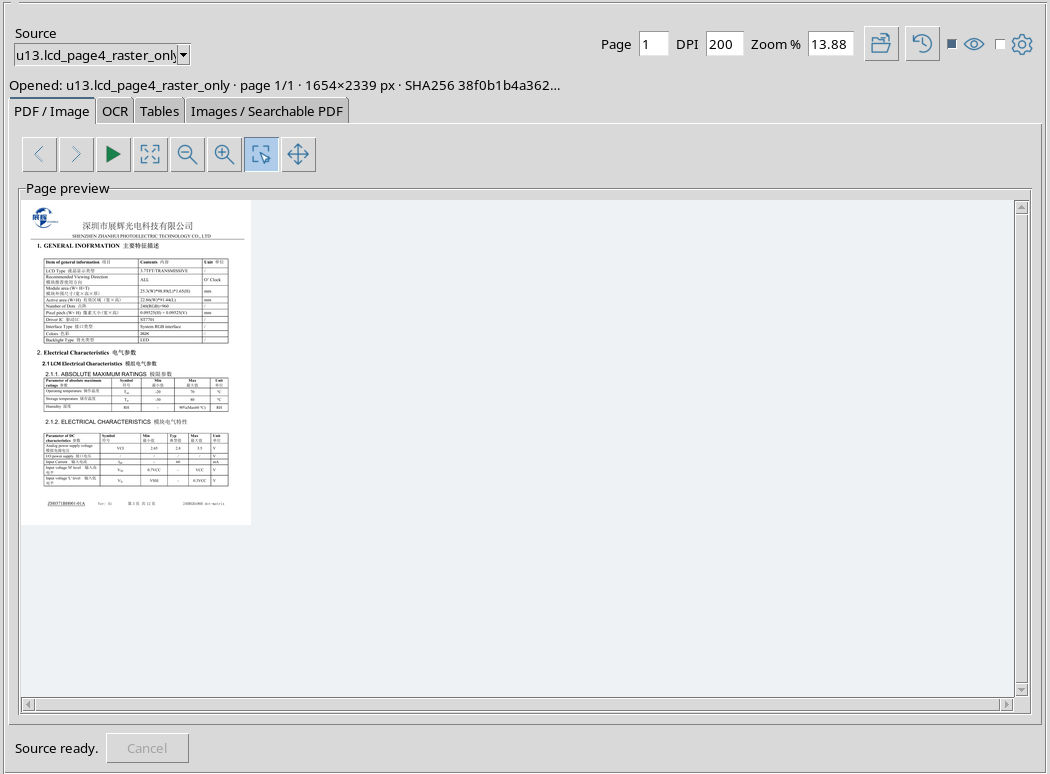
In other words: 1 page of the derived PDF corresponds to physical page 4 of the original datasheet.
13. Set recognition languages
Open Recognition settings and enter eng+chi_sim in the field OCR languages. The acronyms indicate English and Simplified Chinese; both languages must be available in the local Tesseract installation.
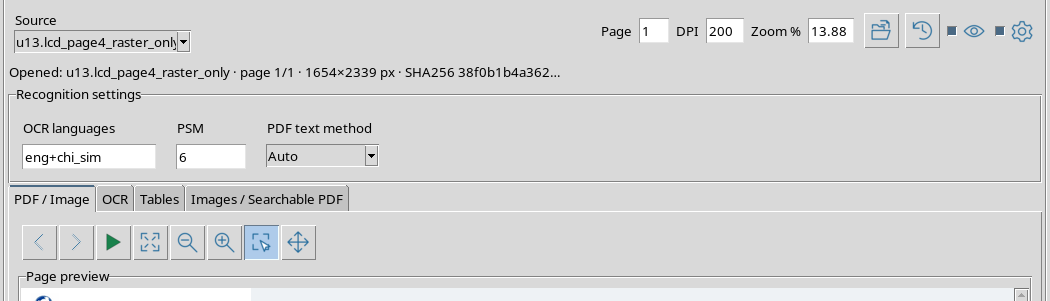
Wrong language selection can compromise the identification of Latin ideograms and words, especially in bilingual headers and tables.
14. The meaning of PSM and PDF text method
In the same section are visible PSM and PDF text method, which concern other paths of recognition and extraction of the viewer.
For Create searchable PDF in this version, the OCRmyPDF engine is invoked with the selected language and with automatic straightening and orientation operations. The displayed values of PSM and PDF text method are not passed as specific parameters to the OCRmyPDF command: do not attribute the result to an applied PSM without verifying it.
15. Choose the Output Dataset
Return to Images / Searchable PDF. In the Searchable PDF Dataset ID field, enter a unique identifier, for example lcd_page4_searchable_pdf.
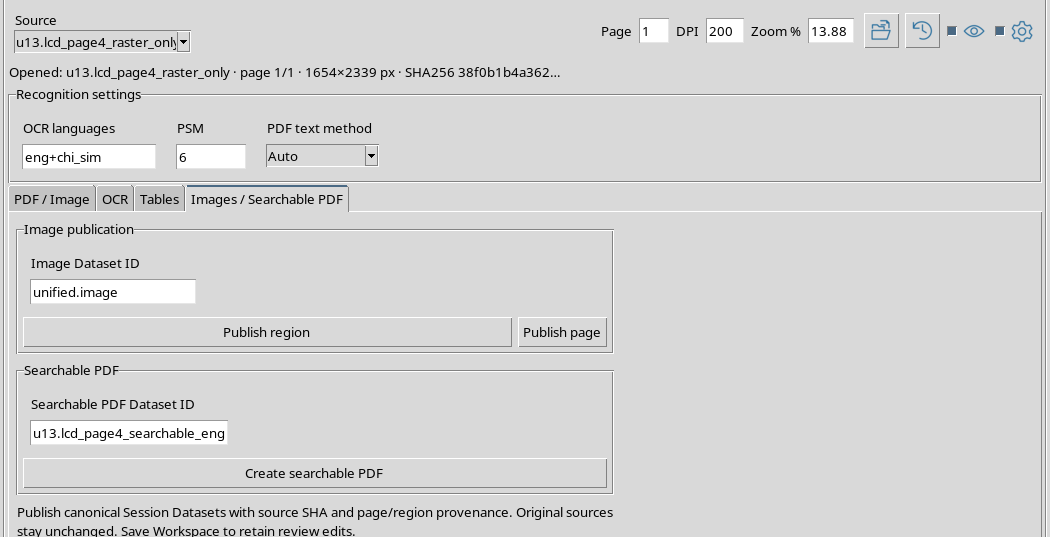
The identifier is for the new derived PDF. Do not reuse the source’s if you want to keep it as a reference for later checks.
16. A command applied to the source PDF
Create searchable PDF operates on the Source PDF; it is not simply a variant of the Run OCR button of the OCR tab and does not automatically publish text editor content.
For our one-page PDF raster, the result will also be one page. Do not interpret the Region rectangle or Page field as a request to create a file containing only a clipping: the creation path works on the input PDF document.
17. Start Create searchable PDF
After checking the raster source and identifier, press Create searchable PDF. the viewer starts the work handled by OCRmyPDF/Tesseract.
During processing the GUI shows the operation in progress and maintains control of the request. Do not confuse the appearance of an already visible preview with the confirmation of the publication.
18. Publication confirmation
At the end, the message Published document.pdf Dataset: appears followed by the new identifier.
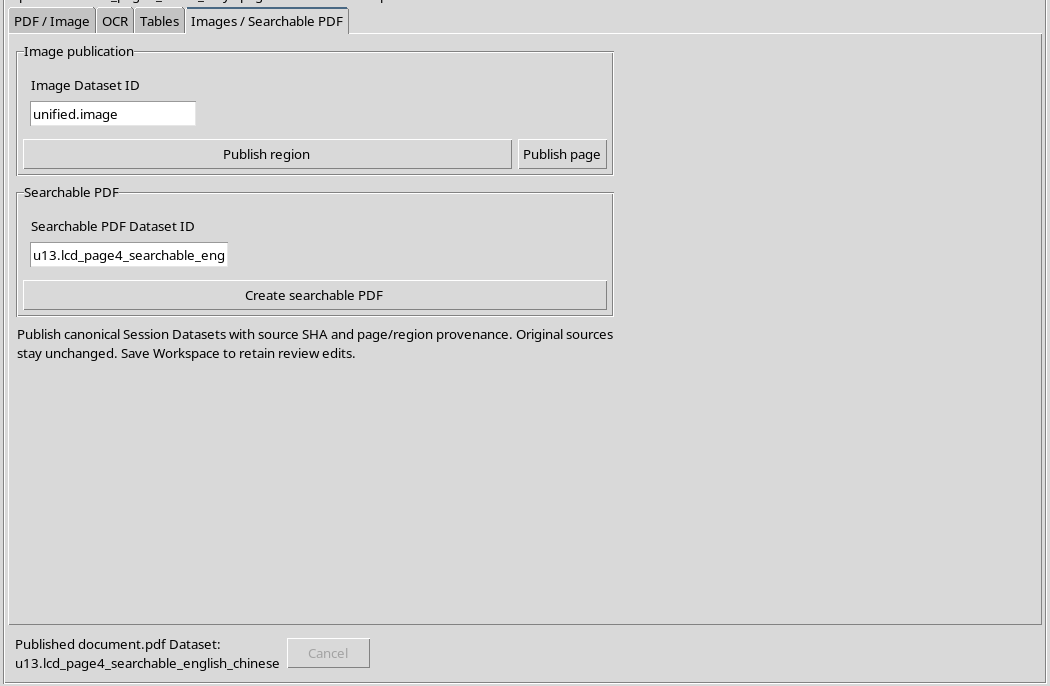
The searchable PDF was recorded as Canonical Session Dataset. It did not replace either the original datasheet or the raster copy used as input.
19. How is the PDF actually published
This figure has been rendered by the Canonical PDF just published. The appearance reproduces the datasheet page, with texts, tables and units.
The OCR layer is generally invisible in graphical representation: you can’t judge searchability just by looking at the image of a page. The proof must query the textual content of the PDF.
20. Verify that a new text layer exists
Before the OCR, the PDF raster returned zero pull-out characters. After publication, a textual reading of the result returns 1,310 characters in extraction mode without graphical reconstruction of columns.
The file contains a text layer associated with the characters, not just a page converted to PNG. The result contract remains document.pdf, and the PDF produced contains a page.
21. Bilingual recognition
In the text extracted from the published PDF there are 148 Chinese characters, along with Latin characters, numbers and symbols.
This shows that the text layer contains elements of the two languages set. However, 148 is not an OCR accuracy measure: the number indicates characters found, without verifying that each character matches the source.
22. Look for terms that have been recognized
In the actual test result you will find, among others, ST7701, Input Current, 0.7VCC, Symbol, Min, Typ and Unit. There are also Chinese character sequences such as 深圳 and 单位.
These are examples of searchable terms that a PDF program can find in the text layer. Technical word search can therefore work even when the origin was a PDF made exclusively of images.
23. The scientific limits of OCR
Not all data has been recognised correctly. In our test the OCR text does not store in searchable way some important information of the electric table:
| Value in the original | Presence in OCR text |
|---|---|
| ST7701 | Present |
| Input Current | Present |
| 0.7VCC | Present |
| VCI | Not found |
| 2.65 | Not found |
| 3.5 | Not found |
| 0.3VCC | Not found |
The lack of a string in the does not necessarily prove that it has disappeared from the visible image search. It means that the text layer is not reliable enough to be used as a scientific transcription without comparison with the datasheet.
24. The image may appear correct even if the text is incomplete
The resulting PDF page retains the appearance of the document, but the OCRmyPDF engine can apply image straightening, orientation and compression.
Therefore the should not be declared identical pixels per pixel visual result to the original raster copy. The original source remains unchanged, while the new PDF has its own fingerprint and text content to verify.
25. Check contract and number of pages
The new Dataset is type document.pdf, in PDF format, and contains a Page, consistent with raster input.
The verification of the file structure and the possibility of extracting text from it constitute two different controls: a PDF could be technically valid but not yet searchable, or it could be searchable with errors in recognition.
26. Provenance and relationship to the original
The metadata of the new Dataset records the immediate canonical source, i.e. the PDF raster of a page, its SHA-256 fingerprint and the page number in the working document.
Full provenance includes a further step: that raster page had been derived from the 4 physical page of the manufacturer’s original PDF. Do not confuse the ID and the derived PDF page with those of the initial document of 13 pages.
27. The role of OCR settings and metadata
The result records the use of OCRmyPDF/Tesseract, the eng+chi_sim configuration and the fact that the PDF was processed to add OCR.
A scope or method field reported in the metadata can describe the status of the interface controls, but not necessarily the page clipping. For the searchable PDF, it verifies the published document, the number of pages and the source identifier.
28. Protection against unapplied pages
If you change the Page field without pressing Render page and attempt a new processing, the viewer rejects the operation with the message Press Render page to apply changed page or DPI settings before processing.
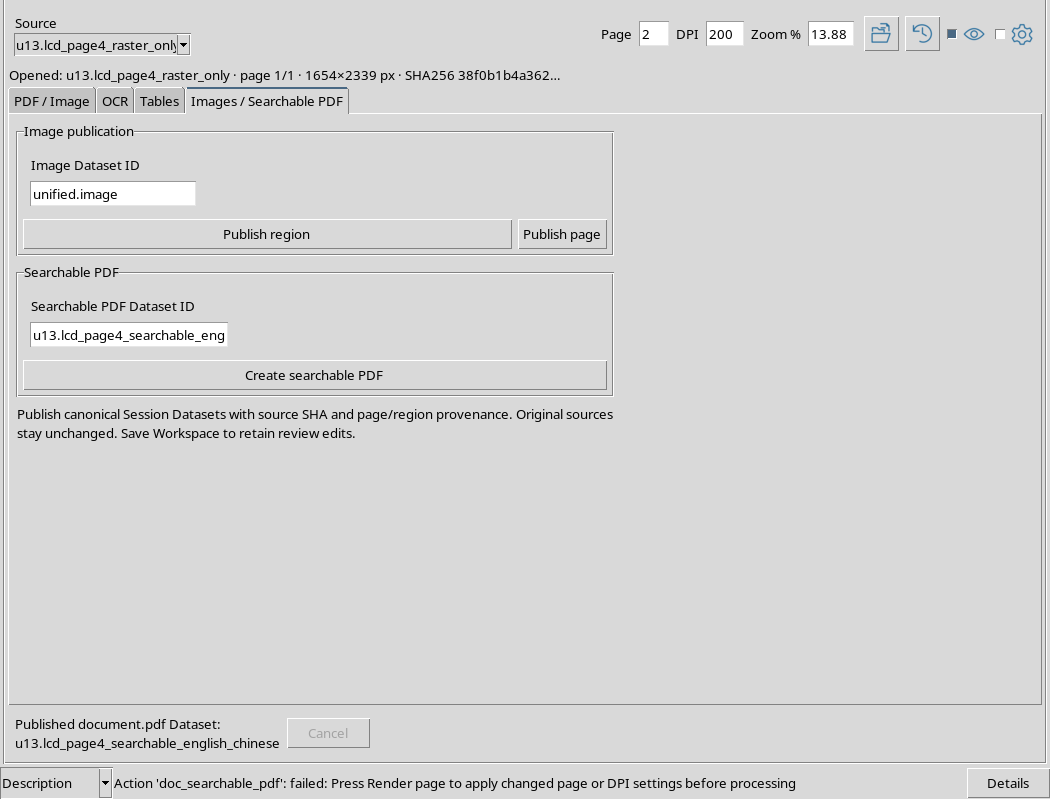
The already created Searchable Dataset remains unchanged. This protection prevents the result from being attributed to an unrendered page state.
29. Resume the result from Source
After publishing, use Refresh sources, if necessary, and select the new PDF in the normal Source field.
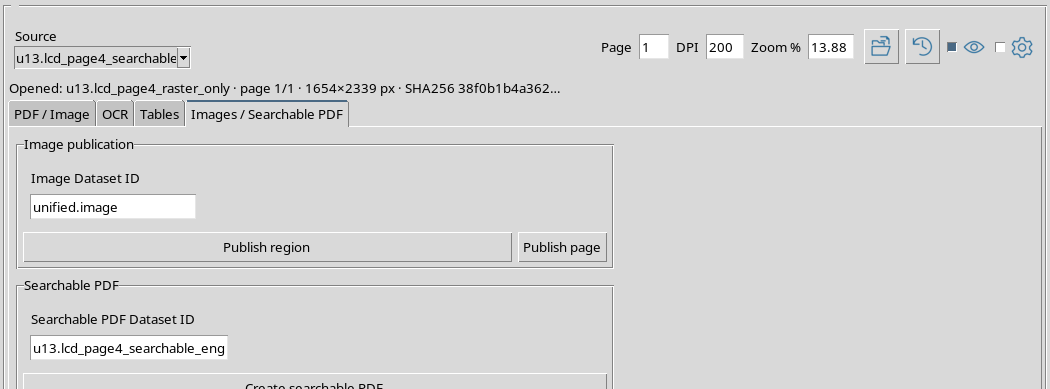
The result is a canonical document that can be used by the viewer, not a temporary file linked exclusively to the completion message.
30. Reopen the published PDF
Press Open source on the new Dataset. The GUI opens the searchable PDF page and recognizes its contract, content and number of pages.
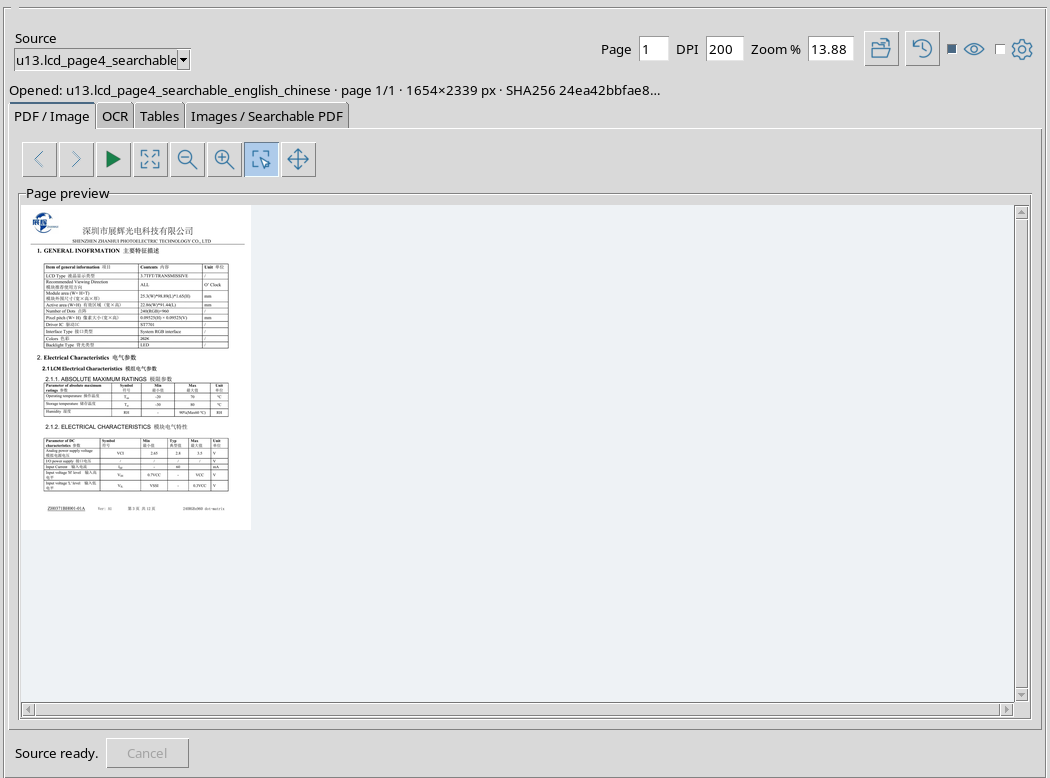
The display in the PDF / Image pane remains a graphical preview. To verify text selection or search you need to examine the PDF file with a reader or tool that accesses the text layer.
31. What the Session Keeps
The Sample Session contains three separate Datasets: the original PDF datasheet, the image-only raster PDF derived from its own page and the new searchable PDF with English/Chinese text.
This allows each phase to be controlled without rewriting the source. For accurate comparison, it retains the originals and considers the OCR output as a derived result, not as the definitive transcription of the specifications.
32. How to use the secure searchable PDF
The published PDF is useful for text search, consultation and preliminary retrieval of words or sections. It is less reliable when used automatically to pick up electrical values without controls, especially when recognition omits symbols or digits.
For a scientific analysis of VCI characteristics or logical levels, it continues to refer to the original PDF and, for structured data, to the Tables workflow described in the previous chapters.
33. Conclusions and next steps
We verified a real passage from Image-only PDF with no extractable text to Searchable canonical PDF, with English and Chinese text actually present and provenance preserved.
We have also verified two essential limits: the engine rejects the original PDF which already contains digital text and the new OCR level does not necessarily recognize all scientific values. The difference between document searchable and Exact transcription is fundamental.
The next chapter, U14 — Workspace and History, will cover saving and restoring work in the framework, without introducing an alternative archive of the viewer.