

Copy and publish reviewed text
With GX-TXT Unified Documents 1.2.0 you can copy the recognized text to the clipboard or publish it as a Session canonical Dataset. They are two different operations: the first is to quickly transfer the content, the second to make it a documented and reusable result, with a verifiable link to the source.
We continue the example on the bilingual electronic datasheet ZH0371BH001-01A, recognized and correct in the previous guide. In this procedure we check both English/Chinese text and provenance, without altering the original PDF.
1. Objective: From the correct text to a Dataset
The OCR result appears in the Editable text review area of the OCR card. After verifying it and if necessary correcting it, you can use either Copy text or Publish text.
For publication, the viewer creates a Dataset with document.text contract, distinct from the starting PDF document.pdf. Do not confuse the operation with a modified PDF save.
2. The material of our example
We use the original manufacturer’s PDF datasheet, which contains 13 physical pages, Latin characters, simplified Chinese and technical specifications.
This material is particularly useful because it allows to verify how Unicode text and electrical units are stored in the output, even with the typical OCR limits.
3. Two commands with different purposes
Copy text copies the current editor content to the clipboard; it does not automatically create a Dataset. The clipboard content can be pasted into other applications, but it is not a scientific archive with source metadata.
Publish text instead records the result in canonical form within the Session, with identification, contract, textual payload and information on the source document.
4. Open the canonical PDF
Import the PDF through the normal capture manager, then open Viewers → Unified Documents. In the Source field, select the document.pdf Dataset and press Open source.
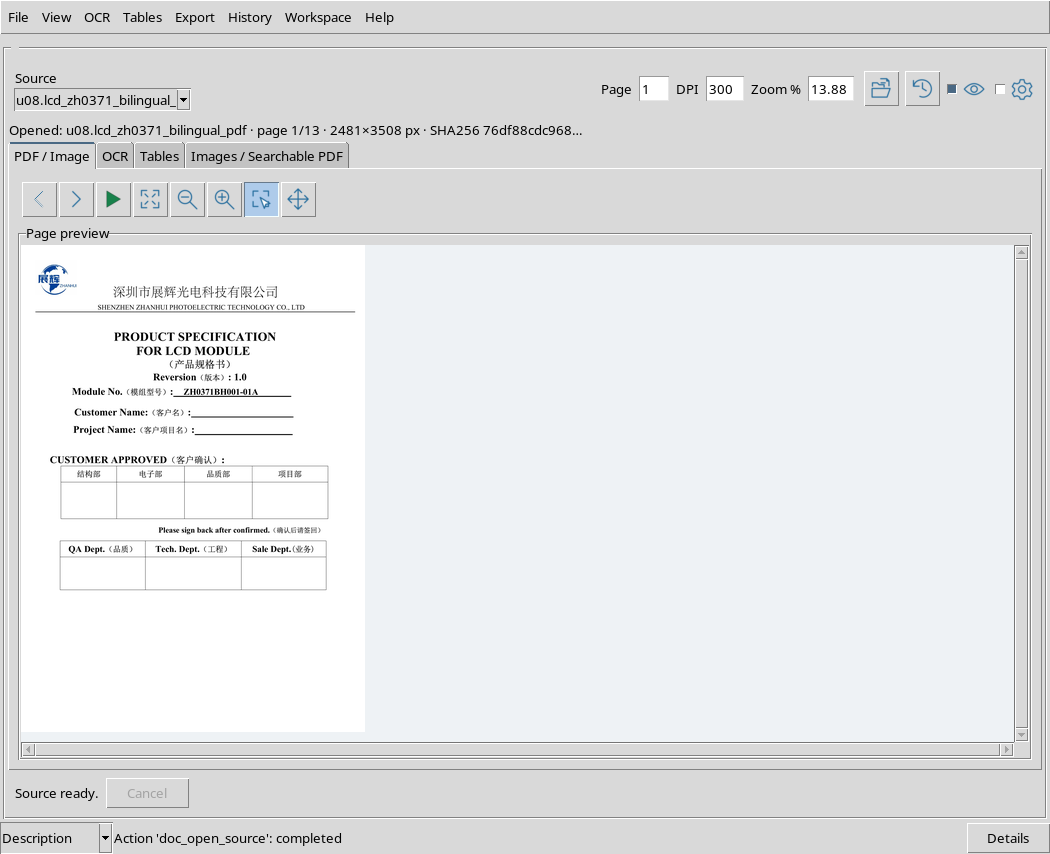
The Source field must contain a Dataset actually recorded in the Session: the viewer does not require replacing the source with an arbitrary filesystem path.
5. Choose Page and Resolution
In the PDF / Image tab set Page = 4 and DPI = 200, then press Render page. Numbering indicates the physical page in the file, not necessarily the one printed on the sheet.
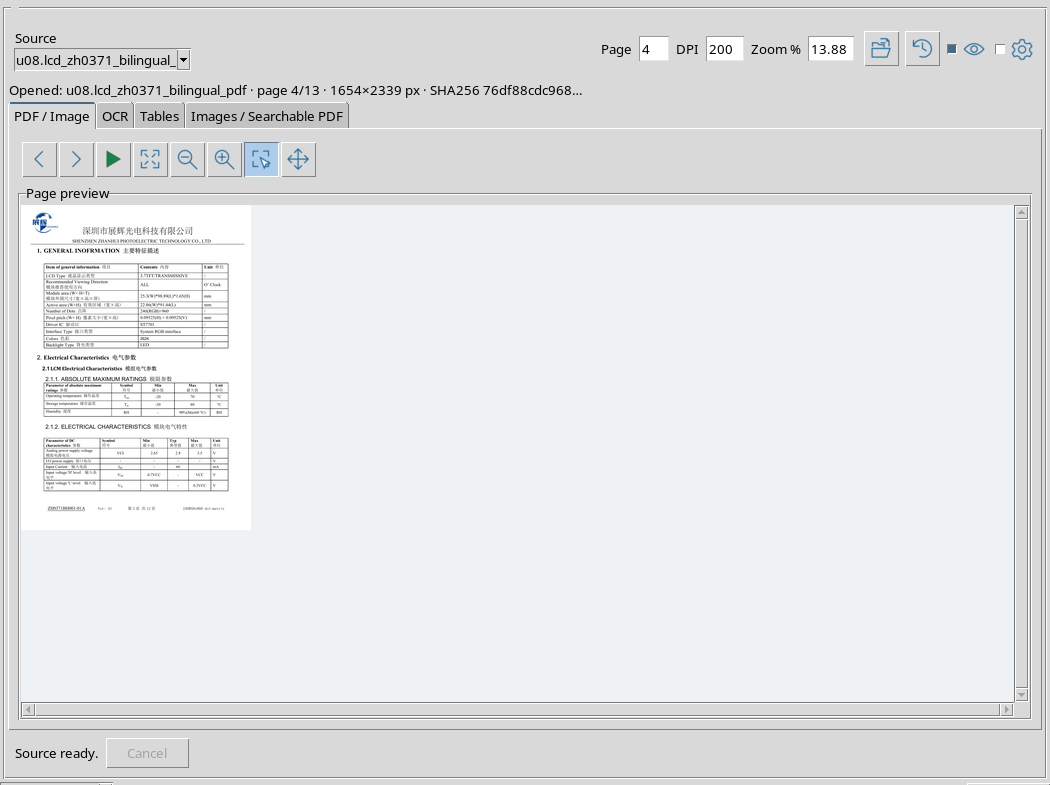
The page contains information about the display and electrical parameters. To check a digit or drive, always go back to the original PDF page.
6. Set up bilingual recognition
Open Recognition settings and choose OCR languages = eng+chi_sim, PSM = 3 and PDF text method = OCR. On the OCR tab, expand Options and use OCR workflow = PDF OCR with Scope = Page.
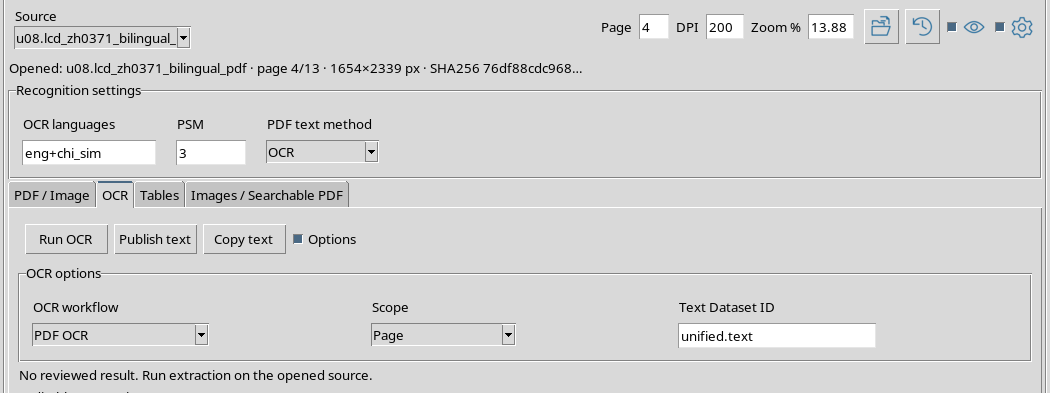
Here OCR means optical recognition of the visual content of the page. Native instead reads the text already embedded in the PDF, when available; the two methods are not equivalent.
7. Start OCR Run
Press Run OCR and wait for the job to finish. The result appears in the Editable text review box. Do not publish while a new extraction is still in progress.
Example execution generated 1.143 Unicode characters, of which 137 are Chinese characters. This quantity is not an automatic accuracy assessment.
8. Check the initial output
Read the text in the editor before copying or publishing it. Technical terms, numeric values, and OCR headers must be compared to the original page.
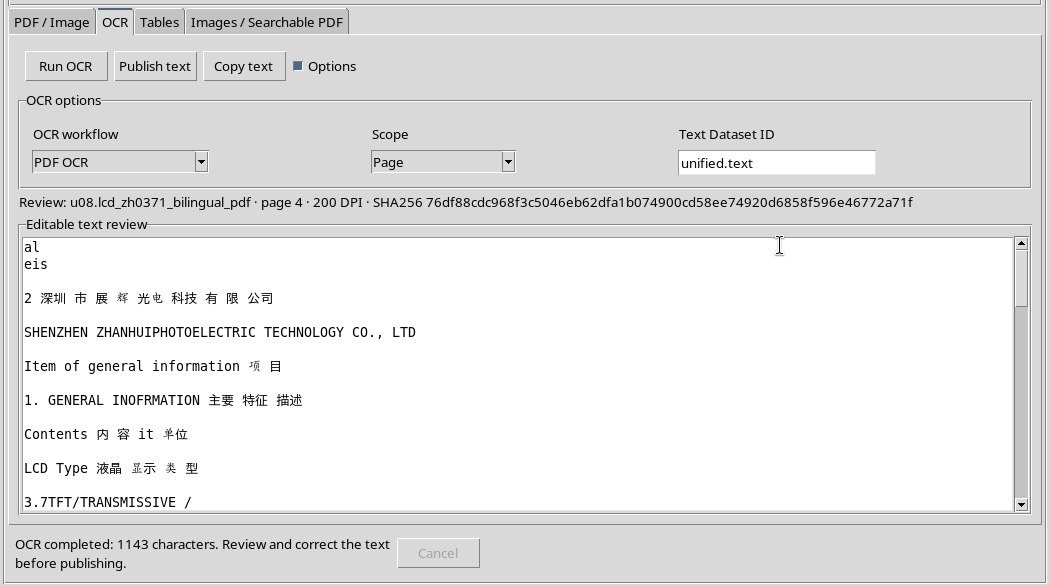
It is possible that some cells in a table or some electrical numbers are interpreted incompletely: the publication command does not certify the scientific correctness of what has been recognized.
9. Two errors to be corrected
In our output was the sequence Driver IC 驱动 TC ST7701, while the original reports 驱动 IC Driver ST7701. Also, in the OCR representation appeared 3.5 Vv, to be corrected in 3.5 V based on the PDF.
Do not apply indiscriminate substitutions: each change must match a verified item in the source.
10. Save the fix in the editor
Correct the text directly in Editable text review. The first replacement maintains the length, the second eliminates a character; the revised text then contains 1,142 characters, with the 137 Chinese characters preserved.
The fix changes the draft of the viewer, not the bytes of the original document.
11. Visually locate revised text
Select the correct driver entry in the editor, to verify Latin characters, ideograms and spaces.
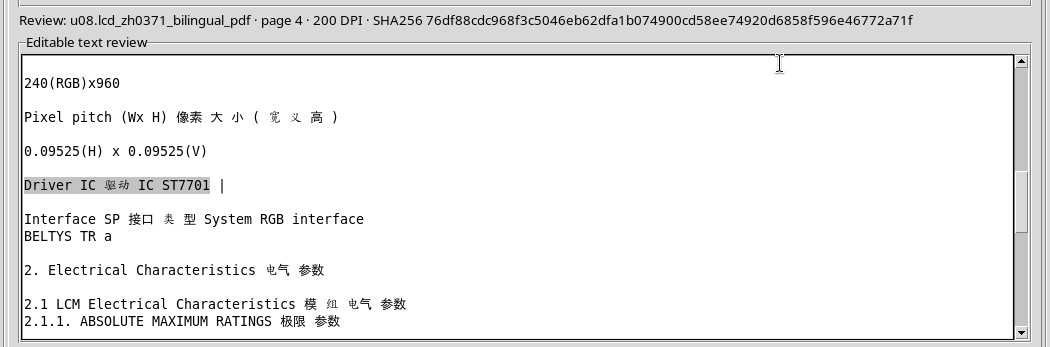
The selected text is actual Unicode editor text. Subsequent operations Copy text and Publish text cover the entire content of the revision, not just this selection.
12. Check completeness
In our example the final revision occupies 1.142 Unicode characters, divided into 79 lines, and the content published in UTF- 8 requires 1,420 bytes.
Characters and bytes are different sizes: different Chinese ideograms occupy more than one byte in UTF-8 encoding. To verify the absence of truncations you have to compare the content, not just the file size.
13. Use Copy text
On the OCR tab, press Copy text. the viewer copies the editor content to the clipboard and displays the message Recognized text copied to the clipboard.
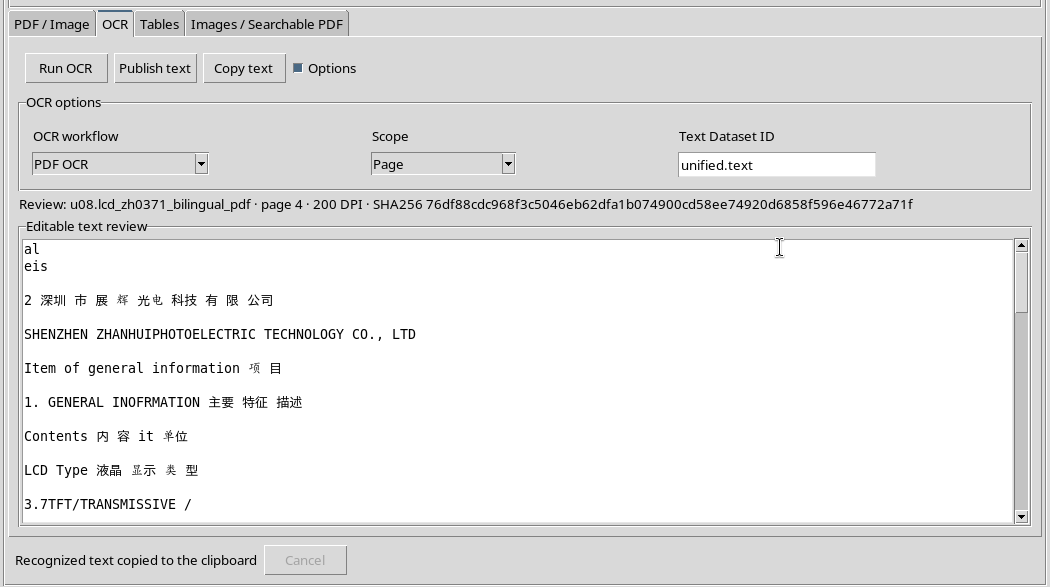
You can paste text into a regular editor for a manual control. Copying also includes Chinese characters and wraps.
14. The limits of the clipboard
Notes are a temporary mechanism of the graphics system. They do not contain, alone, the Dataset contract, the source checksum or the relationship to the original page.
For traceable and usable machining from other GX-TXT components, choose Publish text instead of relying solely on the clipboard.
15. Define the Text Dataset ID
Expand Options, if necessary, and locate the field Text Dataset ID. Enter a descriptive identifier for the result, e.g. lcd_page4_reviewed_text, avoiding collisions with Dataset already present in the Session.
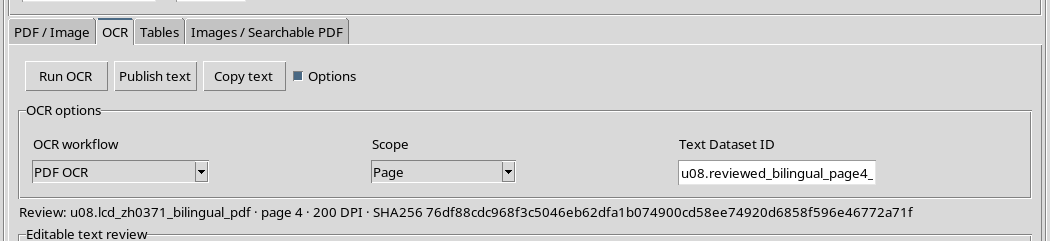
An ID used in the Demonstration Session is visible on the screen; it is not a mandatory name. The chosen identifier belongs to the new text, not to the PDF source.
16. What document.text means
The document.text contract identifies a canonical Dataset containing text. For this workflow the payload is a UTF-8 text file; it is not a PDF, image or structured table.
A downstream consumer must read the content as encoded text, retaining Unicode characters and wraps.
17. Publish with Publish text
Verify that Source, Page and DPI match the provenance indicated by the revision (Review: message), then press Publish text.
the viewer checks the text, the presence of the OCR context, the correspondence with the active source and the validity of the Dataset ID. The publication must refer to the same page and version of document that generated the revision.
18. Recognize Confirmation
At the end, a message of type Published document.text Dataset: appears followed by the result identifier.
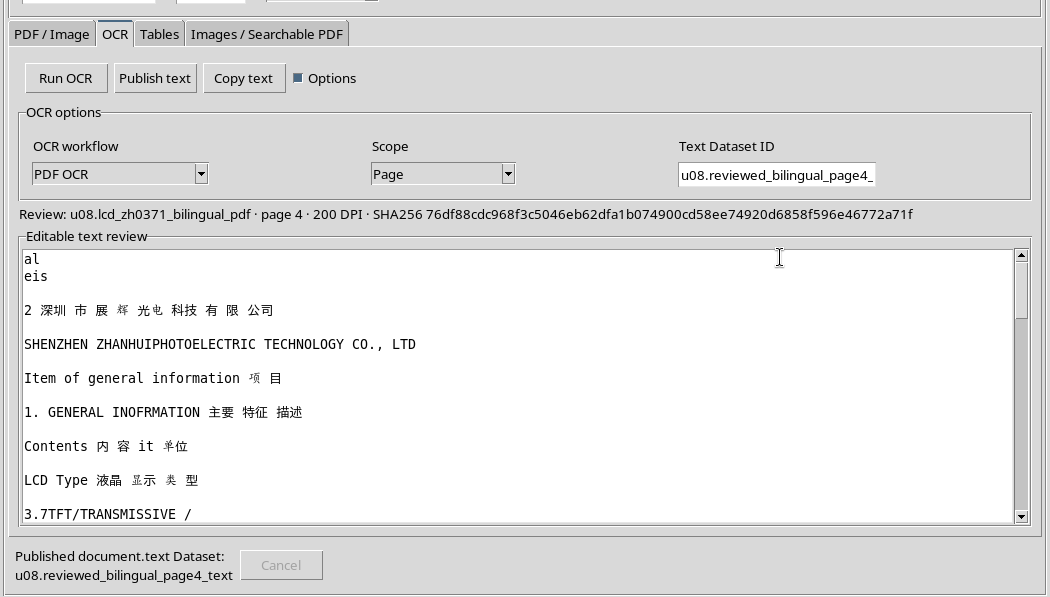
This confirmation concerns the creation of the derived Dataset in the Session. The original PDF remains available as a separate source.
19. Check published content
In our example the canonical result contains 1,142 characters, 137 Chinese characters, 79 lines and 1,420 bytes UTF- 8. The text read from the Dataset corresponds bytes per bytes to the revision: no characters or lines were deleted.
Content matching does not amount to a judgment on the goodness of the OCR. Badly reconstructed figures must still be corrected by verifying the source.
20. What metadata accompanies the result
The Dataset carries the relevant source information: Source Dataset ID, SHA-256 imprint of the source, page 4, 200 DPI, OCR method, eng+chi_sim languages, PSM 3, Scope Page and UTF-8 encoding.
This data allows you to reconstruct the extraction context and distinguish the derived text from the other pages of the same document.
21. The source remains intact
The workflow does not rewrite the datasheet and does not replace the original Dataset. The document.pdf source and the new document.text Dataset coexist when finished.
For a reproducible procedure keep the PDF and derived text in the Session, avoiding using a simple copy-paste as the only result.
22. Publication blocked by different provenance
If the Page field is changed from 4 to 5 without running a new consistent OCR, the revision continues to come from the 4 page. The Retained draft — publication blocked warning appears, and the publish command rejects the mismatched context.
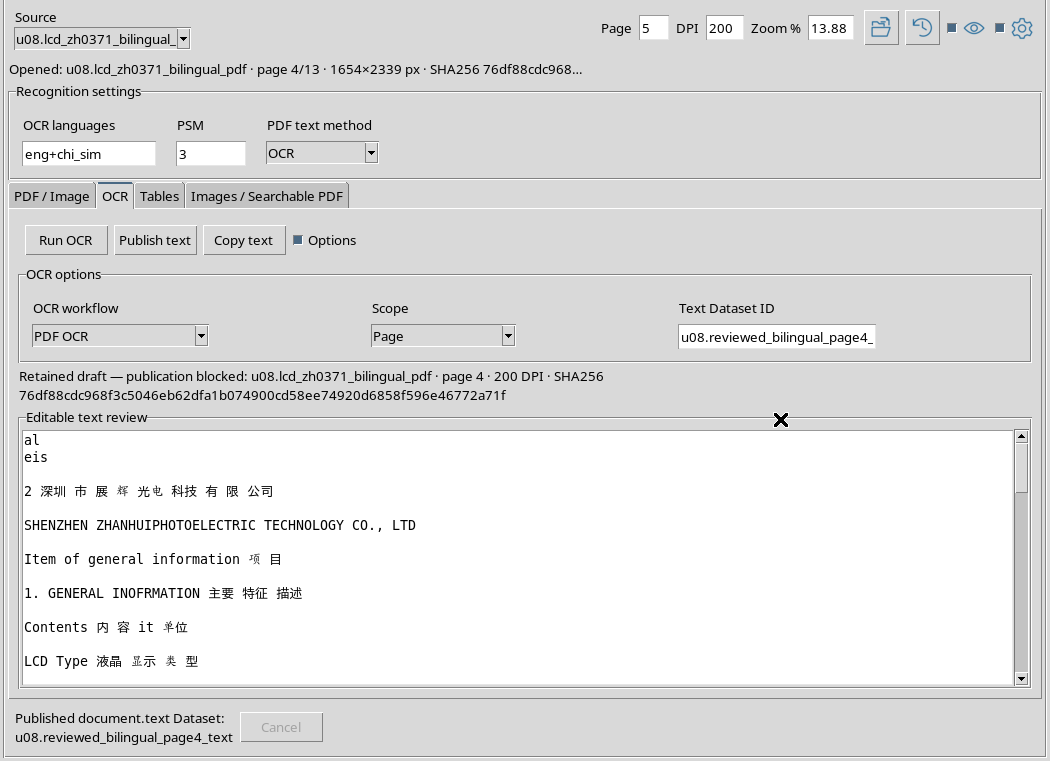
The page field has been changed in the image, not yet rendered the new page: the control still prevents a publication from coming from outside. The Dataset already created remains unchanged.
23. Restore the original page
Reset Page = 4, leave DPI = 200 and press Render page. Then go back to the OCR tab: the Review: message is again consistent with the revised content.
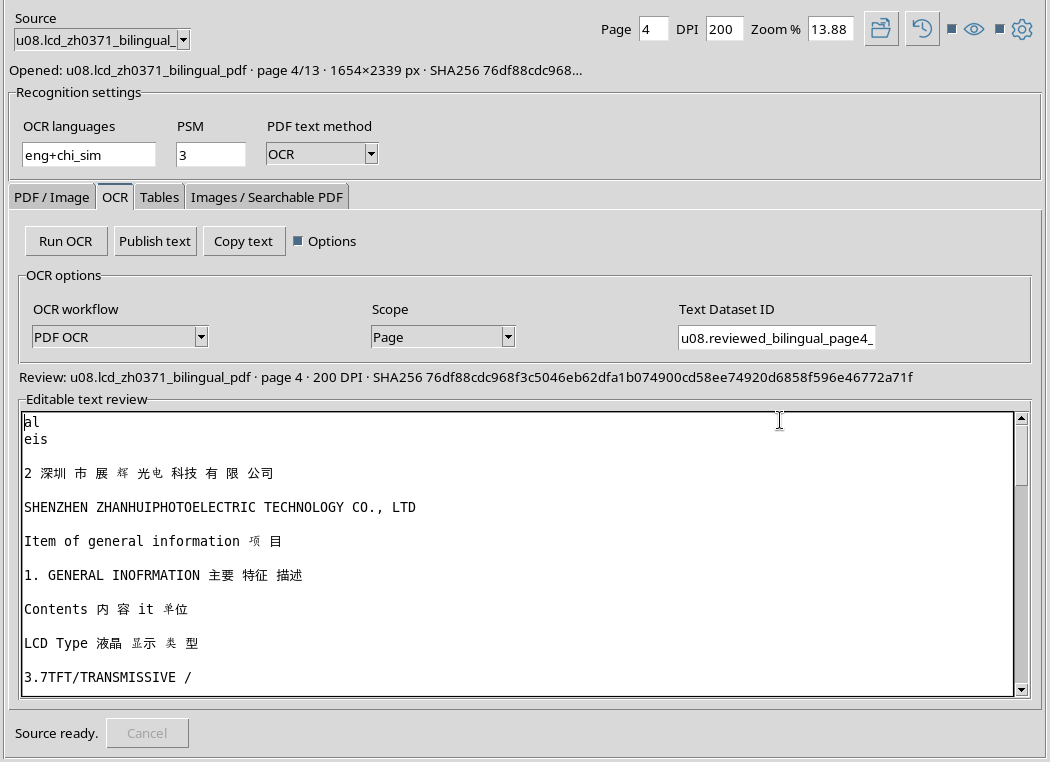
No need to rerun the OCR to retrieve a valid revision when the original document and page are still available. Do not use a new Publish text command without first checking the identifier and any existing publications.
24. Limits and continuation of the guide
The publication guarantees a canonical representation of the text you have verified, not a reliable automatic interpretation of each electrical value. In an English/Chinese mixed datasheet, table headers, units, similar letters and separators deserve visual control.
In the next chapter we will move to the Tables tab, using the same type of document to explain options and meaning of tabular extraction, distinct from publishing OCR text.