

From a PDF to reviewed text and a Workspace
1. Route objective
This guide illustrates a complete flow: a PDF becomes a Canonical textual Dataset in GX-TXT, after OCR recognition and correction in the editor. The work is then saved in the Workspace, closed and reopened to check that the revised text is still available.
An automatically recognized result does not coincide with a revised result. Run OCR generates the initial text; Editable text review allows human control; Publish text publishes the review result in the Session.
2. The Sample Document
We use a Two-page A4 synthetic PDF, with text, a demonstration table and a small chart. The second page is suitable for highlighting an OCR error in the numeric labels of the horizontal axis.
Open the two-page synthetic PDF.
The document contains exercise data and does not represent a real experiment: one should not attribute a measured physical meaning to the curve.
3. Canonical acquisition of the source
The PDF file must be acquired in the Session through the normal GX-TXT path dedicated to PDF documents. You get a Dataset of type document.pdf. Unified Documents’ Source field lists available canonical sources; it should not be interpreted as a generic disk file selector.
The capture module allows you to retain the identity and integrity of the document. the viewer must work on that source, instead of a copy not associated with the Session.
4. Open the viewer from the main window
Open Unified Documents from the Viewers section of the framework. The main tabs are PDF / Image, OCR, Tables and Images / Searchable PDF.
In the Source field, choose the Instructional PDF Dataset, then use Open source. The Refresh sources button updates the catalog when a new canonical file has been imported.
5. Choose the correct page
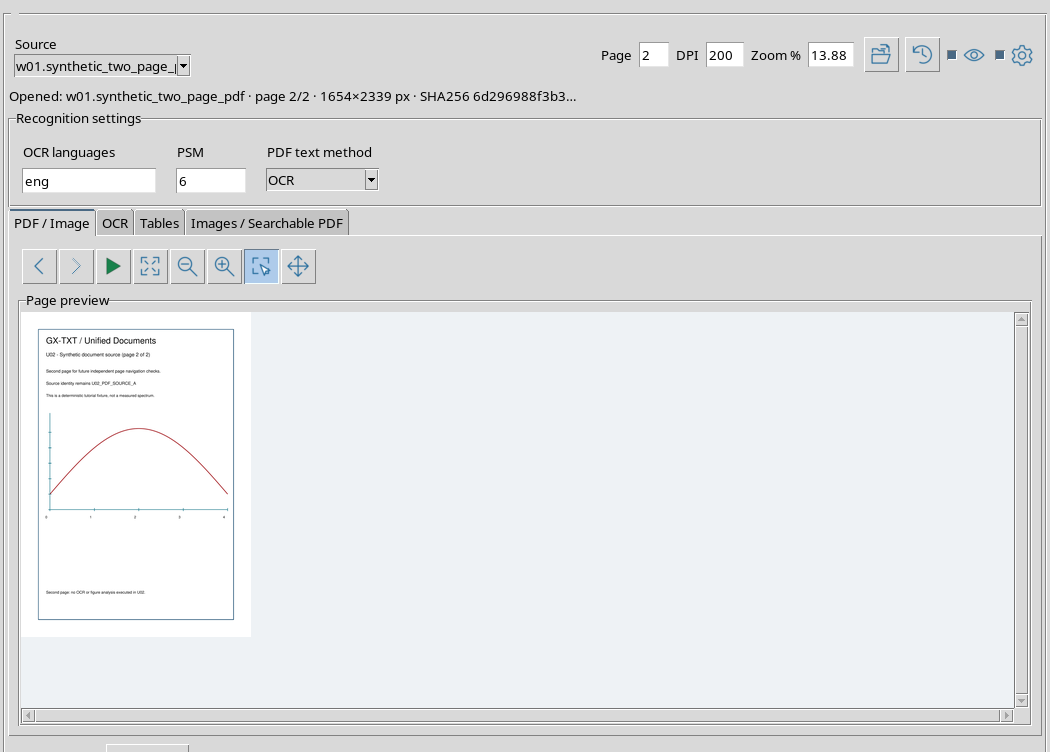
In the example you have to set Page = 2 and DPI = 200, then use Render page. The information bar identifies the page as 2/2 and displays the origin of the document.
The chosen page must be verified before the OCR. A plausible text result, if produced from the wrong page, is not a result scientifically associated with the desired document.
6. Observe the original chart
The 2 page contains the header, some sentences and a demonstration chart. The labels of the horizontal axis are 0, 1, 2, 3, 4. The first label will become the point of comparison between the original image and recognized text.
When working on a technical document, it is advisable to check in particular the digits, units, minus signs, indexes and formulas: OCR errors on these elements can be more serious than a typo in ordinary text.
7. Configure Recognition settings
Expand Recognition settings. For this exercise set OCR languages = eng, PSM = 6 and PDF text method = OCR.
The original PDF already has a selectable text layer, but we choose the OCR method to actually exercise optical recognition and compare it with the page. The Auto and Native alternatives can produce a different path depending on the structure of the source.
8. Open the OCR tab
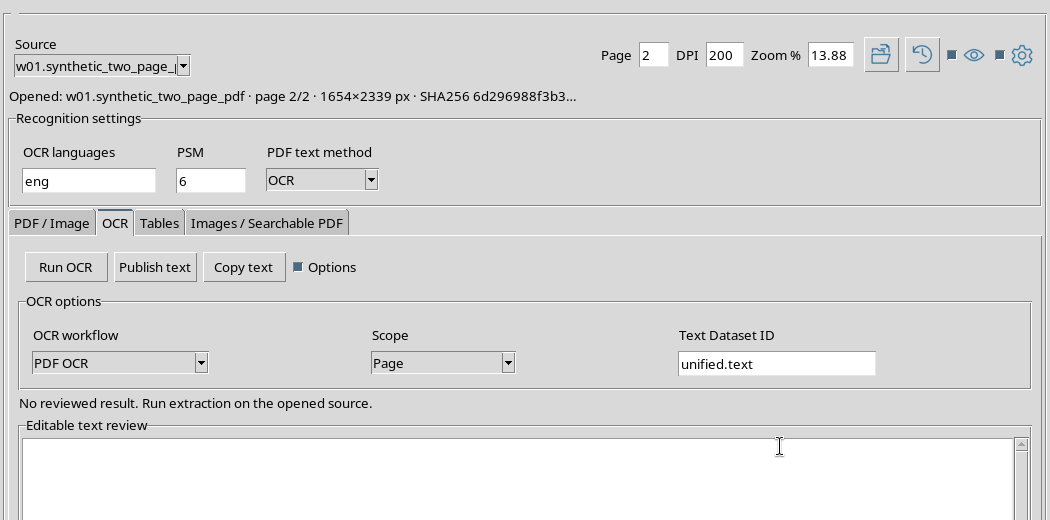
Switch to the OCR tab. Run OCR, Publish text and Copy text are available. The Options panel opens the workflow, Scope and output Dataset identifier settings.
The Editable text review area is initially empty: text appears only after an operation produces a draft recognition.
9. Set PDF OCR and Scope Page
In the Options panel select OCR workflow = PDF OCR and Scope = Page. This way the work is only about the 2 page displayed.
The other Scope options have a different purpose: Region limits reading to a graphical selection, while Document extends the operation to the document according to the workflow. In this exercise you don’t need to draw an ROI, because we also want to recognize the labels of the chart.
10. Run OCR
Press Run OCR. the viewer starts the operation on the canonical source, using the 2 page, rendering to 200 DPI, the English language and the Scope Page.
The result is not published automatically. First it arrives in the editor, where it remains available for review and comparison with the PDF.
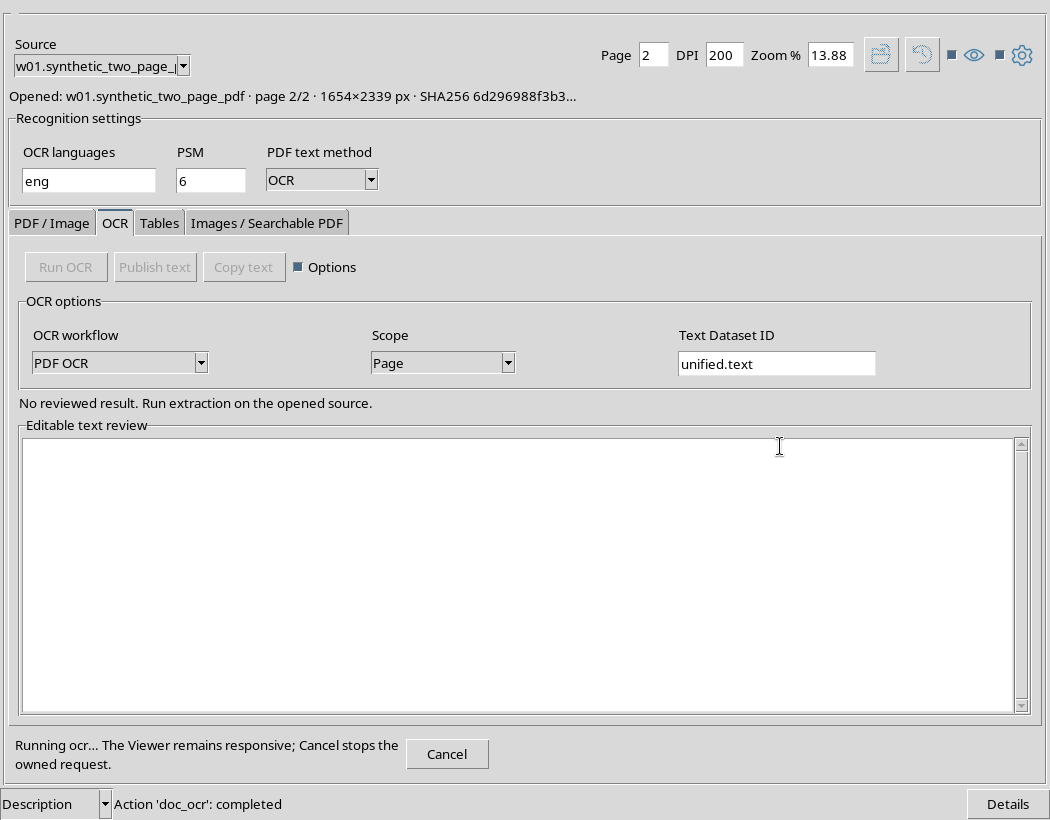
11. During Work: Status and Cancel
During recognition the Cancel button may become available, while other incompatible operations are disabled. You must not change source or attempt to publish during a still pending job.
In this path the work is left to finish. Cancel serves to interrupt the job controlled by the viewer; it does not delete the source Dataset or Session.
12. Examine the raw result
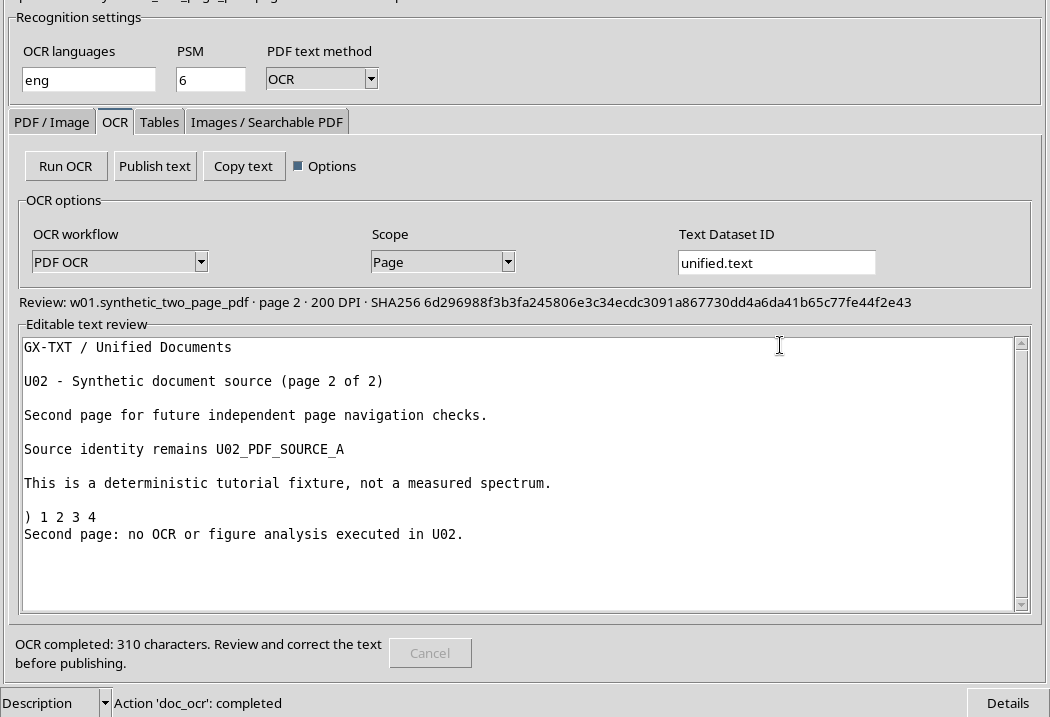
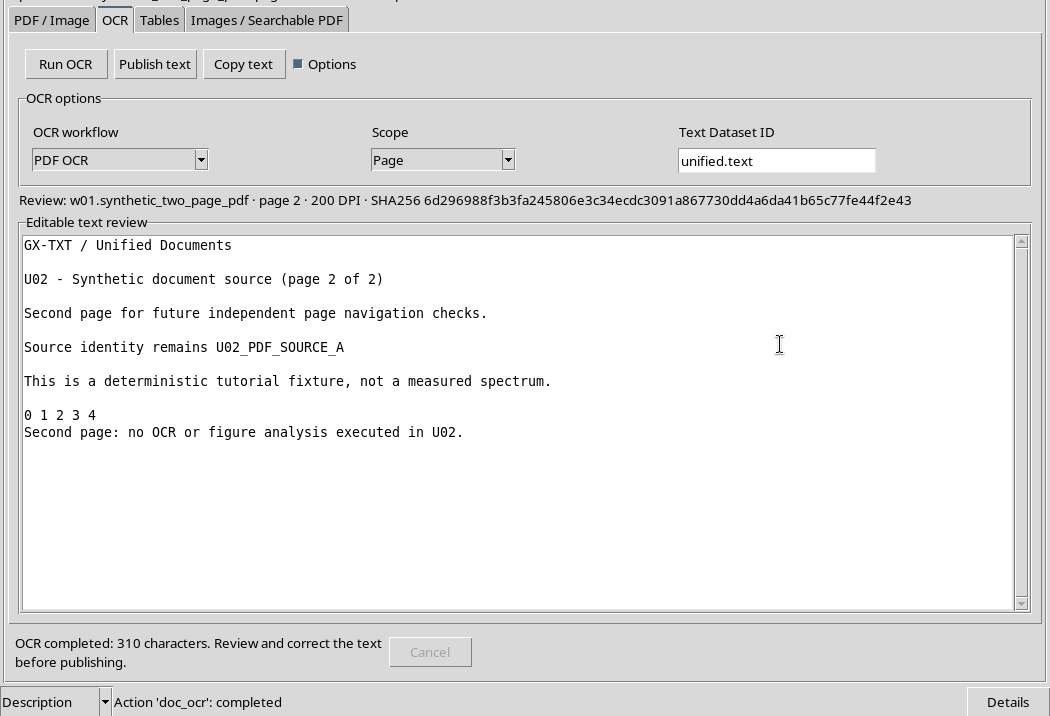
At the end of the OCR, the editor contains 310 characters. Most of the short sample text is readable, but the first number of the axis is interpreted as a parenthesis: the recognized line is ) 1 2 3 4.
This error was actually produced by the recognition, not inserted into the screen. The original document shows the 0 value instead.
13. Comparison with the original page
Before editing the draft, compare the labels with the chart and the original text of the PDF. Both representations confirm the 0 1 2 3 4 sequence.
This verification avoids correcting the OCR by simple intuition. On a scale, a zero exchanged for another symbol can distort the interpretation of a given.
14. Correct draft
In the Editable text review editor, replace the wrong parenthesis with 0. The sequence becomes 0 1 2 3 4.
The edit is about the revision text, not the original PDF. The fix consists of one character replaced with another: the text length then remains 310 characters.
15. Select and check revised fonts
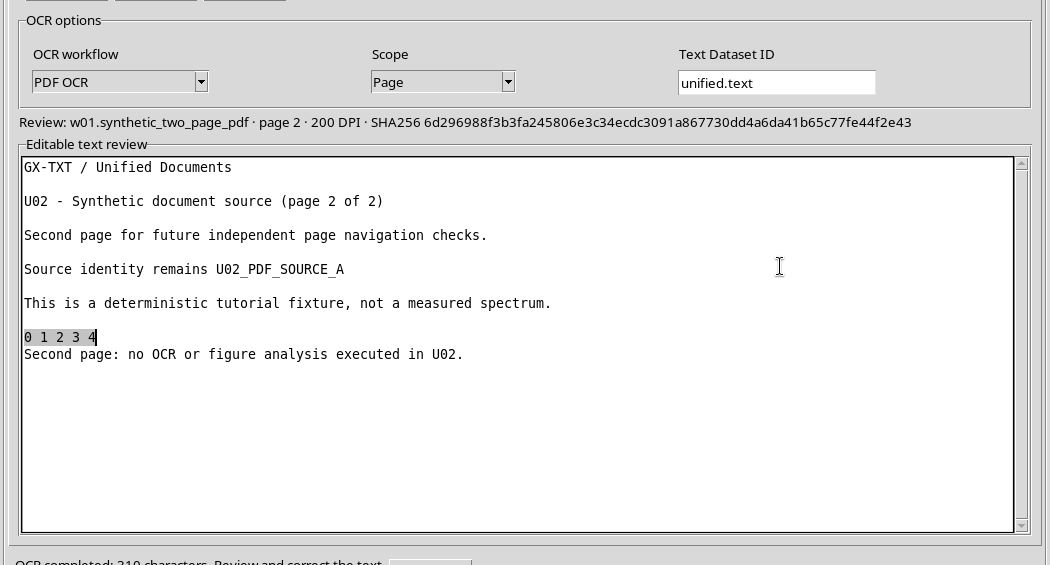
Highlight the 0 1 2 3 4 sequence in the editor to check the result. Check that the other sentences were not accidentally edited.
Also check its provenance indicated by the GUI: same source PDF, 2 page and 200 DPI. A draft referring to another source or page should not be published in the current context.
16. Copy text: copy to clipboard
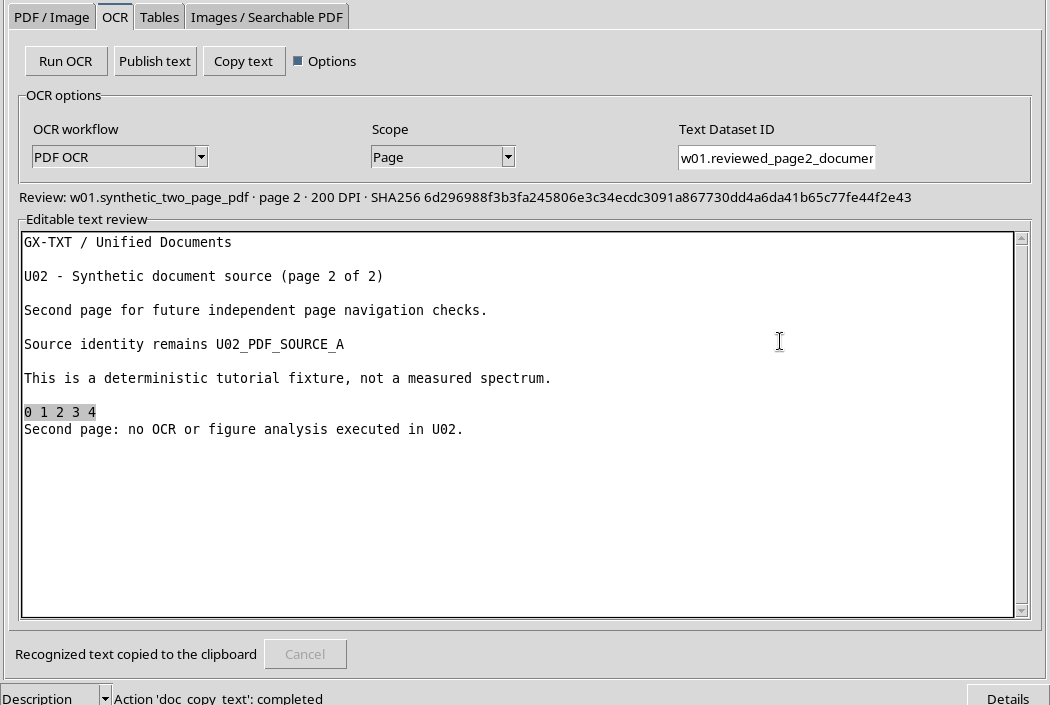
Copy text transfers editor content to clipboard. It does not rerun the OCR and does not create a Dataset on its own.
For this example the copied content was identical to the full revision, with 310 characters and the initial digit correct. This is a Unicode copy verification, not a measure of the global recognition accuracy.
17. Choose Text Dataset ID
In the Text Dataset ID field indicate a name distinct from the source. The example employs w01.reviewed_page2_document_text. In a real project use a descriptive convention consistent with the other Sessions.
A recognizable output identifier makes it possible to distinguish textual revisions from the source PDF and any other extracted results.
18. Publish revised text
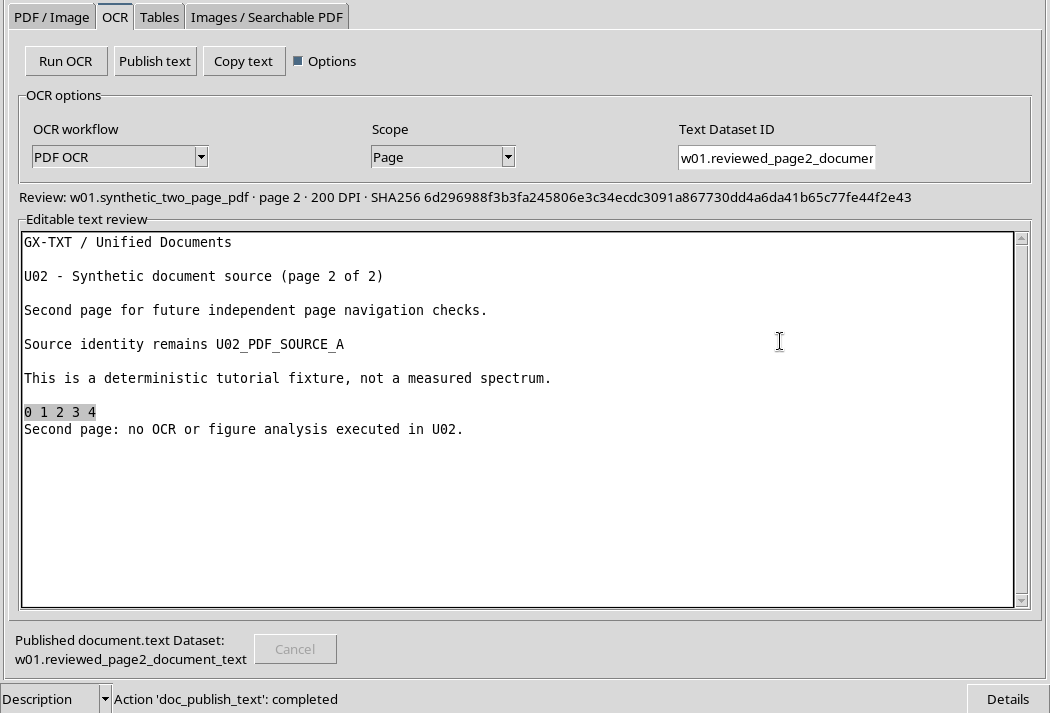
Press Publish text only after checking the content and provenance. The GUI records the result as Canonical Dataset document.text in the same Session as the original PDF.
The status message confirms the publication. Unlike Copy text, this operation produces a result that can be read from the canonical GX-TXT catalog.
19. What document.text contains
The document.text contract represents textual content recorded as Dataset. The sample payload uses UTF-8 and is accompanied by source information.
This format is different from the simple OCR draft shown in the editor: published content can be read in a controlled way through the public APIs of the Session.
20. Check content regardless of GUI
After publishing, check the Dataset via public APIs instead of relying only on the status message. The document.text contract, the UTF-8 text, the source Dataset, its SHA-256 hash, the number of 2 page and the 200 DPI of the rendering are relevant.
In the example the canonical payload read by Session corresponds exactly to the 310 characters revised in the editor.
21. The PDF must not change
The publication of a text result is not an in-place modification of the PDF. The initial document remains a separate Dataset document.pdf, associated with its original SHA-256.
In this path there are therefore two separate Datasets: the PDF source and the revised text. The second is derived from the first, but does not replace it.
22. Save the Workspace
To also preserve the draft and working status, use Workspace → Save. The Workspace retains the scientific interface, including the source, current page and revised text, while the published Dataset remains in the Session.
Save and Publish text perform different functions: saving the Workspace is not equivalent to publishing a Dataset; publishing a Dataset does not replace saving the interface if you want to resume work.
23. Session Workspaces: locate the saved document
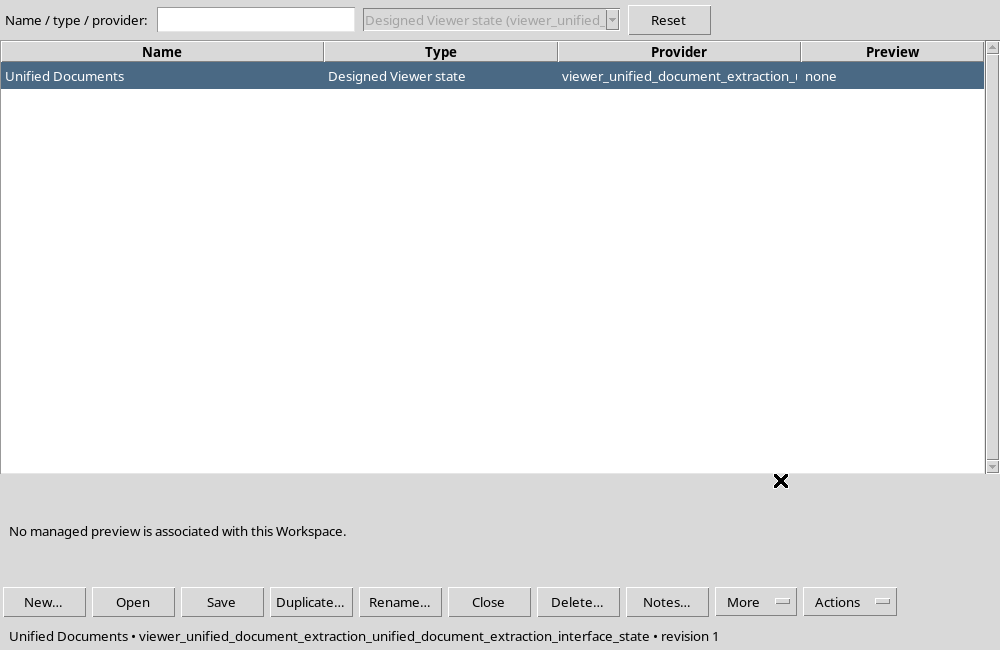
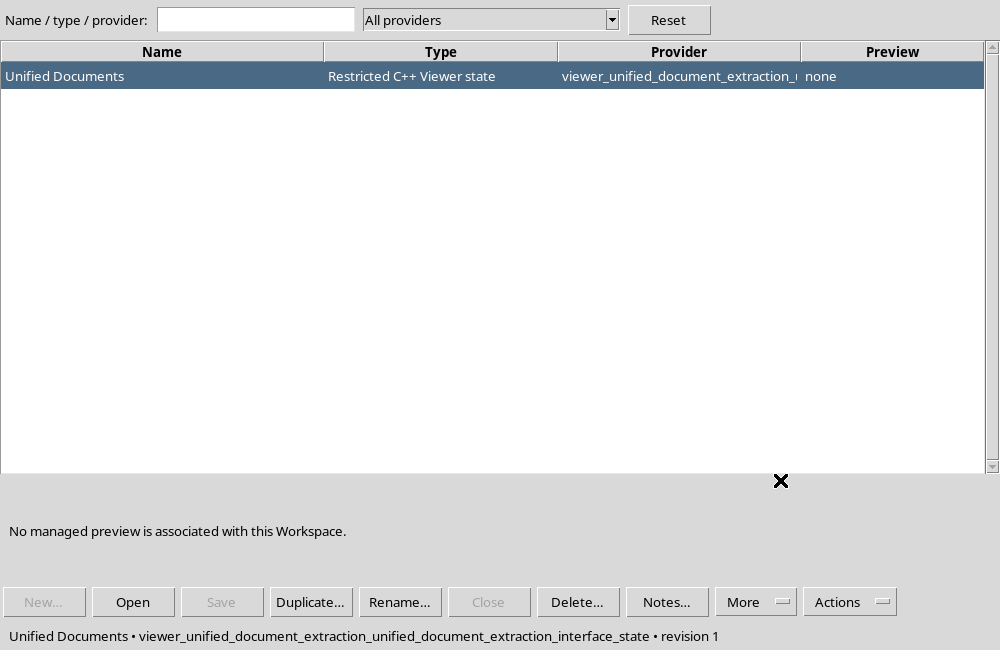
Open Workspace → Session Workspaces…. The Workspace Unified Documents must appear in the shared manager.
The manager is a service of the framework, not a separate archive created by the viewer. The Workspace contains the saved work state, associated with the current Session.
24. Close Viewer and Application Properly
After saving, close the handler and use the normal Workspace → Close command. For a complete verification of persistence it is useful to regularly terminate GX-TXT and restart it: it is not enough to hide the window or open another tab.
This procedure must not delete any Dataset. Canonical content remains in the Session and Workspace remains available for later opening.
25. Reopen the same Cold Session
After the application restarts, reopen the Session itself through the normal path of GX-TXT. The catalog retains the PDF source and the published Text Dataset.
Open Session Workspaces, select the previously saved Workspace Unified Documents and use Open. The gesture reopens the viewer associated with the Workspace, does not create a second independent copy of the text.
26. Check recovery in GUI
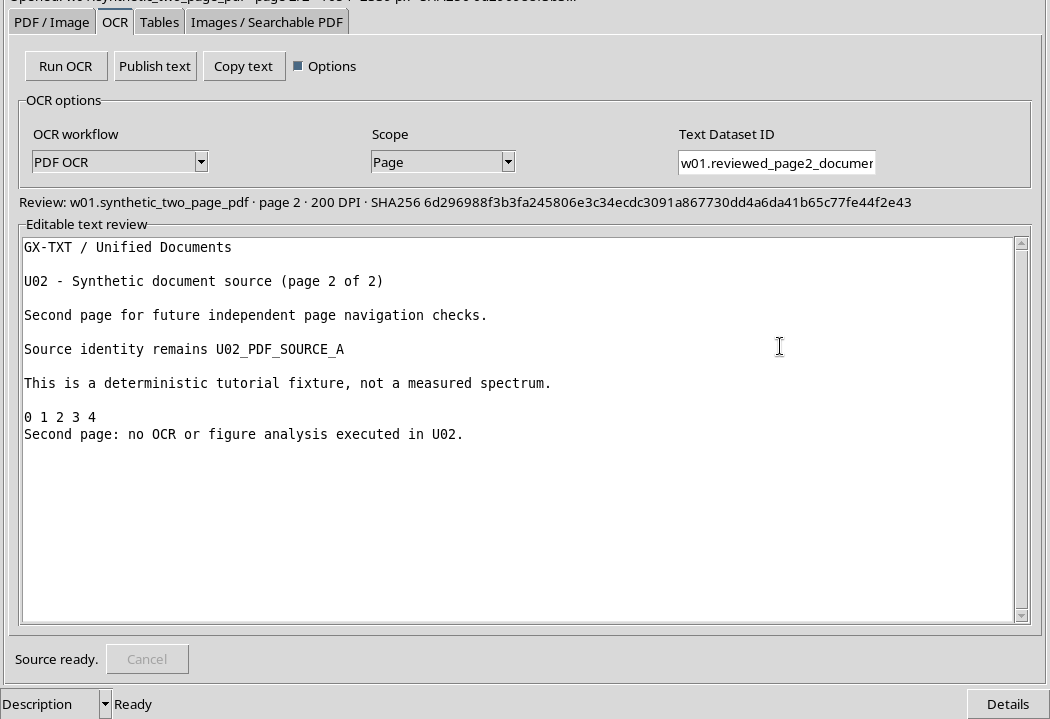
The reopened Viewer still shows the OCR tab, the reference to the PDF source, Page = 2, DPI = 200 and the correct text.
The comparison between the re-opened window editor, the content of the Workspace and the published canonical payload returns the same 310 characters. The revision is therefore recoverable even after the complete closure of the application.
27. Workflow result
The full path created the original PDF as document.pdf and the revised result as document.text. The correction of an optical error on the chart labels was only applied to the text, with verification of page and origin.
The test includes canonical acquisition, OCR, review, publication, independent reading, Workspace rescue and cold reopening. It does not demonstrate general OCR accuracy and does not contain actual measurements.
28. Switch to real scientific documents
On datasheets, articles or experimental reports it is essential to systematically verify numbers, units, symbols, formulas and headers, not just the words of the current text.
For tables and images there are separate workflows in the Tables and Images / Searchable PDF tabs, with publication in appropriate canonical Datasets. The principle remains the same: to preserve the unchanged source, review the result and document its provenance.