

Opening Curve Digitalizer and Linking Your First Image
Chapter V01 · Illustrated guide
From the Viewers catalog to a scientific raster image: open the Viewer, recognize its initial state, and select a canonical Image Dataset without confusing it with an already digitized curve.
1. Purpose and the essential distinction
Curve Digitalizer is the GX-TXT Viewer used to extract numerical coordinates from curves in raster images. The source is not a file opened independently of the application: it is a canonical Image Dataset registered in the active Session.
Opening the Viewer, loading an image, calibrating the axes, and publishing data are separate operations. In this first chapter, we proceed as far as the verified display of the source raster. We have not yet calibrated the axes, added points, or published any new curve Datasets.
2. Prerequisites for opening the Viewer
Before opening the Viewer, you need a valid GX-TXT Session and the Viewer module available in the catalog.
| Element | Requirement |
|---|---|
| Framework | DEV112 Release 2 with patches P001–P005 |
| Viewer | viewer.curve_digitizer, Digitalizer entry under Viewers |
| Session | An existing, open Session |
| Source | Compatible Dataset, normally with the image.raster contract |
| Desktop environment | Python 3, Tkinter, NumPy, and Pillow |
Important: The standard procedure is to import the image using the Session’s acquisition tools.
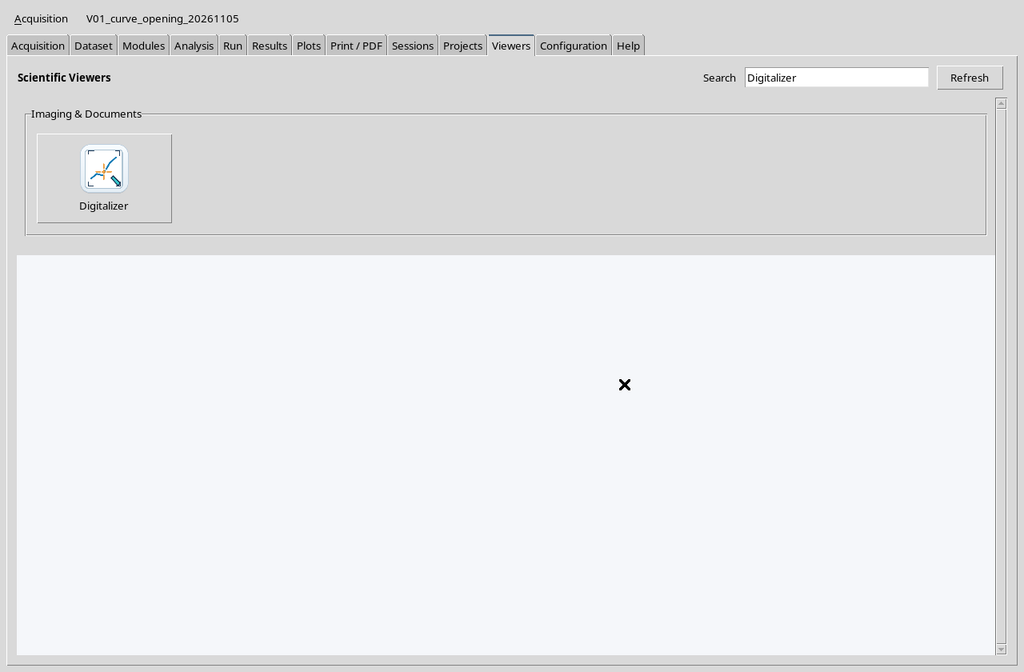
3. Find Digitalizer in the Viewers catalog
In the GX-TXT main window:
- Make sure the intended Session is open.
- Select the Viewers tab.
- Enter
Digitalizerin the Search field, or find the Viewer in the Imaging & Documents category. - Click the Digitalizer tile.
The Viewer tile is not a Dataset: opening the Viewer does not create curves, publish data, or automatically modify the original image.
4. First launch: the window has no source yet
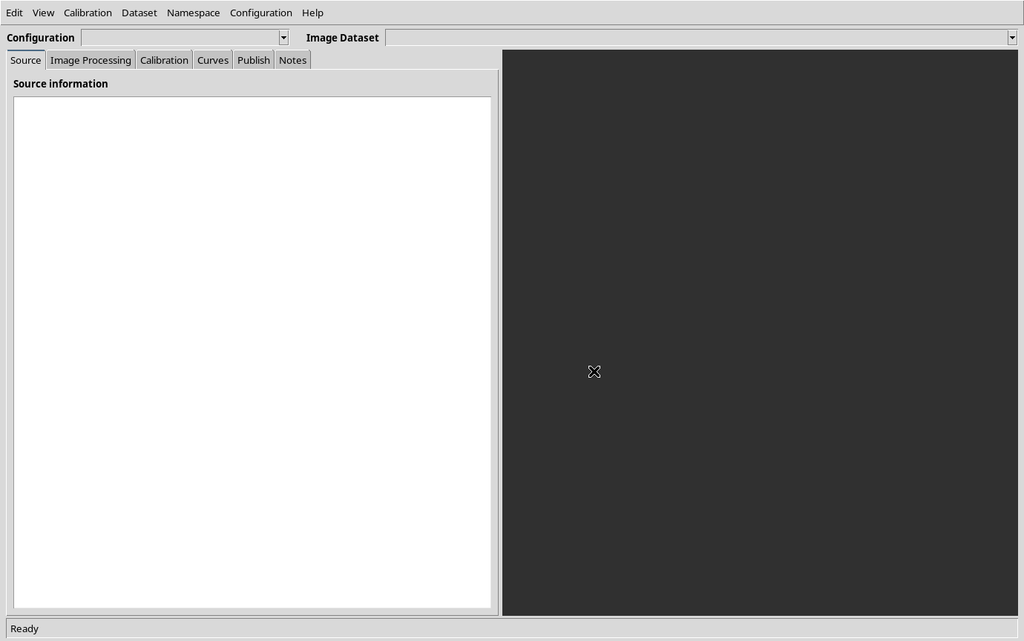
If the Session contains no images and no configurations have been created, the Viewer can still open. The Configuration and Image Dataset selectors are empty; the Source information panel contains no metadata, and the canvas on the right is uniformly dark.
The six tabs are Source, Image Processing, Calibration, Curves, Publish, and Notes. The menu bar contains Edit, View, Calibration, Dataset, Namespace, Configuration, and Help. The initial tab is Source.
This screen is not an error if there is no Image Dataset yet. If no valid Session exists, however, the CORE prevents the Viewer from opening.
5. Prepare a canonical Image Dataset
To use a raster image, it must first be available as a Dataset in the Session. The acq.image_binary module recognizes PNG, JPEG, BMP, and TIFF files and registers a scientific source with the image.raster contract.
In this example, the following canonical record was verified:
| Field | Value in this example |
|---|---|
| Dataset ID | v01.synthetic_multicurve |
| Contract | image.raster |
| Format and media type | png, image/png |
| Source module | acq.image_binary |
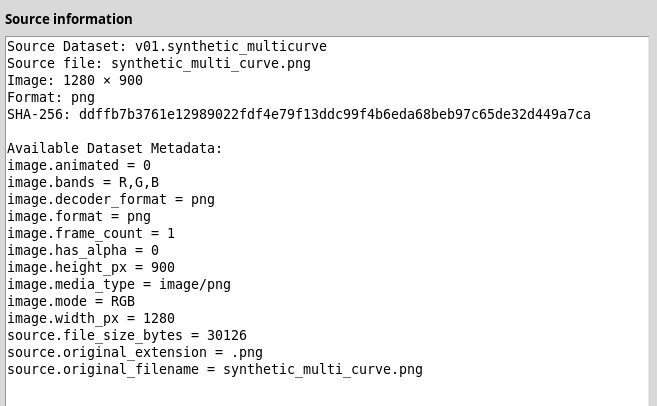
| Raster dimensions | 1280 × 900 pixels |
| Source SHA-256 | ddffb7b3761e12989022fdf4e79f13ddc99f4b6eda68beb97c65de32d449a7ca |
After import, the Image Dataset selector makes v01.synthetic_multicurve available. The field may still be empty: having a Dataset in the catalog and linking it to a configuration are separate events. Automatic catalog refresh every five seconds is described in the module documentation; in this example, the newly imported Dataset appeared without restarting the Viewer.
6. Create a Digitizer Configuration
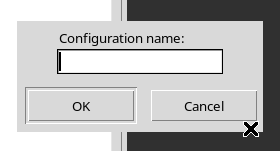
Before assigning the source, open Configuration → New configuration…. The Configuration name: dialog appears with a text field and OK and Cancel buttons.
In this example, enter V01 Synthetic Curve Example and click OK. The new entry appears in the Configuration selector, while Image Dataset still has no source selected. This creates an Interactive Document associated with the Session, not a separate external project file.
Why the order matters: the interface cannot link a source when there is no current configuration. Therefore, select the source after creating the configuration. Renaming, duplicating, deleting, and managing multiple configurations are covered separately.
7. Select the Dataset and confirm the source
In the Image Dataset selector, choose the appropriate canonical Dataset. In this example, select v01.synthetic_multicurve.
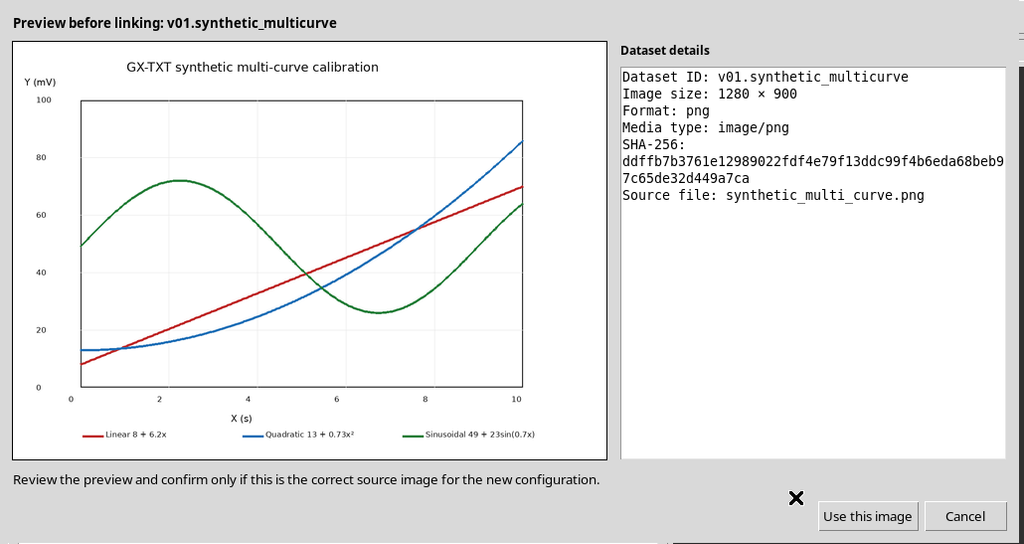
Before accepting the link, the Viewer opens the Preview source image dialog. It displays the image, Dataset ID, format, dimensions, and SHA-256 identity. The message asks you to confirm only if the image is correct.
- Use this image: accepts the link between the configuration and the verified image.
- Cancel: abandons the association without confirming a different source.
Clicking Use this image records the Dataset ID, the source resource identified by its SHA-256, and the original dimensions. The image is decoded in the canvas after canonical source resolution; it is not loaded by opening an arbitrary file with an Open Image button.
8. Understand the result of the first launch
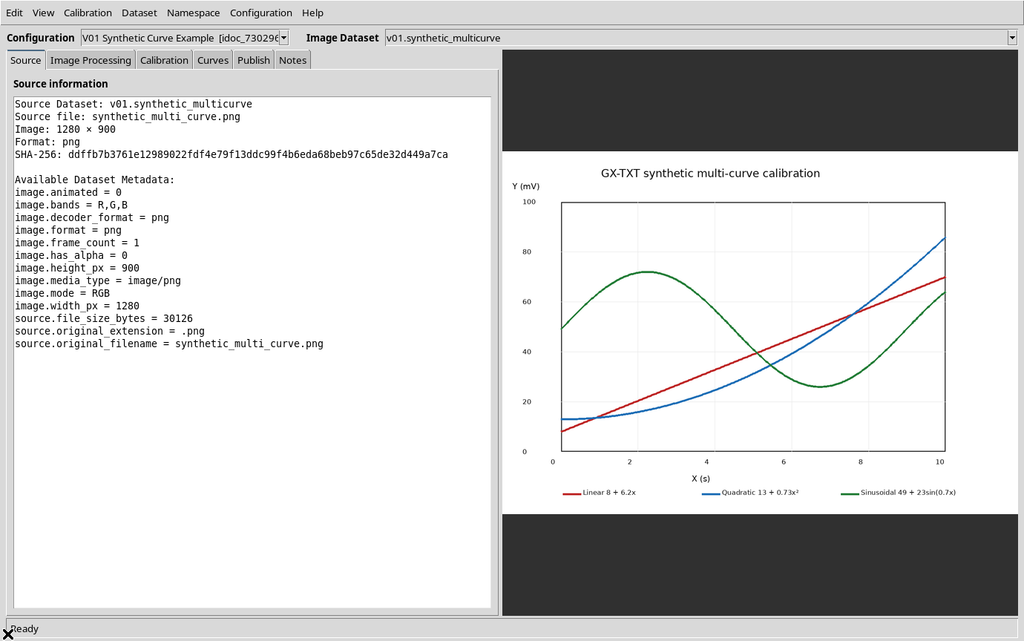
After confirmation, the window displays a populated Configuration selector, the selected Image Dataset, a filled-in Source information panel, and the actual raster on the right. The panel reports the source name, 1280 × 900 pixels, PNG format, SHA-256, and import metadata.
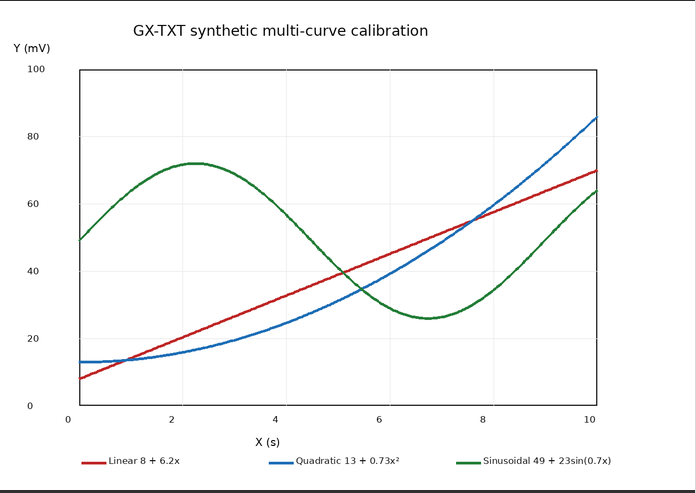
The three colored lines are part of the pixels in the original image. They are not yet a graph produced by Plot Dataset API v4, do not represent a preview of published canonical curves, and do not indicate that any points have been digitized.
| What you see | What it means |
|---|---|
| Graph image on the right | Original canonical raster |
| Metadata in the Source panel | Source identity and properties |
| Selected configuration | Working Interactive Document |
| Any curves, points, or published Datasets | None at this stage |
This is the correct starting state for subsequent axis calibration and curve digitization.
9. Missing resources, errors, and recovery
No Session is open. The public sessionInspectionCurrentSession method requires a valid Session and returns Session Inspection API requires an open or existing Session. when one is unavailable. Open or create a Session first.
The Image Dataset field is empty. When a Session has no compatible images, the selector is empty. Import an image as a canonical Dataset, then check the catalog. If the catalog does not update immediately, use Dataset → Refresh Dataset catalog.
A Dataset exists, but there is no Configuration. Create one using Configuration → New configuration…, then select the image.
The image is incorrect or not the expected source. Click Cancel in the Preview source image dialog. The STALE SOURCE and SOURCE MISSING safeguards apply when a previously linked source changes, disappears, or is renamed.
10. Workflow summary
Using the Viewer for the first time follows a specific sequence: open a Session → make a canonical Image Dataset available → go to Viewers → open Digitalizer → create a configuration → select and confirm the image.
The expected final state is a visible raster image identifiable by its Dataset ID and SHA-256, not an already processed numerical Dataset.