

Correcting, Accepting and Resampling a Proposal
Assisted tracing is useful only if the operator can check the proposal, correct its unsatisfactory parts and decide which vertices to turn into scientific data. In the GX-TXT Curve Digitalizer these three phases are distinct: guides and cyan segments are provisional; accepted segments enter the numerical series; publishing a Dataset is a further, separate operation.
1. Purpose of the Procedure
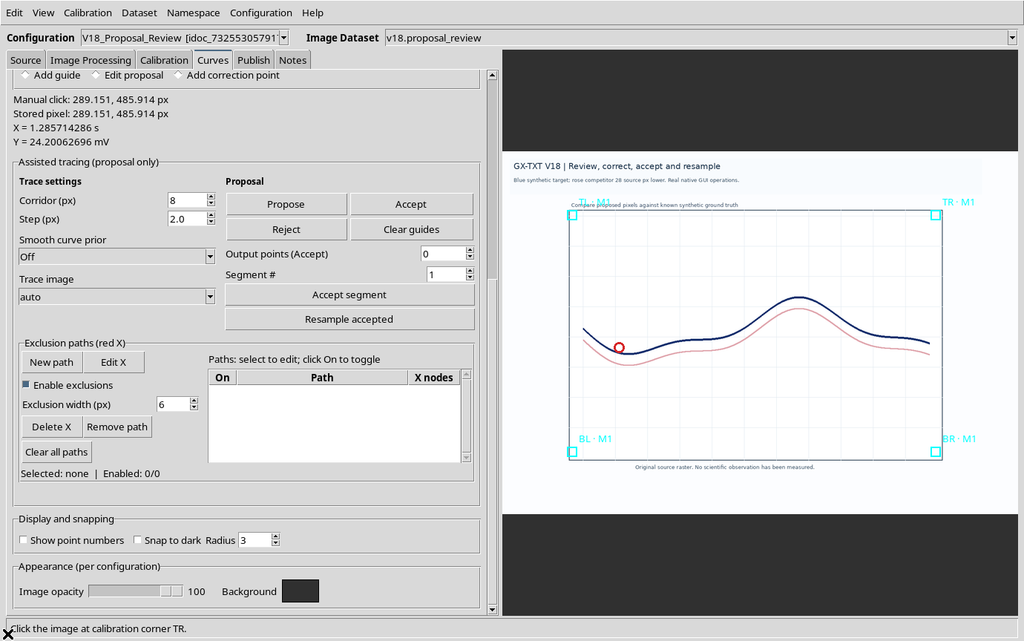
The procedure describes Edit proposal, Add correction point, the Undo/Redo history, Accept segment, Accept, Output points (Accept), Resample accepted, Reject and Clear guides. The context menus of proposed points and of points already acquired are also compared.
The example uses a synthetic image with a blue curve and a competing pink trace, plus a target series containing one manual point to be kept.
2. Source, Calibration and Scientific Ordering
The original image is 1280 × 900 pixels. A four-corner calibration is performed, with X from 0 to 10 s and Y from −20 to 80 mV. In Configuration → Viewer settings → Digitizing, the Monotonic in X policy automatically sets Sort by X: after insertions, corrections and acceptances, the points of the series are sorted by increasing scientific X.
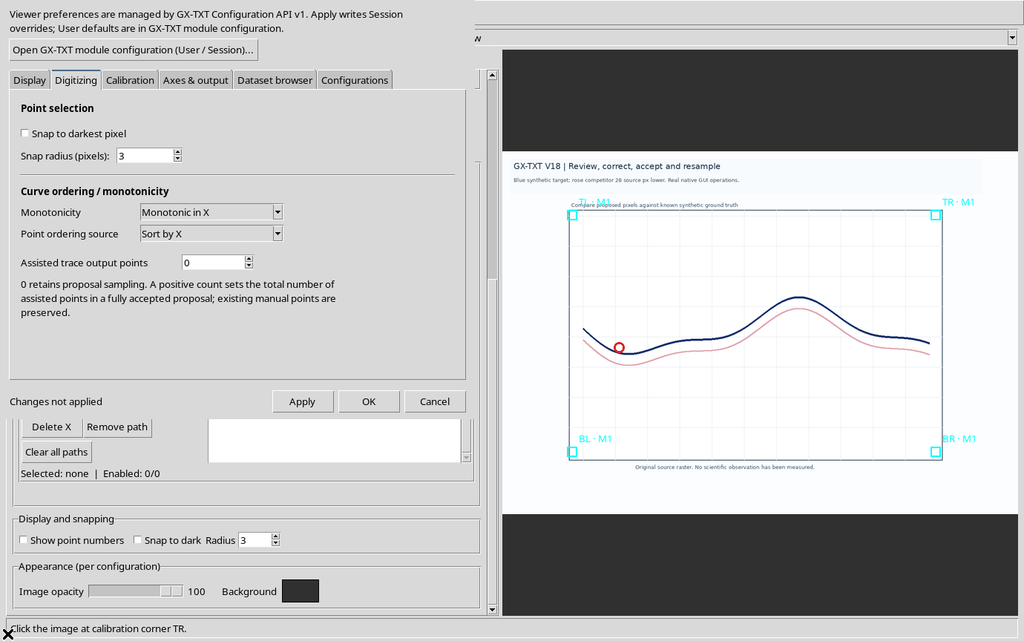
Ordering does not move the points on the image; it only determines the sequence of the records in the curve.
3. Placing the References and Creating a Proposal
In the Curves tab, choose the target series, select Add guide and place five orange guides on the blue line.
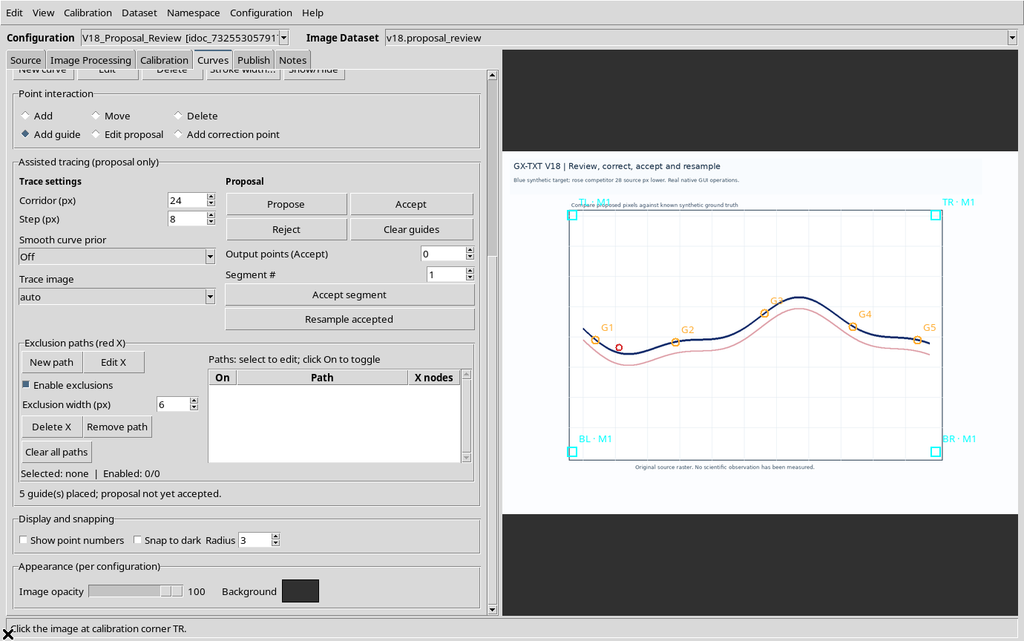
Set Corridor (px) = 24, Step (px) = 8 and Smooth curve prior = Off; use the original raster and press Propose. The program generates 105 provisional points over four segments.
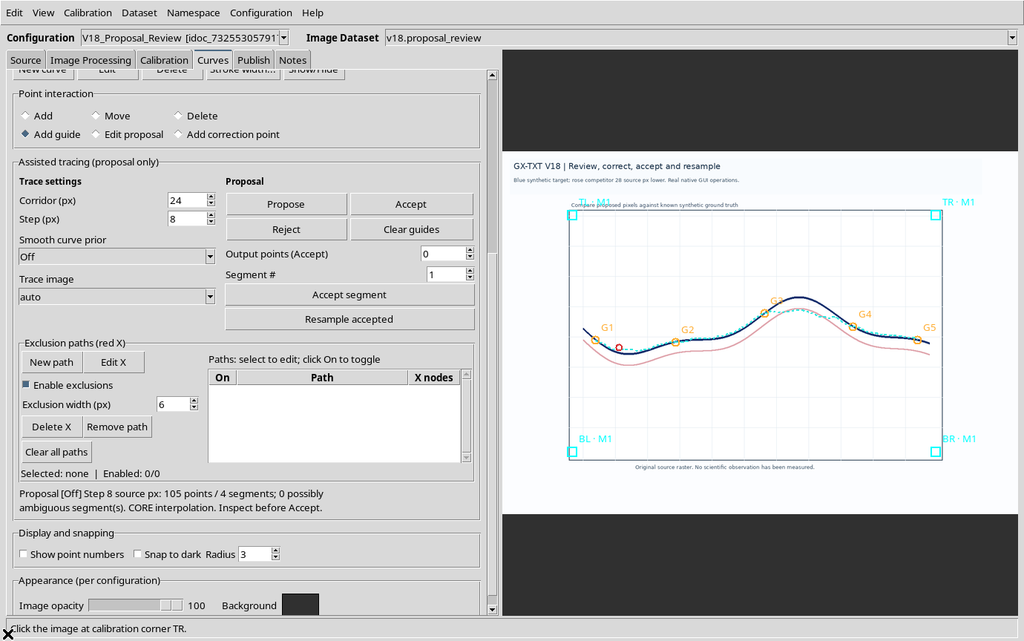
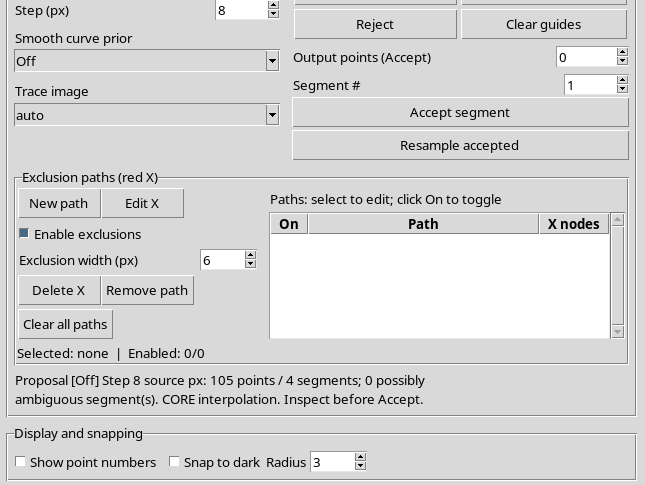
The cyan polyline represents the candidate to be evaluated, not a published numerical series. Generating the proposal does not cancel the manual point already in the series.
4. When to Use Edit Proposal
Under Point interaction, choose Edit proposal to work on a guide or on a generated vertex. The normal gesture is to press the left button near the point and drag it to the new position.
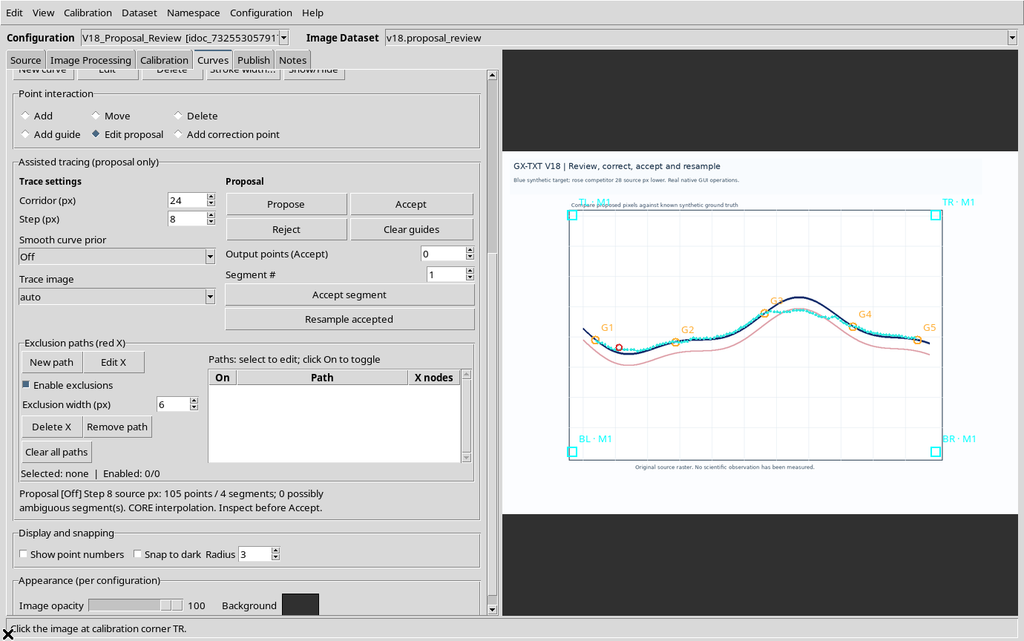
The correction is local: there is no need to automatically recompute every interval if the operator changes only an intermediate guide.
5. The Selection Tolerance: Six Original Pixels
Selecting with Edit proposal requires pressing within 6 pixels of the original image of a guide or of a provisional vertex. A click far away produces no change.
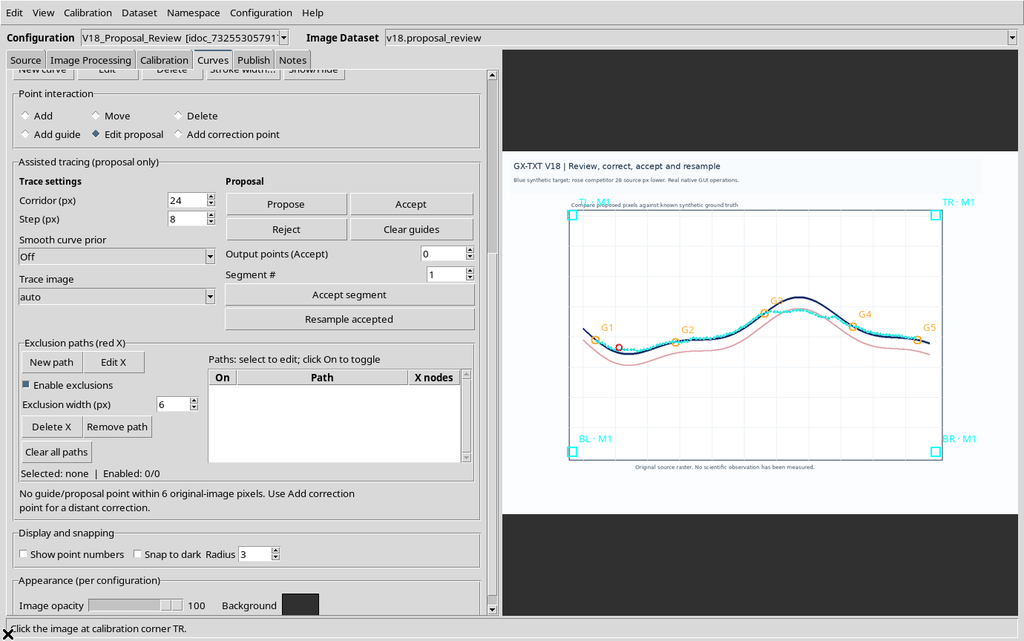
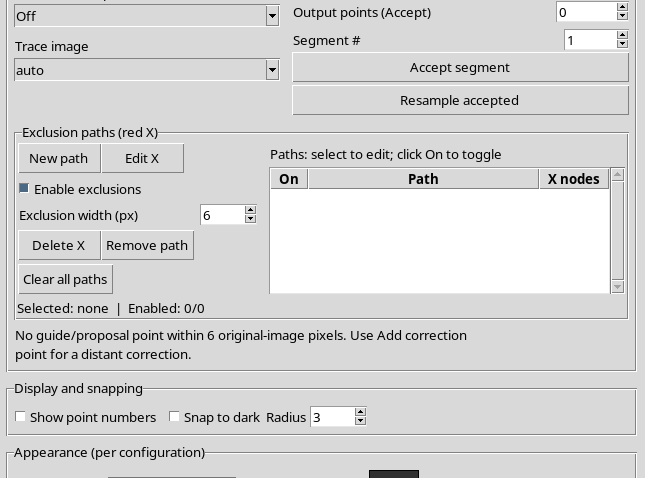
The message suggests using Add correction point when a distant point has to be indicated. The distance refers to source pixels, not to pixels magnified by the window.
6. Moving an Intermediate Guide
Press near G3 and drag it to a new position on the image. The Viewer recomputes the two intervals bordering G3, leaving the first and last segments unchanged.
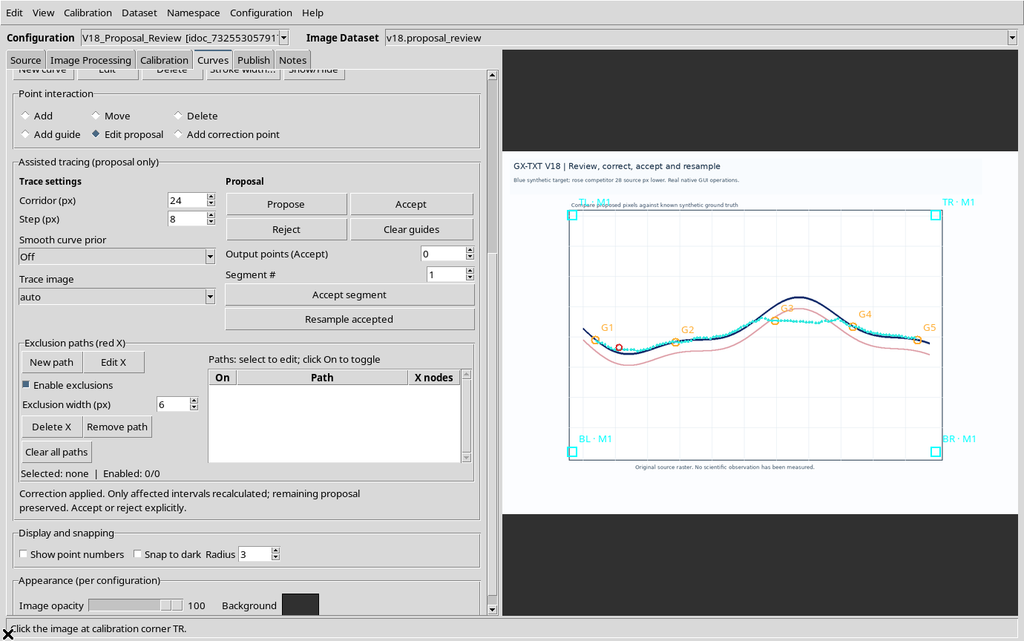
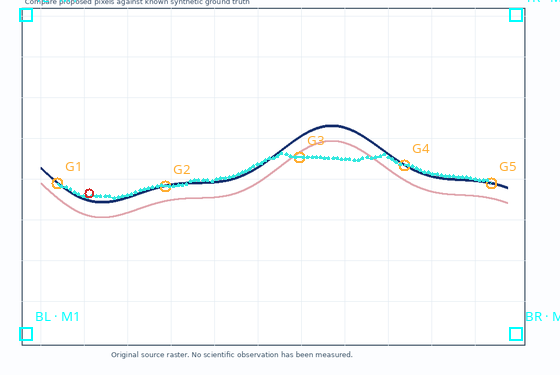
The result must be checked against the original curve. Moving a guide is not the same as automatically accepting the recomputed points.
7. Undo and Redo of the Move
After a change, Edit → Undo returns the previous proposal. Edit → Redo restores the move. A further Undo goes back to the initial candidate.
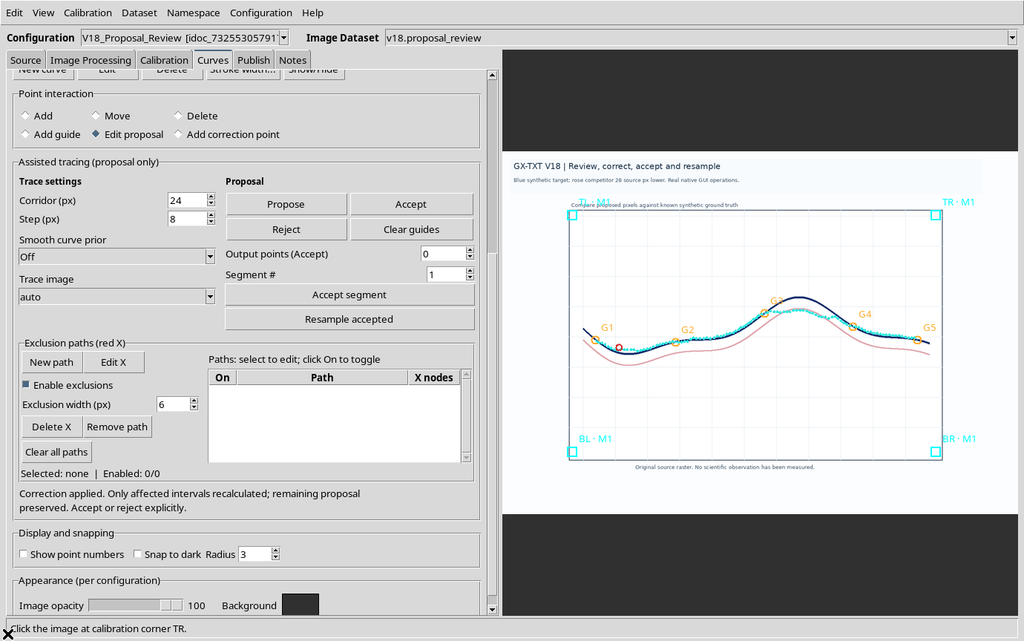
In this example the first and fourth segments stayed geometrically unchanged while the central guide was dragged; Undo recovered all the initial vertices exactly.
8. Add Correction Point: Correction Regardless of Distance
If the cyan proposal passes far from the true curve, choose Add correction point. The function lets you click directly on the correct position in the image, without having to start from an already generated vertex.
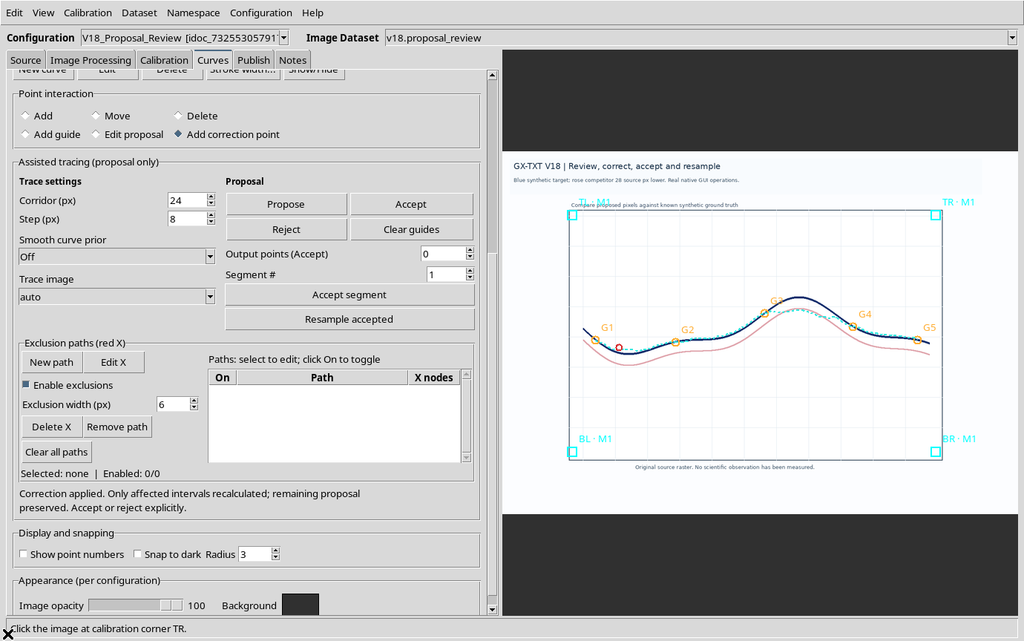
With Monotonic in X, the Viewer uses the calibrated scientific abscissa of the click to identify the interval between the guides. The operator does not have to guess manually which portion to move.
9. A Real Correction Splits the Segment
A click on the blue stroke in the second interval inserted a new guide. The point was placed at about 6.75 source pixels from the nearest generated vertex, so beyond the tolerance used by Edit proposal.
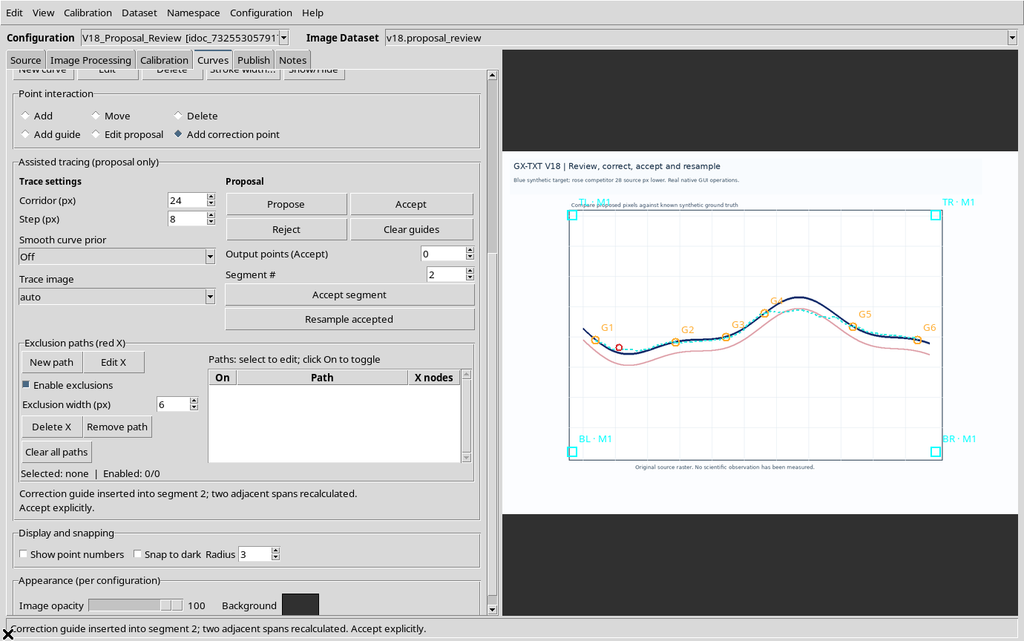
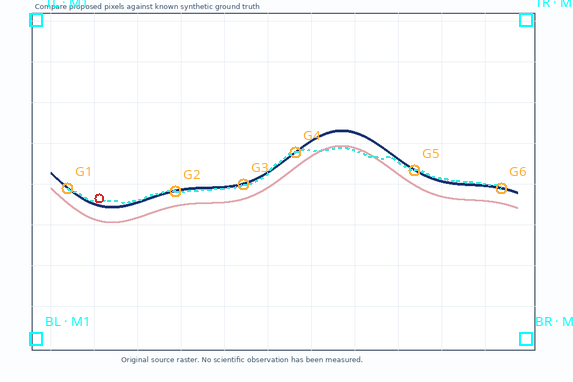
The GUI reports the insertion in segment 2: the two portions around the new constraint are recomputed. The proposal goes from four to five segments; the first and the last two segments stay unchanged.
10. Undo and Redo of a Correction
The new guide can be recovered and removed through the Edit → Undo / Redo history, before acceptance.
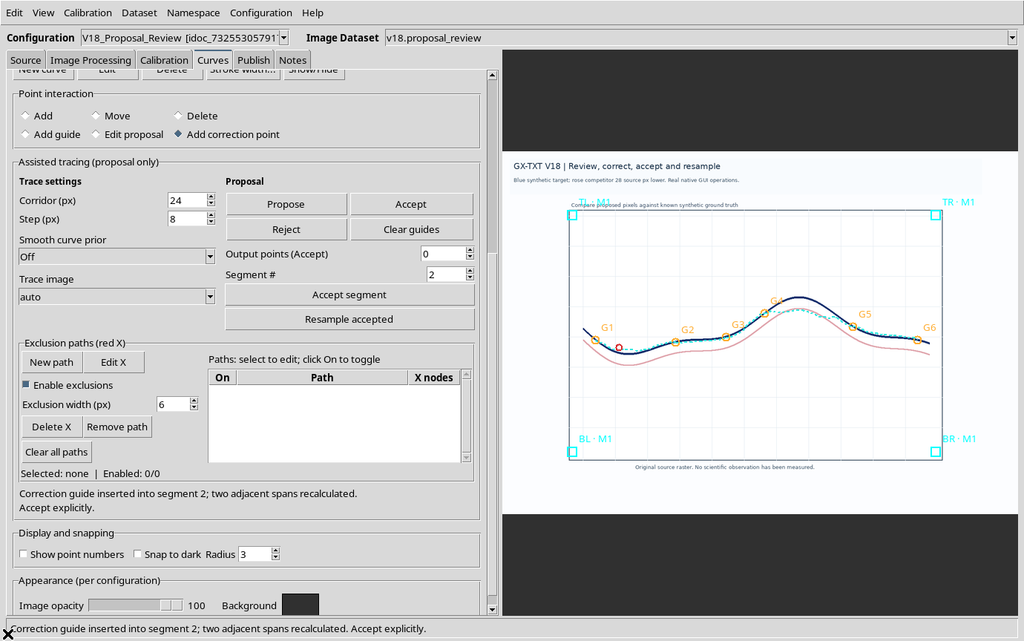
The operation is reversible: Undo returns the original polyline, while Redo recreates the split into five intervals with the same geometric coordinates. The existing scientific points are not modified.
11. Deleting a Correction Guide
With Delete under Point interaction, click the correction guide introduced earlier. The number of segments goes back to four.
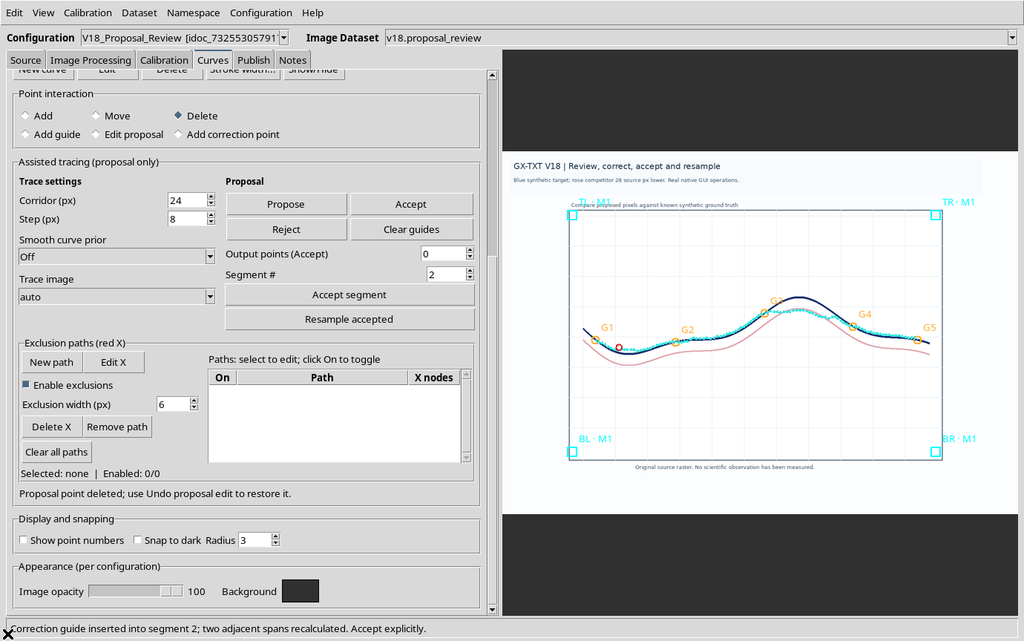
Restoring the original geometry was checked by comparing the same proposal vertices. The result stays provisional and does not change the accepted data.
12. Deleting a Generated Vertex
The Delete mode can also be used on an interior vertex of the candidate polyline, instead of on a guide. In this case only the chosen vertex is removed.
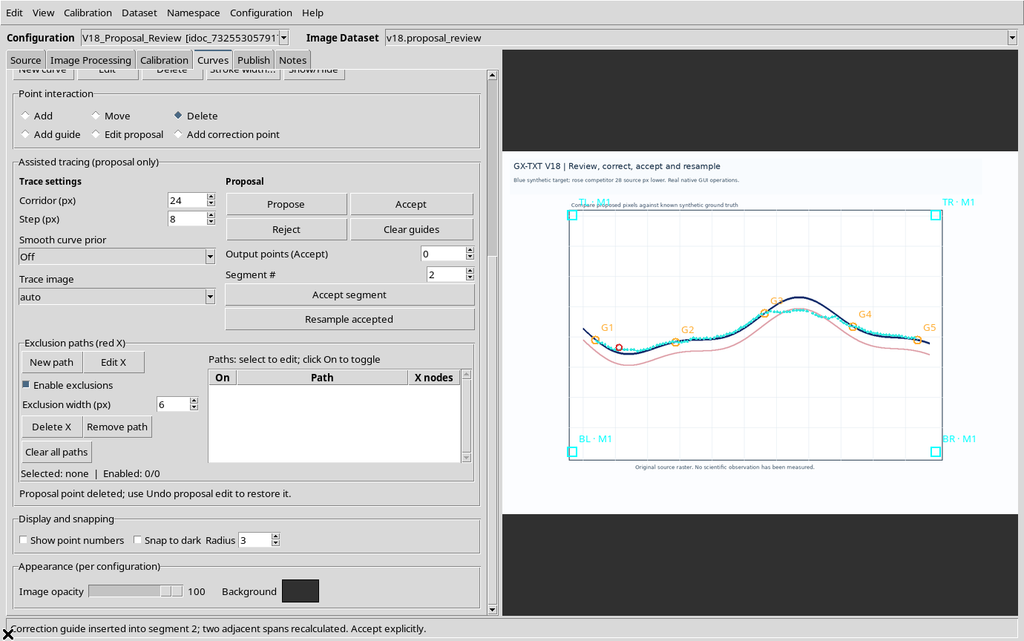
Undo recovers it exactly. The distinction matters: deleting a generated vertex changes a proposal not yet accepted; deleting an acquired scientific point is a different operation.
13. The Step Check Before Accept
Before accepting a proposal, the Viewer checks that Step (px) is still the one used to generate it. If Step is changed from 8 to 10 and you try to accept without a new Propose, a refusal message appears.
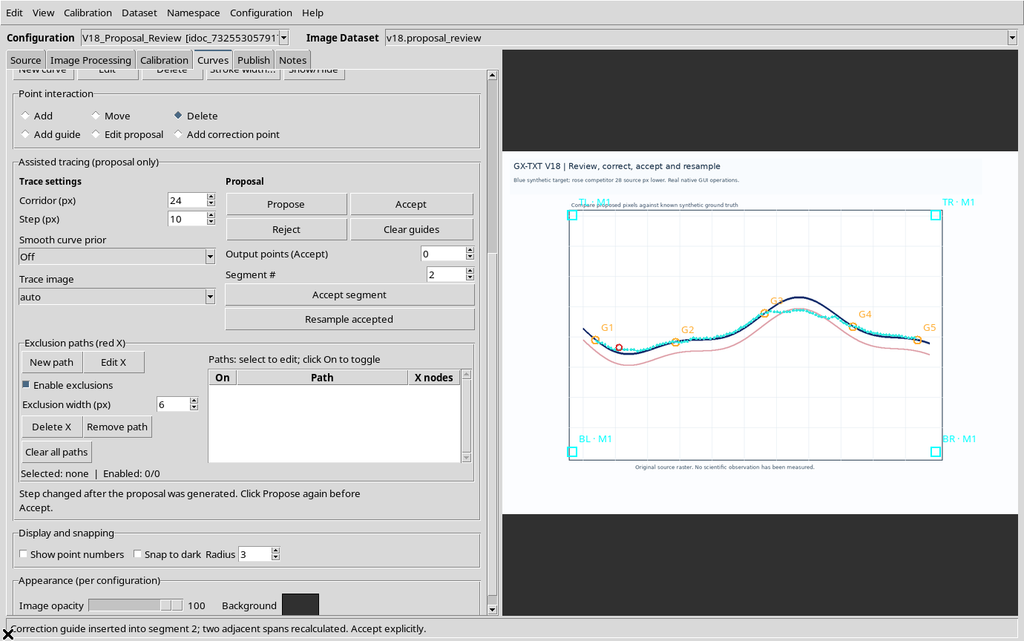
This avoids attributing an earlier result to the new parameters. Correct Step or generate the proposal again, then review it before Accept.
14. Output Points (Accept): Number of Scientific Points
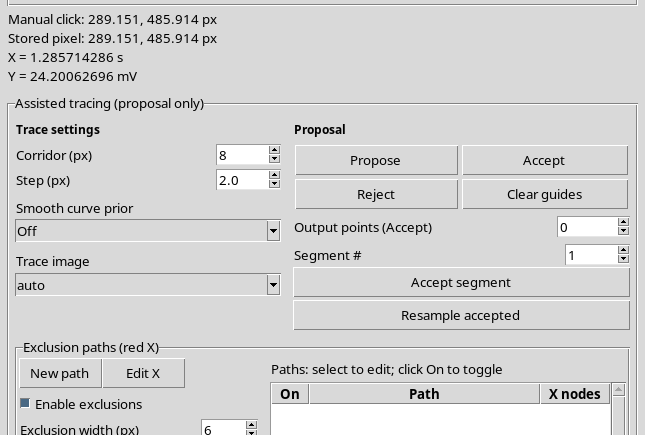
The Output points (Accept) field is not Step. It sets the number of new scientific points to be created in the acceptance operation in progress.
The value 0 keeps the native density of the proposal; a valid positive value ranges from 2 to 10000. Entering 1, the Viewer rejects the request.
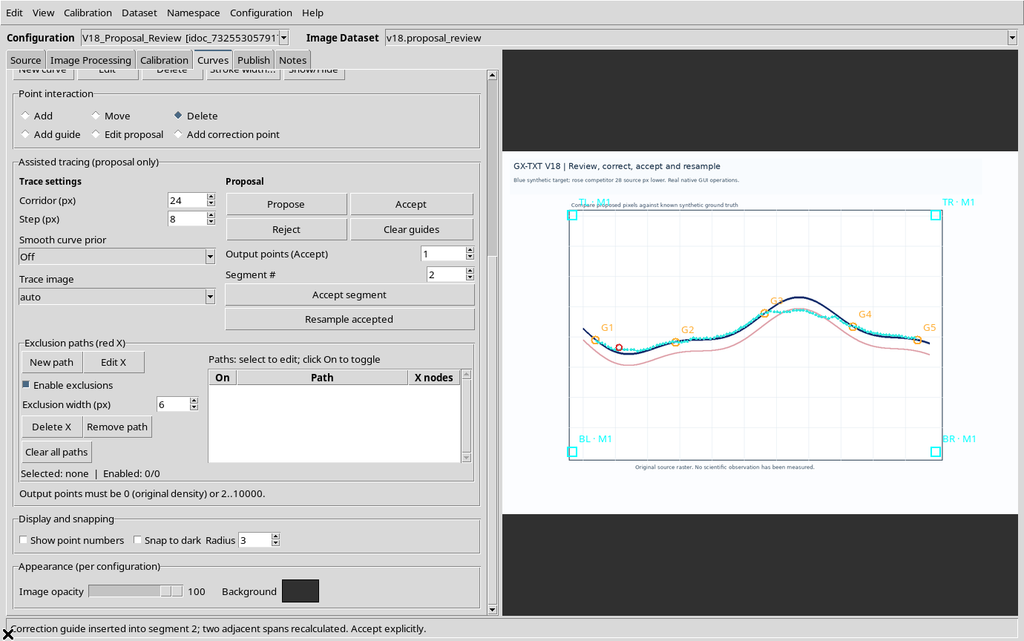
Asking for more points does not mean recovering new experimental information: the Viewer resamples the candidate geometry already examined.
15. Accepting a Single Interval
Set Segment # = 2 and Output points = 20, then press Accept segment. Segment # is numbered starting from one; it selects one of the visible intervals of the proposal.
The Viewer presents an explicit confirmation.
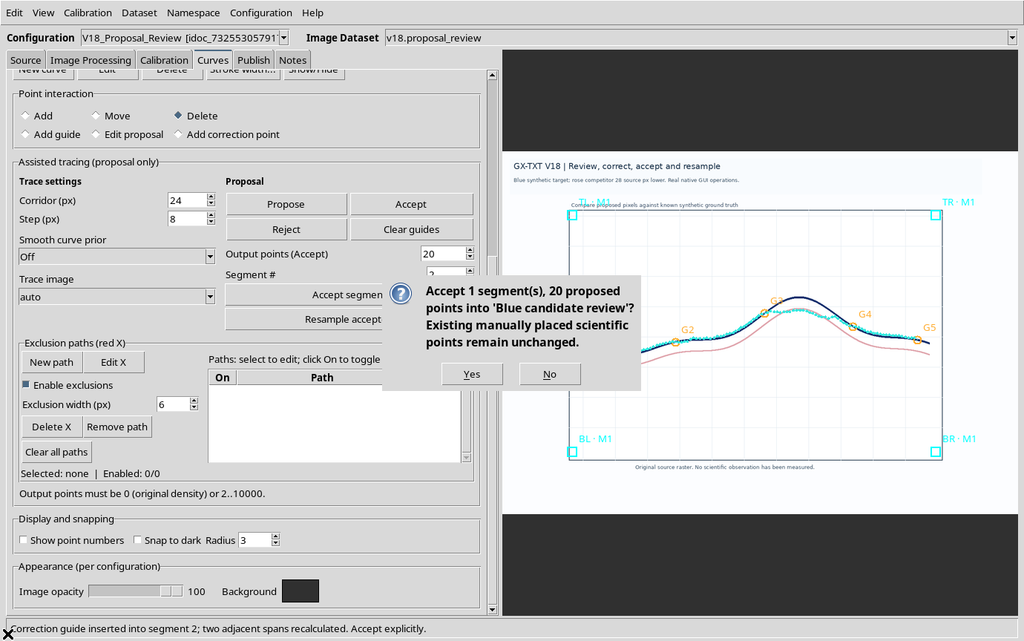
In the first case the operator chooses No. No assisted point is added.
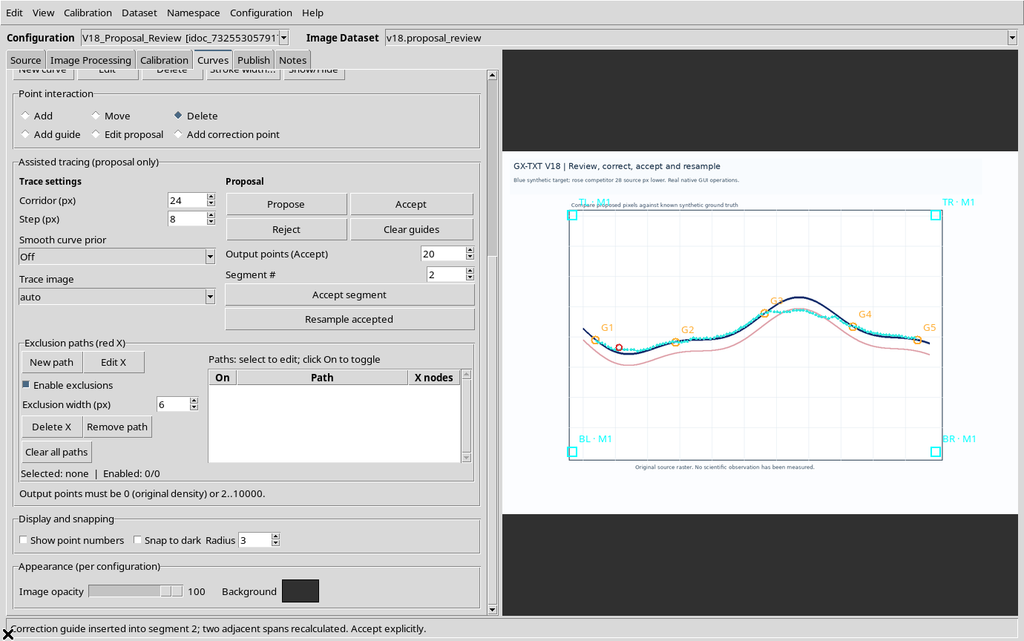
16. Confirming the Acceptance with Yes
Repeating Accept segment and choosing Yes, 20 scientific points with assisted origin are inserted, while the original manual point stays in the series.
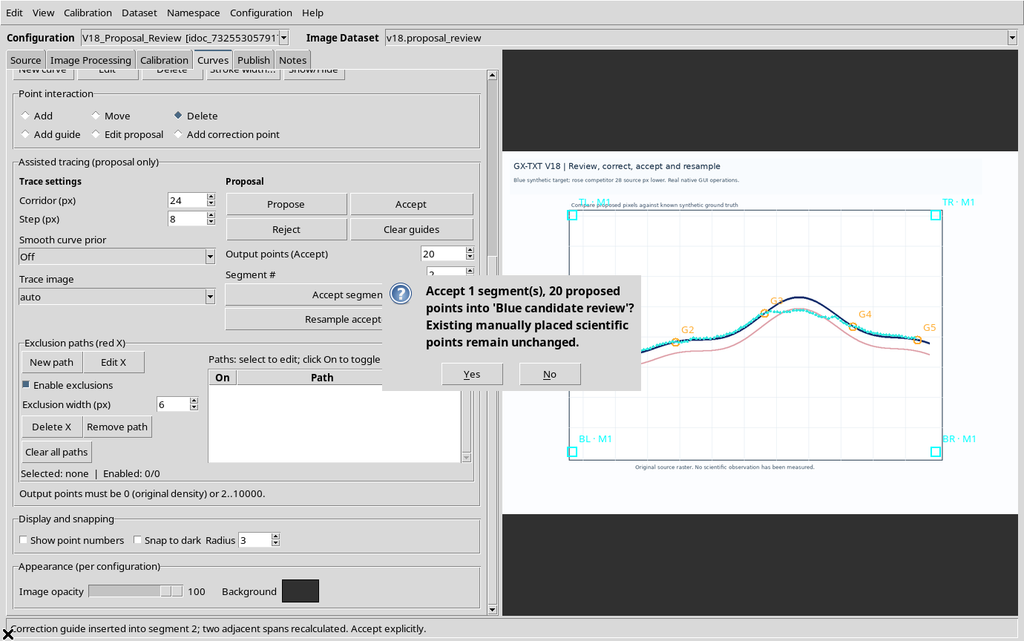
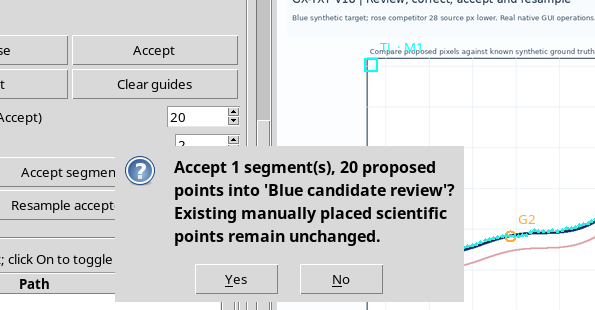
The confirmation states the number of segments and points to be acquired. A request of N with Accept segment concerns the new points for that single interval, not a share of N divided among all the segments of the proposal.
17. Interpreting the Segment Colors
After the second interval has been accepted, the GUI shows one green segment and three cyan segments.
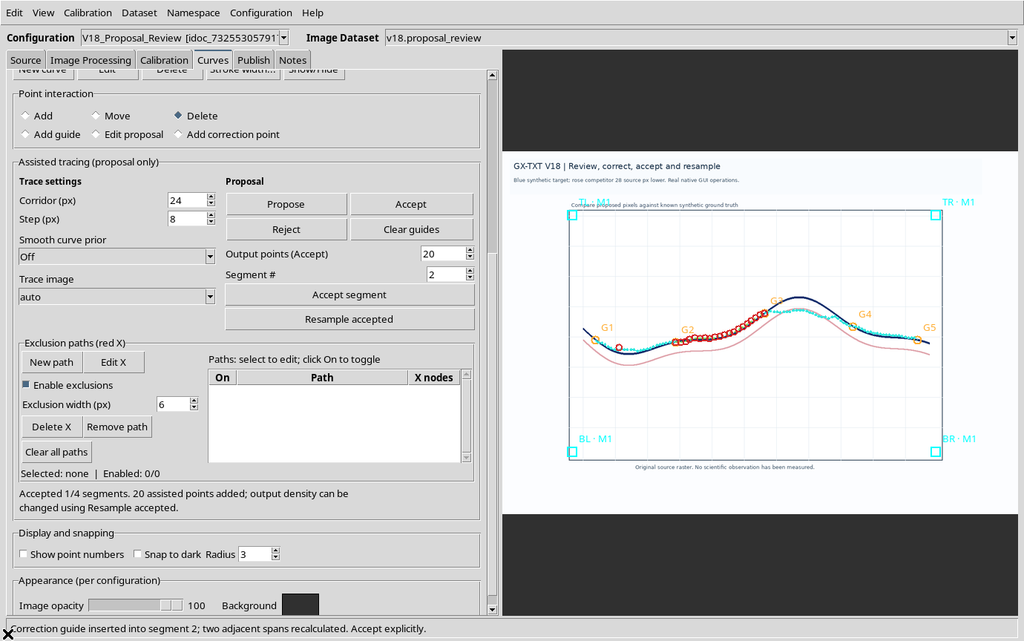
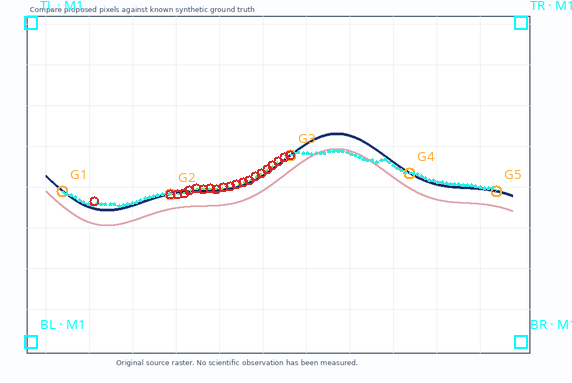
Green identifies a part already turned into numerical points; cyan identifies the proposal still awaiting approval. This difference is one of scientific state, not an indicator of accuracy or uncertainty.
18. Protection of Intervals Already Accepted
In Edit proposal, a guide adjacent to an already accepted segment cannot be moved as if the points were still provisional.
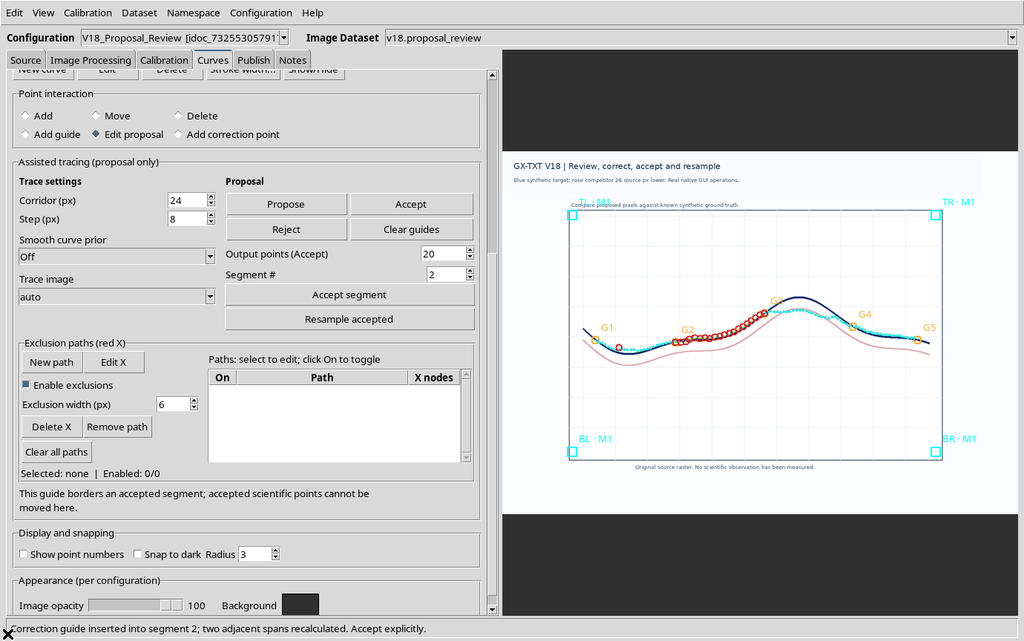
Add correction point also rejects a new constraint falling inside an already accepted interval.
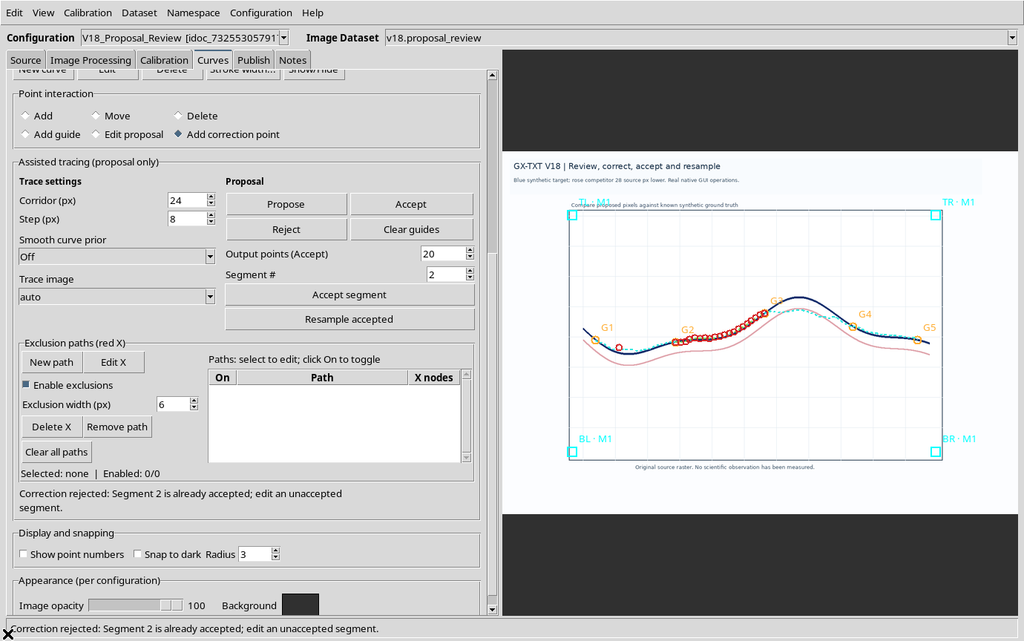
To change acquired points you need to use the appropriate scientific tools, such as Move on the points of the series or Undo, without silently rewriting the portions already confirmed.
19. Changing Output Points During a Partial Acceptance
After the second segment has been accepted with 20 points, Output points is changed to 30 and an attempt is made to acquire another interval. The Viewer rejects the request: Resample accepted must be used first.
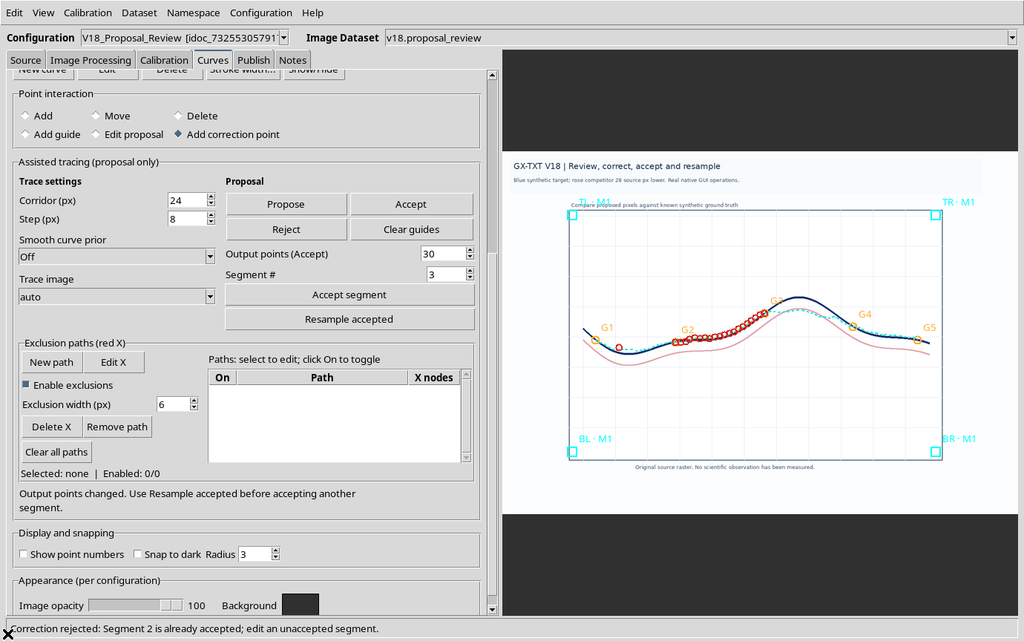
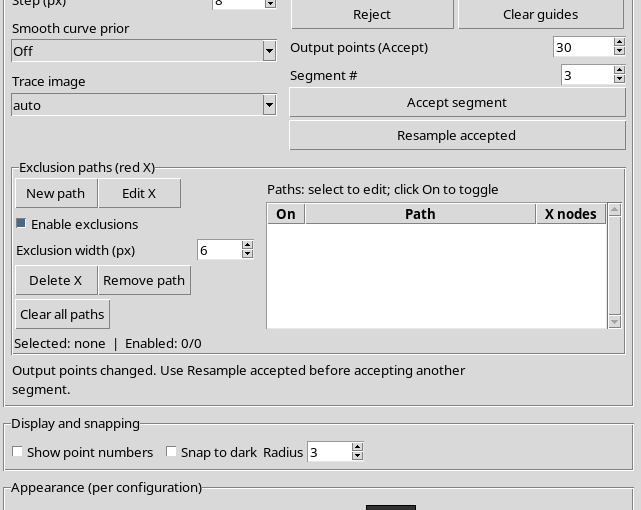
This check prevents mixing incompatible densities in the same proposal without an explicit resampling operation.
20. Resample Accepted and the No Confirmation
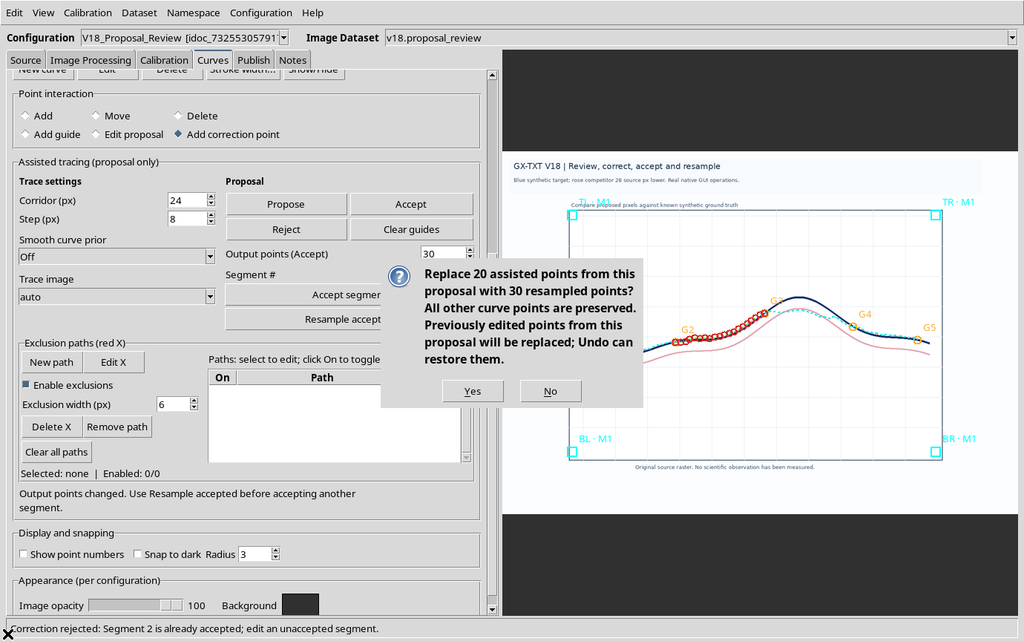
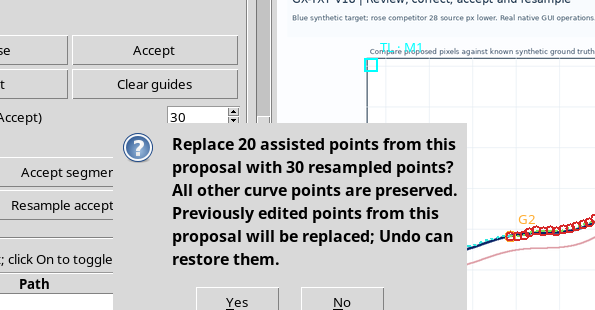
Press Resample accepted with the new value N=30. The program asks for confirmation before replacing the assisted points of the already accepted part.
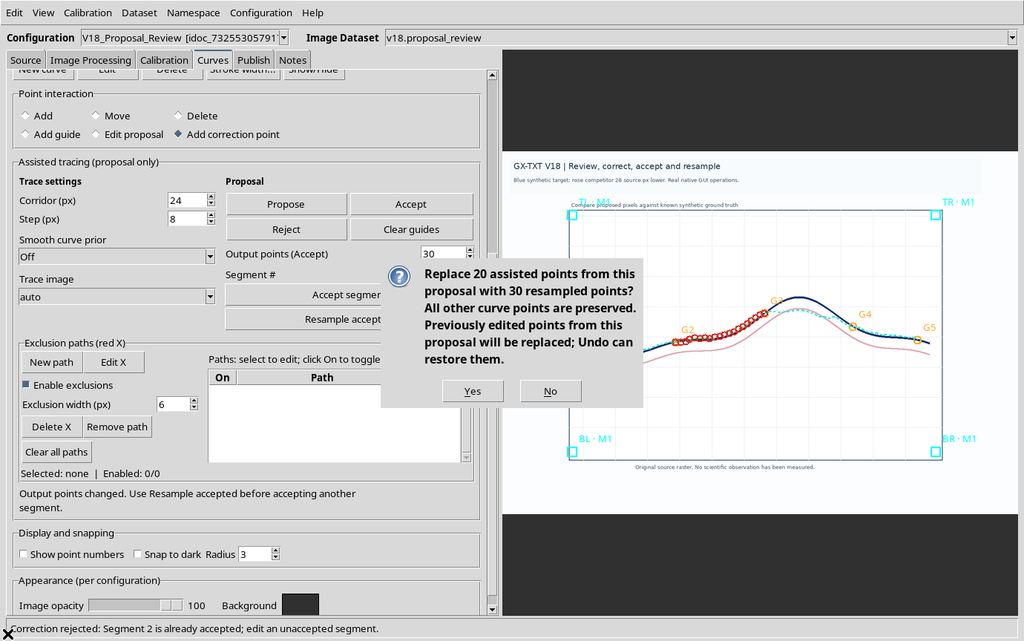
Choosing No, exactly the previous 20 assisted points and the manual point remain.
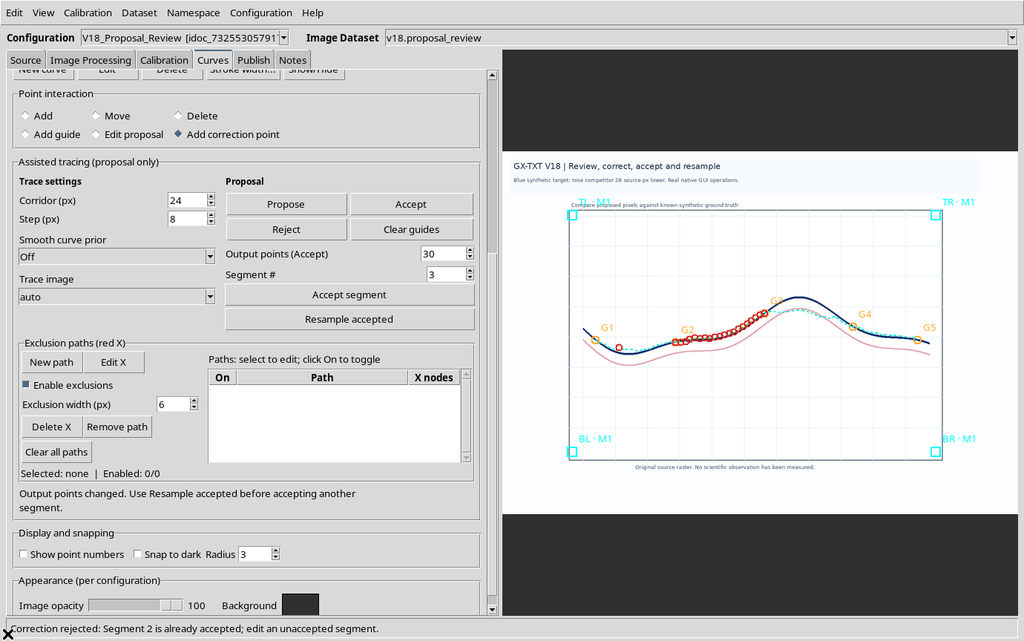
The command is not the same as creating or publishing a new Dataset: it changes the composition of the numerical records in the selected scientific document.
21. Resample Accepted with Yes
Repeat the command and choose Yes.
The second segment is represented with 30 assisted points, plus the single manual point that was kept.
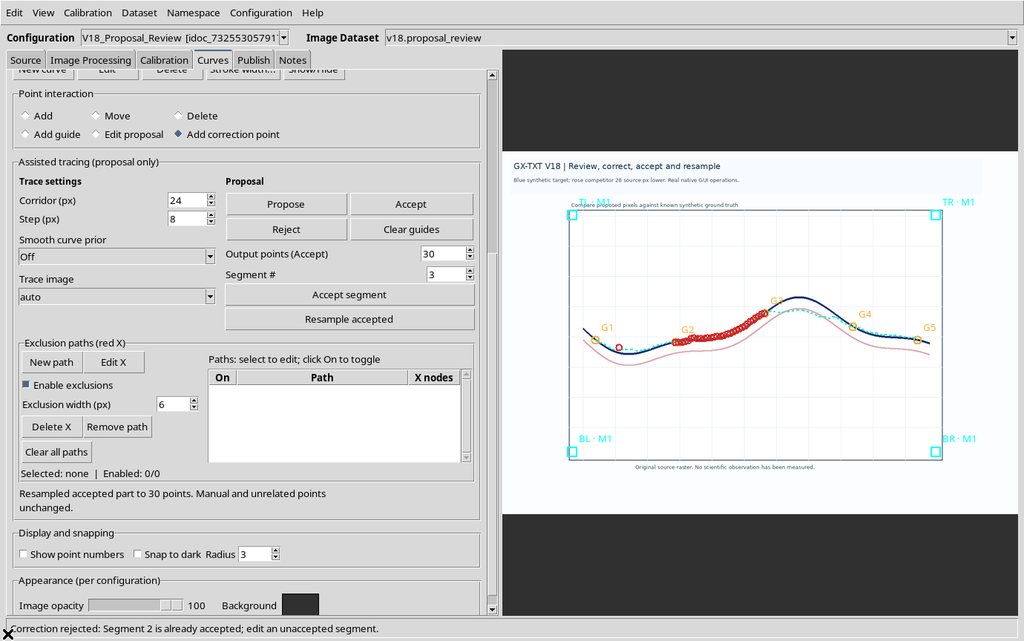
Resampling replaces the assisted records belonging to the current proposal. The other points of the series are not replaced. Undo restores the old 20 records and Redo recovers the same 30 records, with the correct identifiers.
22. An Accepted Segment Is Not Acquired Twice
If Segment # 2 is selected again and Accept segment is pressed, the Viewer reports that it has already been accepted.
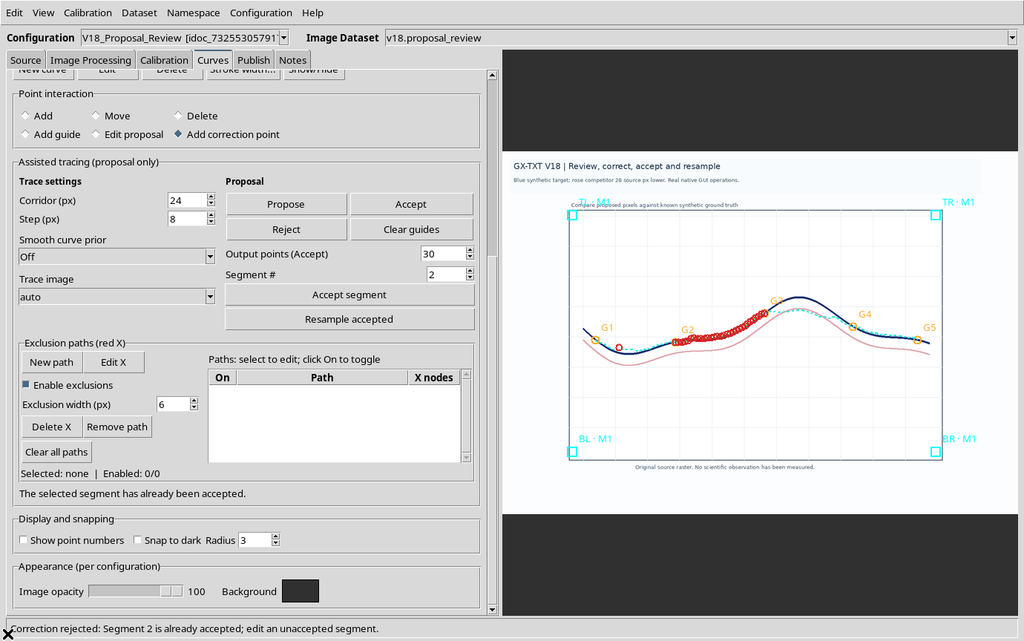
This is a safeguard against automatically duplicating points that belong to the same portion of the proposal.
23. Accepting a Second Segment
Select Segment # = 3, with Output points still set to 30, and press Accept segment. After confirmation, the series acquires another 30 assisted points.
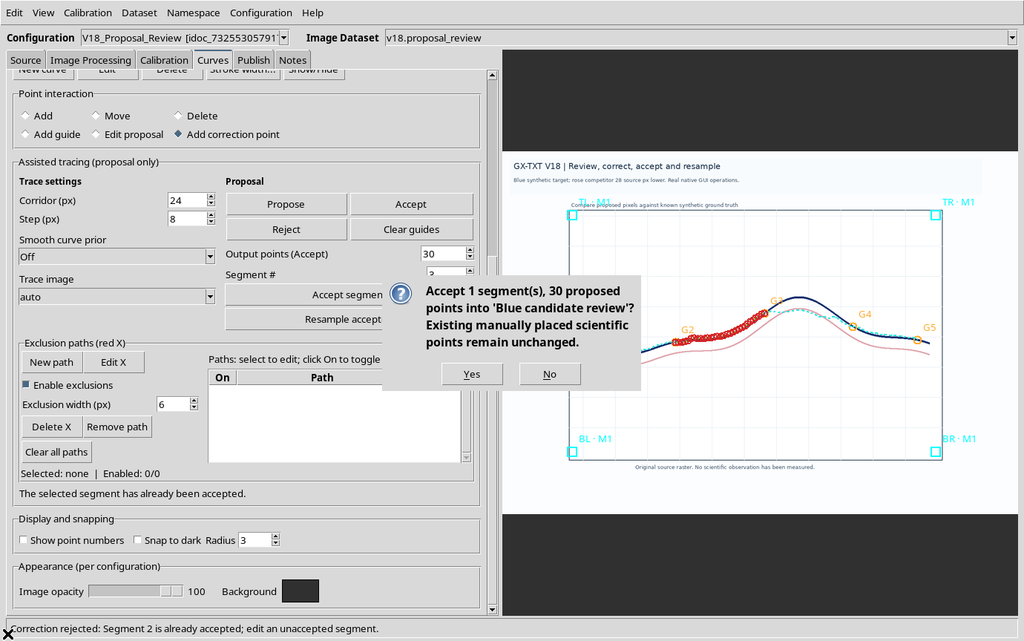
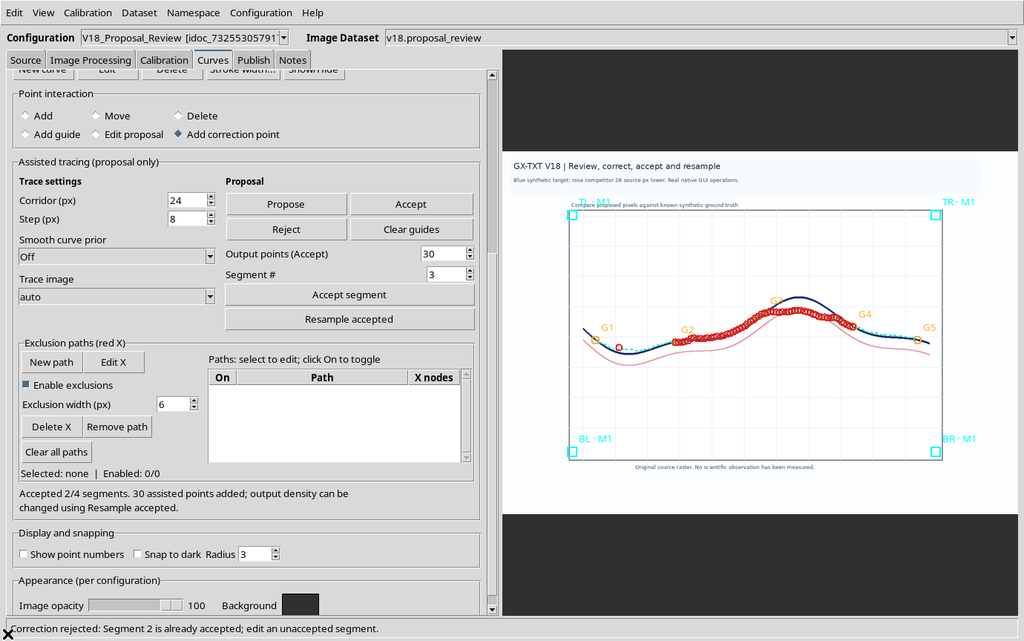
Now segments 2 and 3 are green, while 1 and 4 stay cyan. The curve contains 60 assisted points plus the manual point in total, i.e. 61 records.
24. Accept Completes Only the Remaining Portions
Pressing Accept after two partial acceptances, the Viewer selects only the segments not yet accepted. In our example these are the first and the fourth.
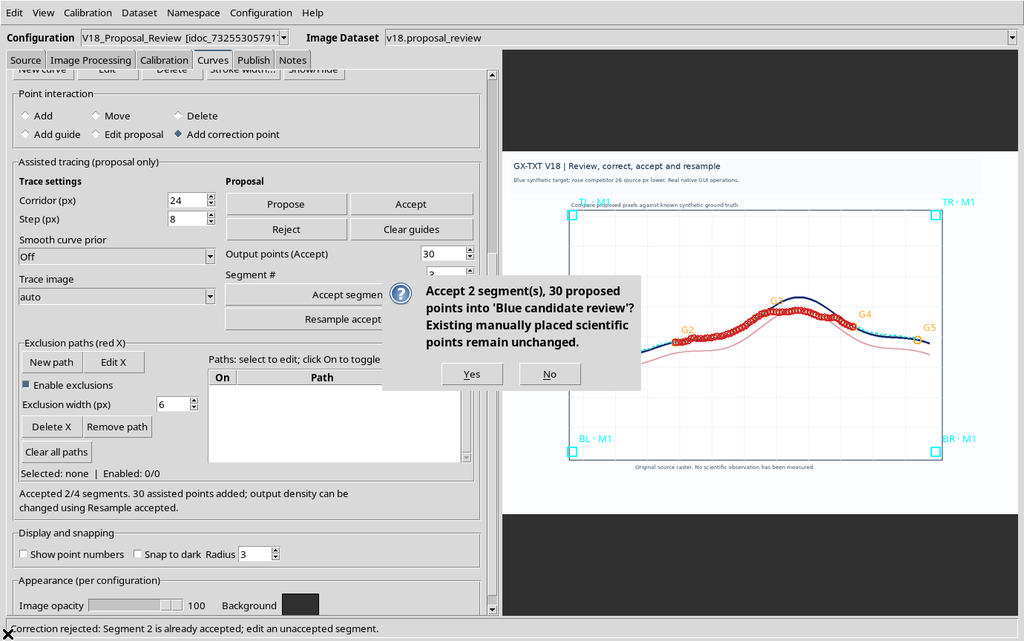
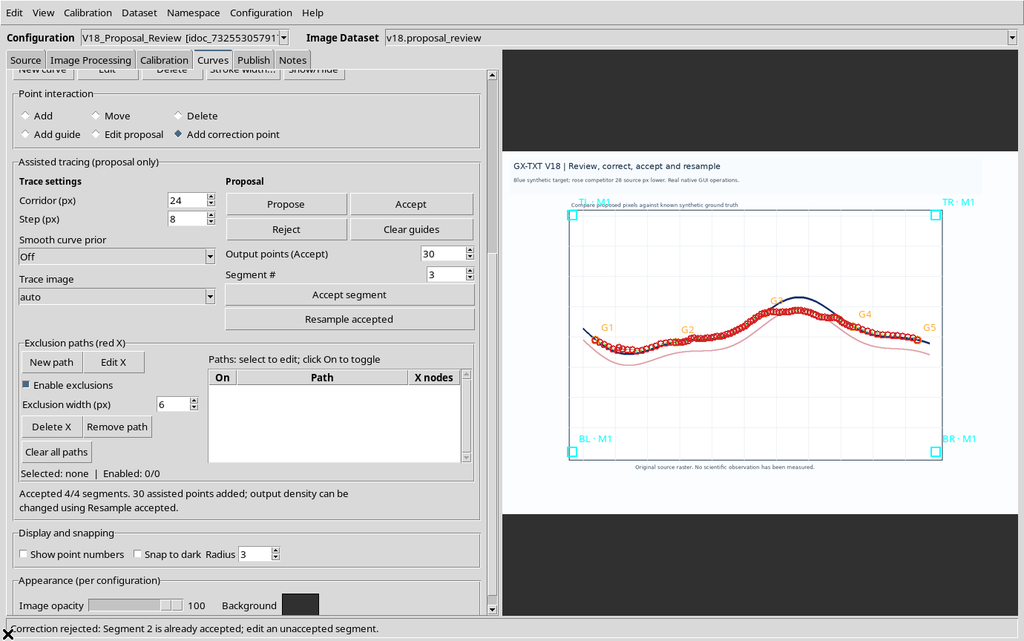
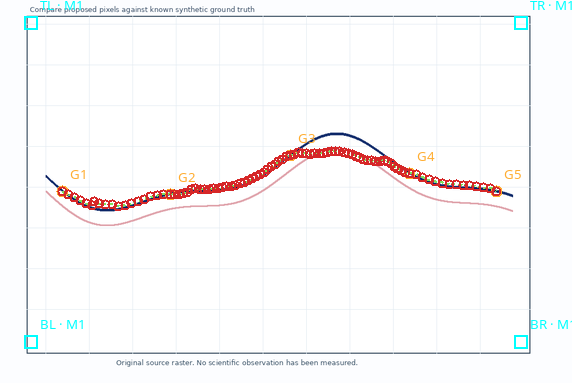
After confirmation, all four segments turn green: another 30 assisted points were added, spread over the remaining parts. The series contains 90 assisted points and one manual point, i.e. 91 records.
25. Exact Count and Shared Guides
Contiguous segments share guides. When adjacent portions are acquired, the Viewer must not automatically add two copies of the same junction point.
With the Sort by X policy, ordering is applied to the calibrated scientific coordinates. A shared guide remains a constraint of the geometry, while the numerical points are identified individually.
In the final result there are no consecutive duplicates of the assisted points at the junctions and the UUID identifiers are unique.
26. Resampling the Fully Accepted Part
After full acceptance, set Output points = 100 and choose Resample accepted. The confirmation window states that the assisted points belonging to the proposal will be replaced, without altering the other records.
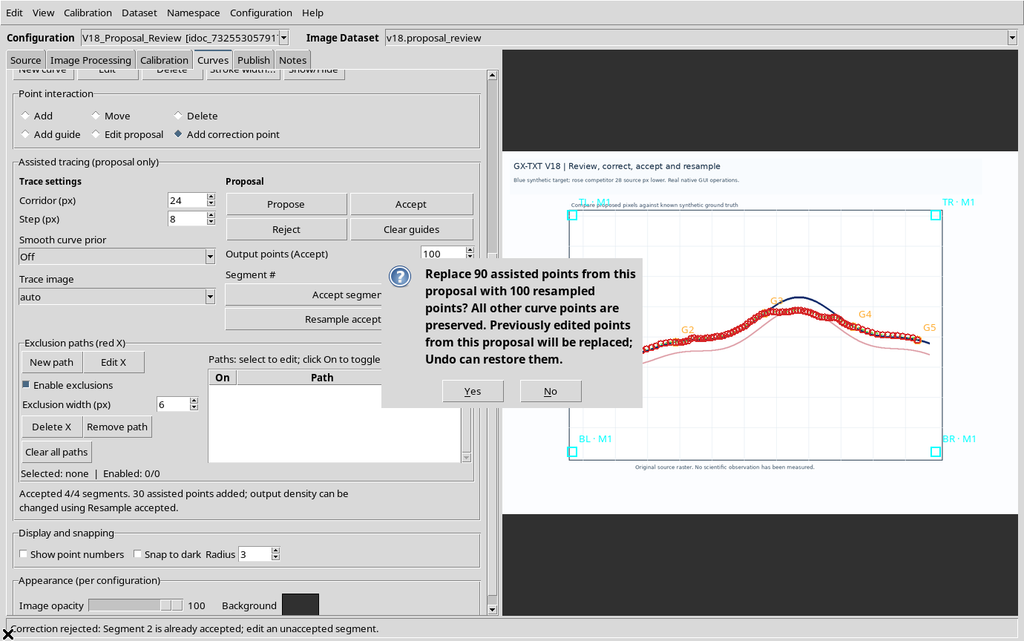
After Yes, the curve count is 101: one hundred assisted points and the initial manual point.
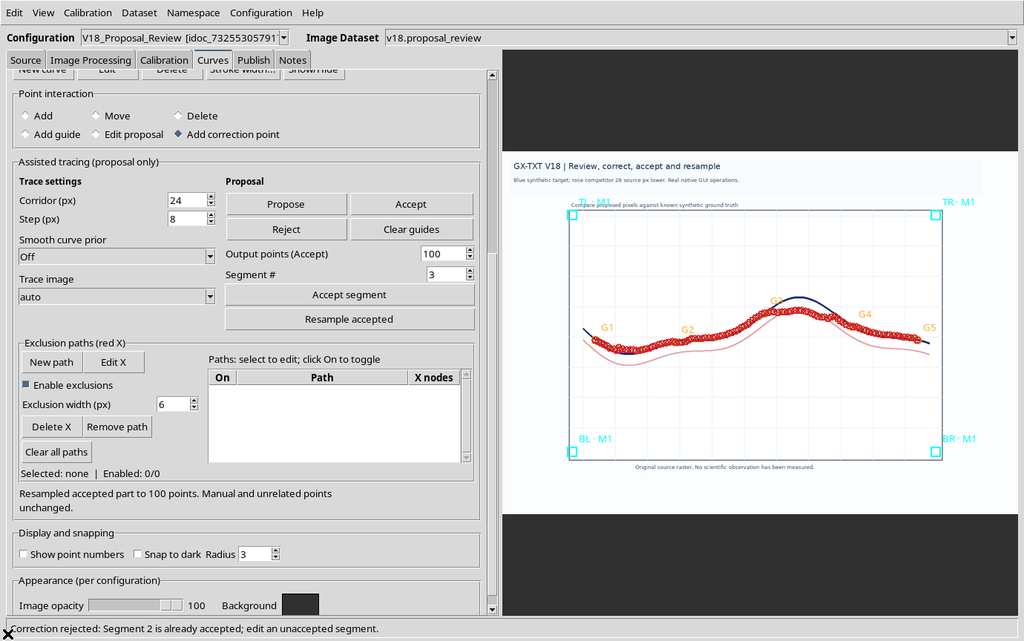
The value 100 is the total of the assisted points of the resampled proposal, not the total of the records in the series.
27. Undo/Redo on the Resampled Scientific Points
Edit → Undo cancels the final resampling, recovering the previous 90 assisted points. Edit → Redo recreates the same 100 points of the confirmed version.
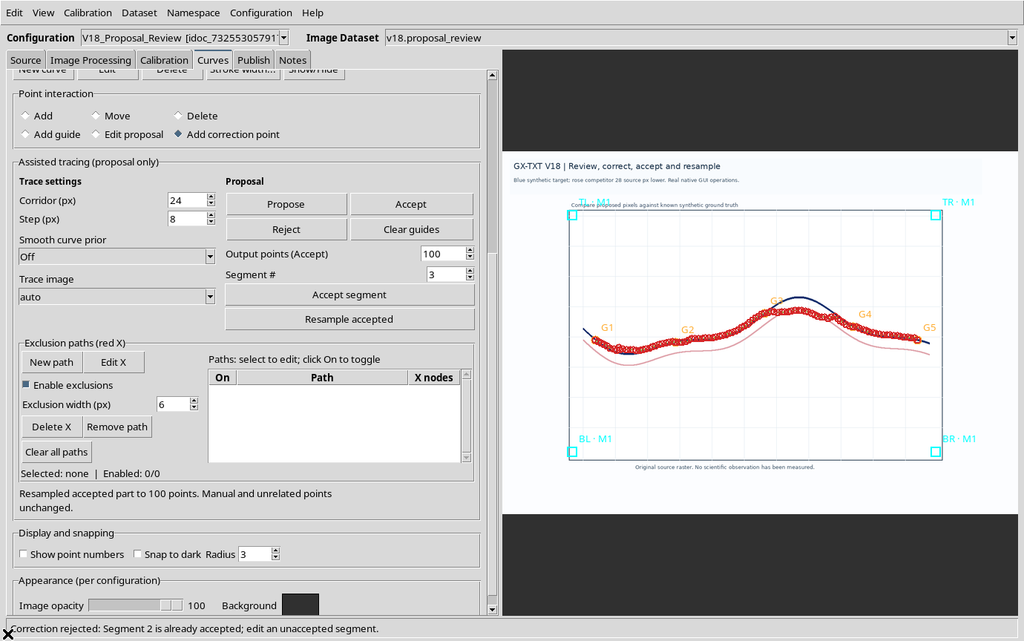
The UUIDs and the coordinates of the manual point stay unchanged in both directions. The operation keeps the history of the accepted scientific points separate from the revisions of the provisional vertices.
28. Context Menu of a Scientific Point
A right-click near a numerical point already present opens the menu with Move scientific point and Delete scientific point.
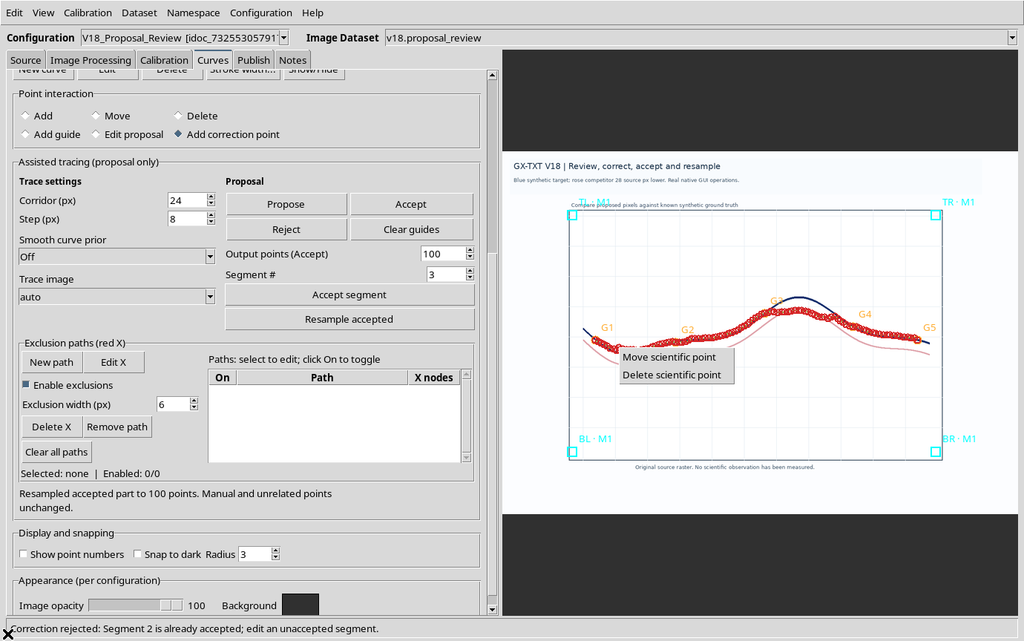
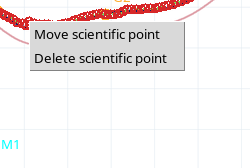
The entries state that the selected object is an acquired scientific datum. It must not be confused with a cyan vertex that has not yet been accepted.
29. Reject After Acceptance
Reject discards any temporary proposal, but does not delete the scientific points already accepted. In the test the 101 records stay present.
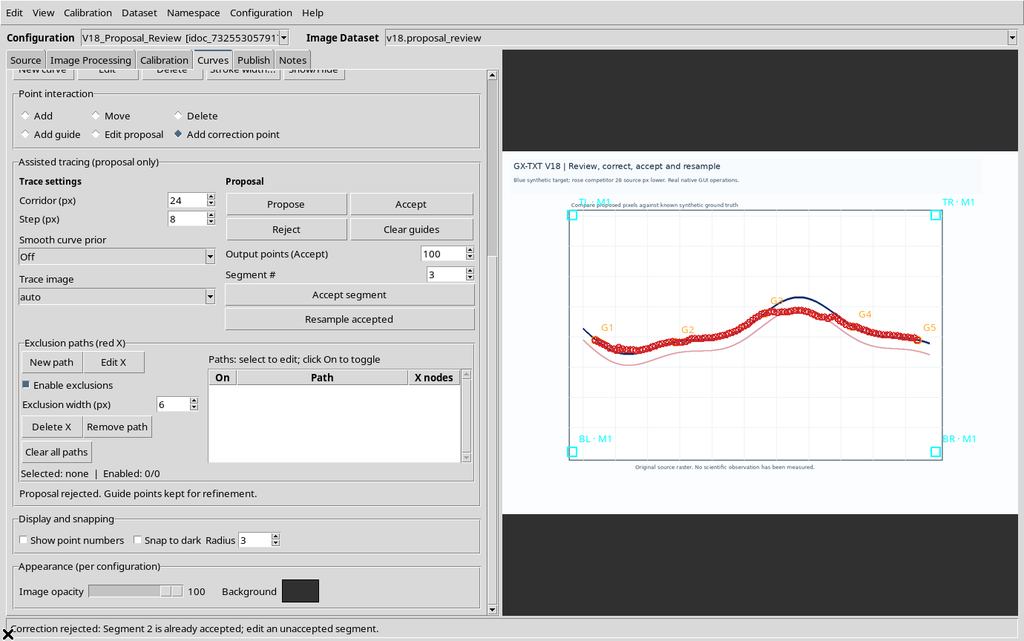
The action can be used to start again from a new candidate, without having to delete or rebuild the data already saved.
30. Clear Guides Does Not Delete the Scientific Points
Press Clear guides to delete the temporary orange guides. The series still consists of 100 assisted points and one manual point.
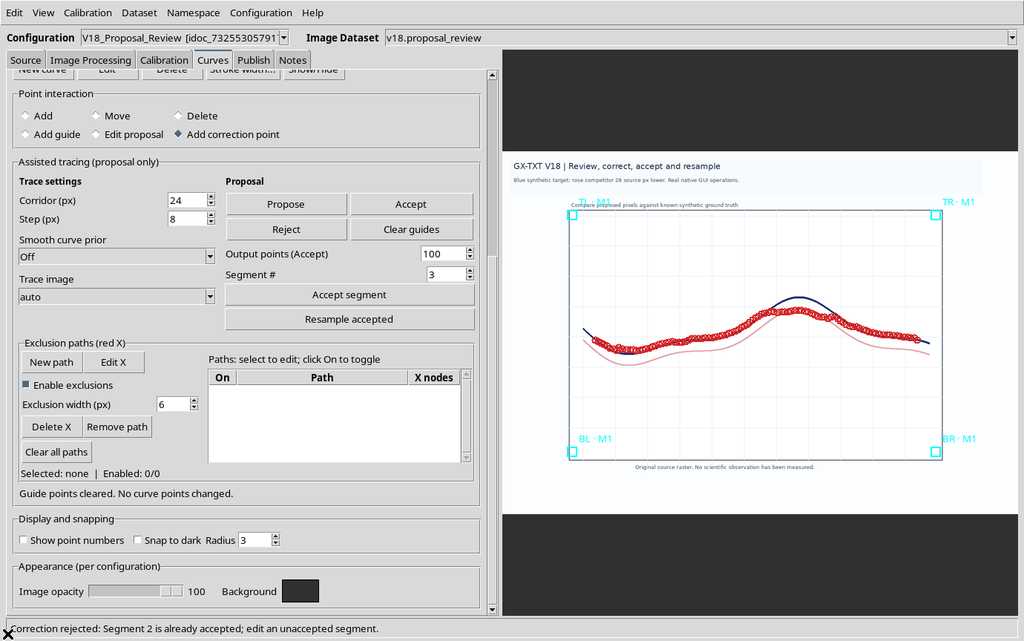
The command concerns the provisional geometry of the assistant, not the scientific numerical table.
31. Save, Close and Reopen the Configuration
Use Configuration → Save configuration, then close the Viewer normally and reopen it in the same Session.
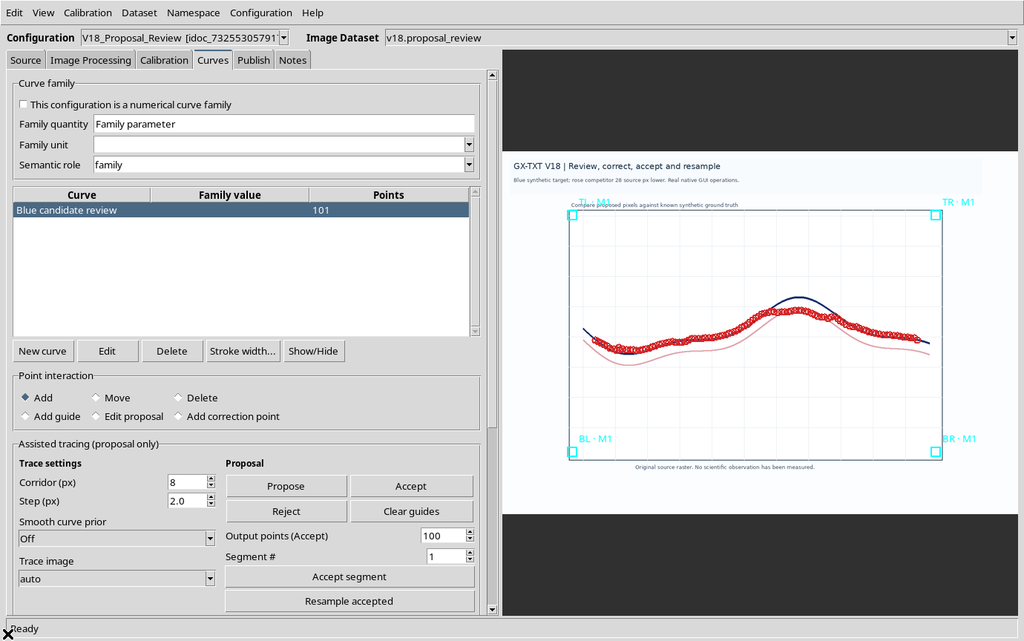
In the case shown, the original raster Dataset, the four-point calibration, the same numerical series and the 101 points with their identity and coordinates preserved remain. The guides and the proposal are not rebuilt automatically.
32. A New Proposal on an Already Populated Series
After reopening, new guides can be placed and Propose pressed on the same series that already contains data.
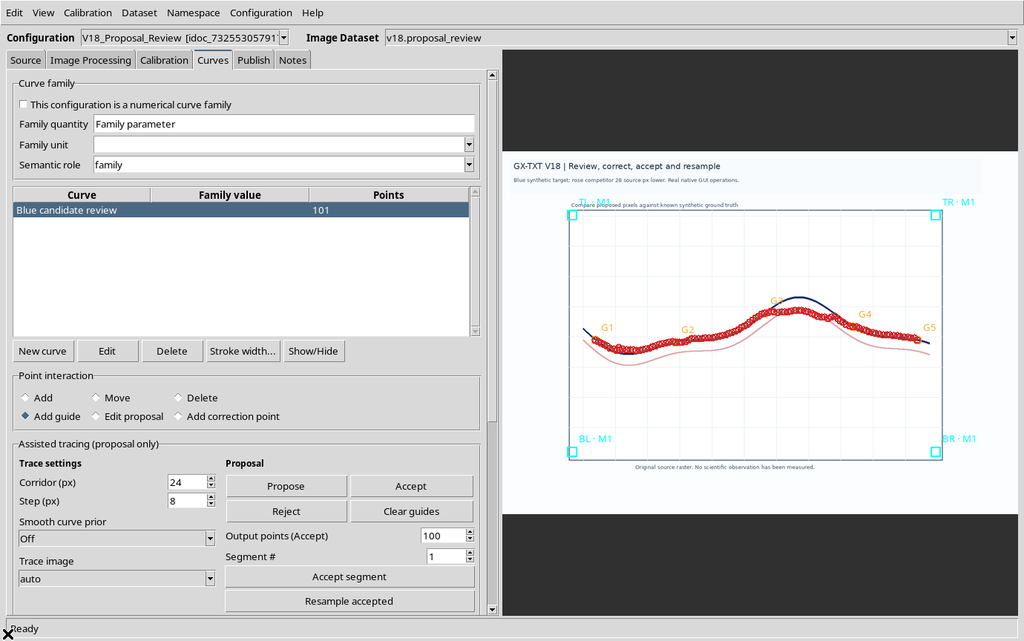
The new cyan polyline is an additional proposal, not an automatic replacement of the previous hundred assisted points. The existing data stay unchanged until the operator performs explicit scientific actions.
33. Context Menu of a Point Still Proposed
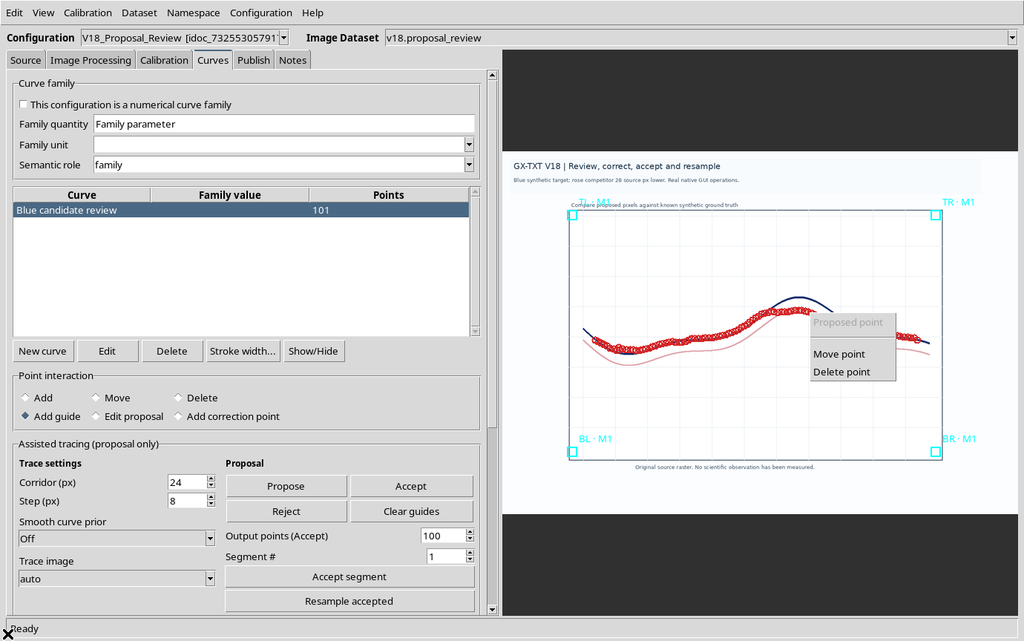
A right-click near a cyan vertex opens a different menu, with Move point and Delete point.
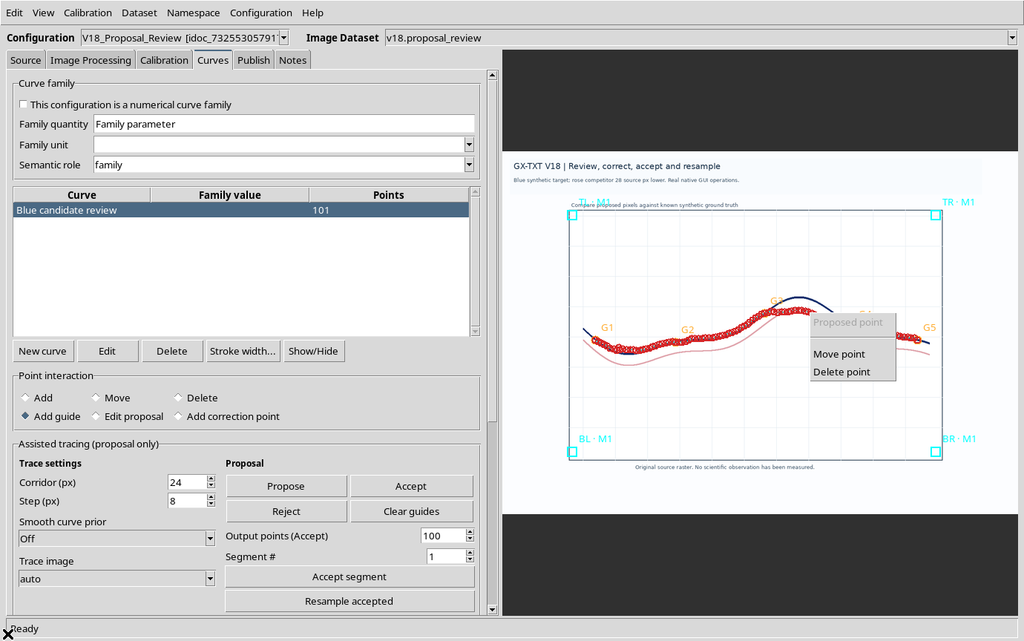
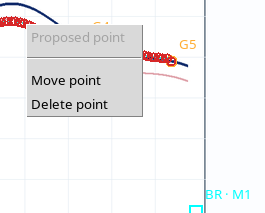
The menu distinguishes the objects of the proposal from the points already saved. The interface may also offer functions to restore the provisional revision, according to the existing history.
34. Deleting from the Menu and Recovering with Undo
Choosing Delete point from the context menu of a cyan vertex changes only the candidate segment.
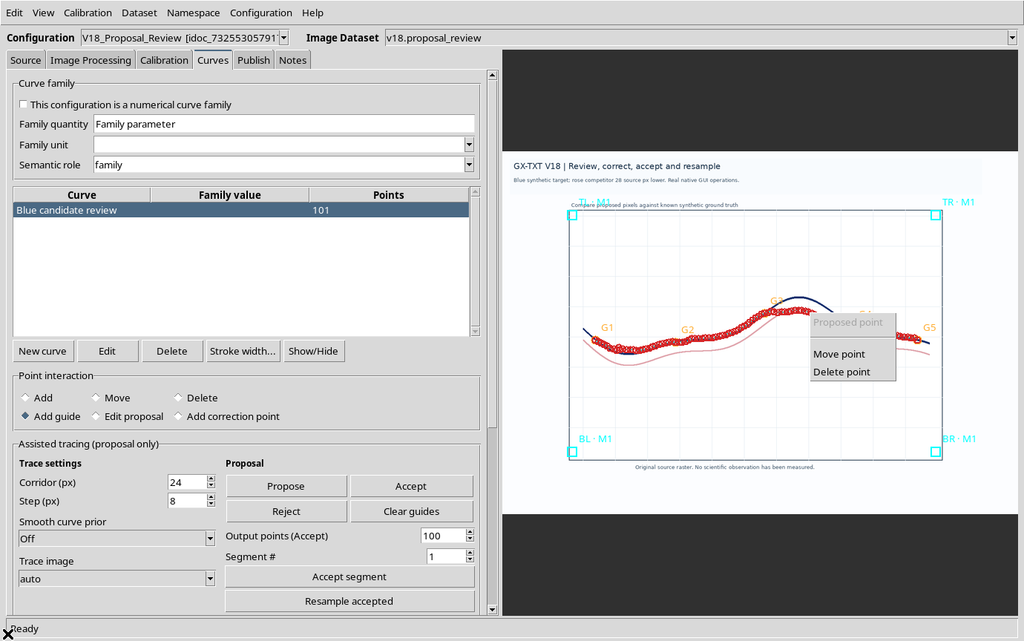
Edit → Undo returns the vertex and the previous proposed geometry.
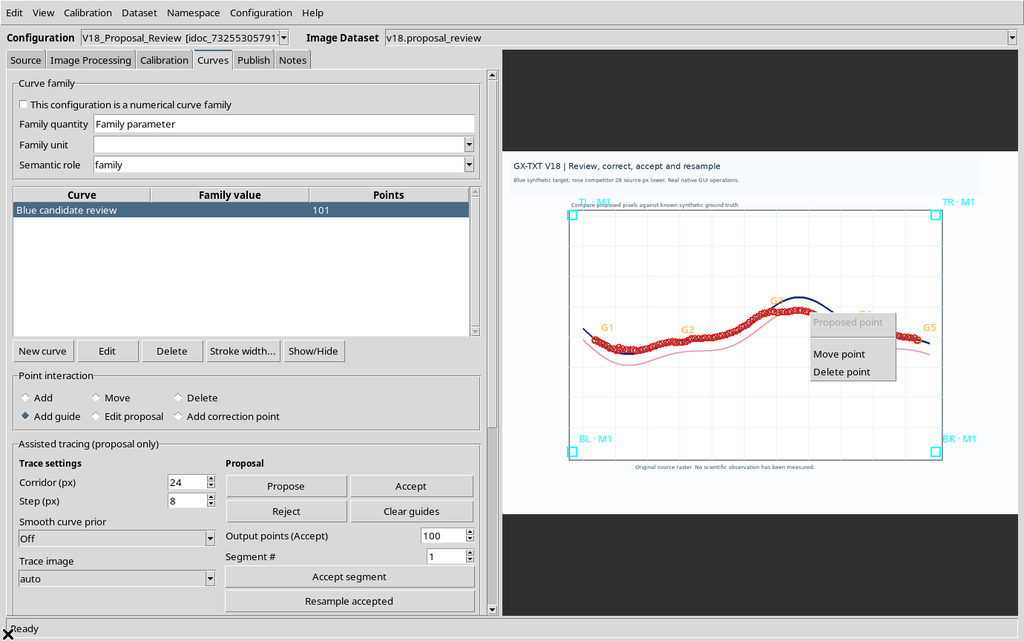
During this operation the series with 101 scientific points stayed identical, including coordinates and UUIDs. After Reject and Clear guides, only the acquired points remain.
35. Checking the Scientific Coordinates
The synthetic image contains a known function in original pixels:
y_px(x) = 440 + 58 sin(2π(x−200)/720) + 20 sin(2π(x−200)/305)
The final coordinates of the curve can be checked independently using the saved calibration. Of the 101 records, 100 have origin=assisted and one origin=manual; all have distinct UUIDs and the calibrated X coordinates are sorted in increasing order.
The independent numerical reconstruction of the X/Y values from the geometry of the four corners matched the saved scientific fields within rounding errors. Compared with the synthetic function, the final 100 assisted points show a mean vertical deviation of about 9.01 source pixels and an RMSE of 12.93 pixels. These values are geometric comparisons on a known image, not metrological uncertainties, nor 100 independent experimental observations.
36. Recommended Procedure and Limits
- Select an Image Dataset and an appropriate calibration, then choose the target series.
- Define the ordering policy and place enough guides in the ambiguous stretches.
- Generate Propose and check the whole polyline on the raster, not just the number of points.
- Use Edit proposal for changes near a vertex or Add correction point for distant corrections.
- Check the resulting geometry with Undo/Redo before acceptance.
- Choose Output points (Accept) and, if needed, Segment #; confirm explicitly with Accept segment or Accept.
- If a part has already been accepted and you want to change the density, use Resample accepted and check which points will be replaced.
- Do not change an accepted segment through the tools reserved for the proposal; use the scientific operations on points or the Undo/Redo history.
- Once the review is finished, always distinguish Reject and Clear guides from deleting numerical points.
- Save the configuration and check the data after reopening.
Digitizing produces numerical data in the Viewer configuration. Publishing a canonical Dataset in the framework is a later step, not performed automatically when Accept is pressed. The user must keep the reference to the source, the calibration and any limits of the method before using the points in quantitative analyses.