

Accessibility, contrast and troubleshooting
The GX-TXT Octave Script Workspace interface lets you write, check and run GNU Octave programs even when working with many sources and support panes. This guide shows how to read code more easily, use the keyboard and interpret error messages without accidentally modifying the source or creating unwanted Jobs.
The procedures refer to GX-TXT DEV112-P005, Octave Script Workspace 1.8.3. The control names match the English labels of the application. The examples are synthetic and do not require instruments, Datasets or external scientific files.
1. Checking the Actual Contrast of the Editor
The High Contrast Dark option can be chosen in the appearance settings of the application. Visual verification is important: setting a theme name does not guarantee that every control, label or window automatically takes on the same colors.
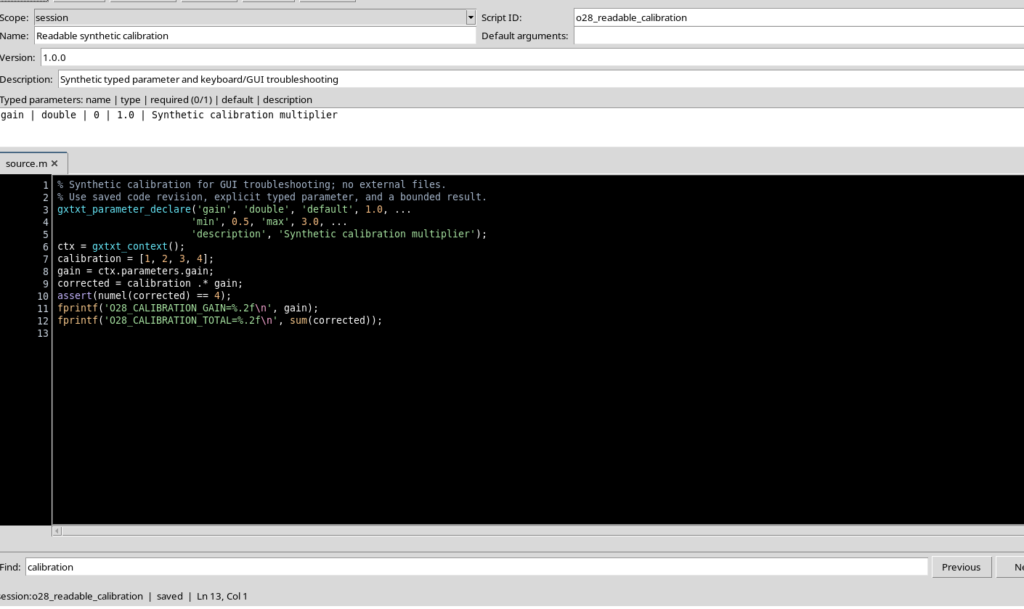
In the Octave editor the main text has a black (#000000) background and a white (#FFFFFF) foreground, with a contrast ratio of 21:1. This measurement concerns the white/black pair; the colors of the different syntax categories may have different ratios.
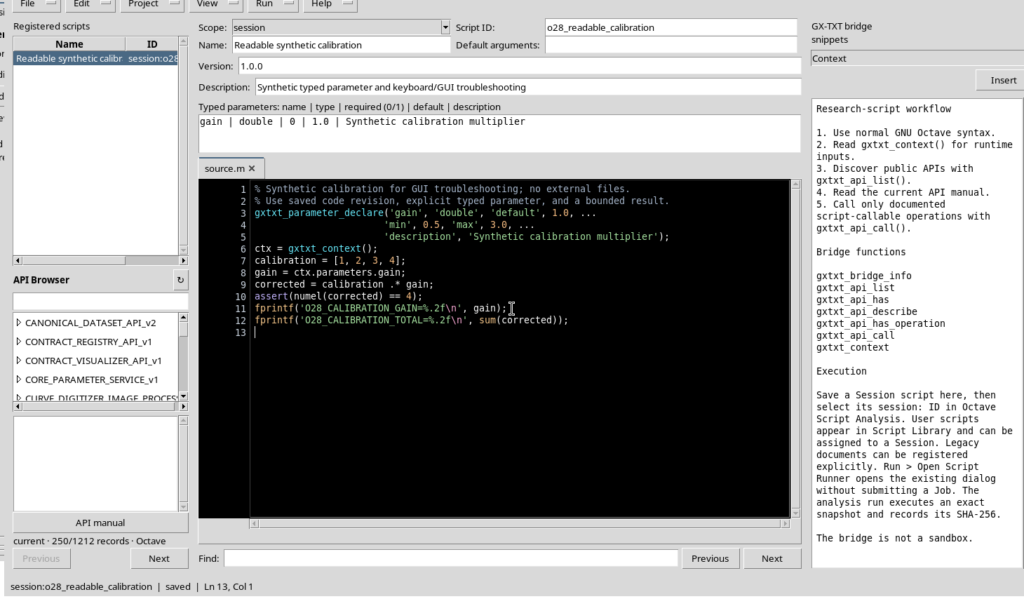
The GUI also uses Tk/ttk controls that keep a light appearance. This does not mean that the dark editor theme is not active: the source theme and that of the external controls are two distinct levels.
2. Giving Room to the Code and Assessing Its Readability
In the configuration shown the source font is DejaVu Sans Mono, 10 points, with a line height of about 17 pixels. It is a monospaced font: alignments, indentation and numbers remain readable, but on high-resolution screens 10 points can look small.
When space for the text is limited, choose View → Focus source / restore panes. The central area expands and temporarily hides the side panes, without deleting their content. For example, a window with code 772 pixels wide can become 1367 pixels wide.
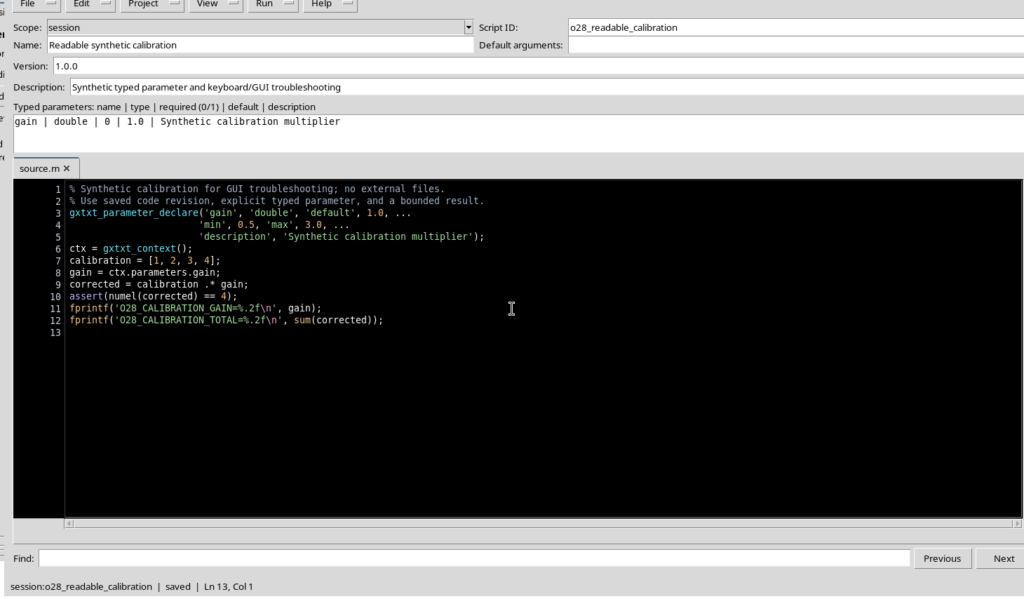
The Workspace does not offer in this menu a zoom command specific to the code font. Note panes and zoom concerns the note panes; it is not the same as automatically enlarging the Source. If the text remains too small, consider the font and display scaling through the desktop environment settings, then check the actual result.
3. Searching the Code with the Keyboard
With the source open, Ctrl+F moves the focus to the Find field. Type a word, for example calibration, then use F3 to go to the next occurrence and Shift+F3 to go back to the previous one. The current occurrence is highlighted in the code.

If the searched string does not appear in the text, no old highlight remains active: this helps avoid confusing a previous result with a new search.
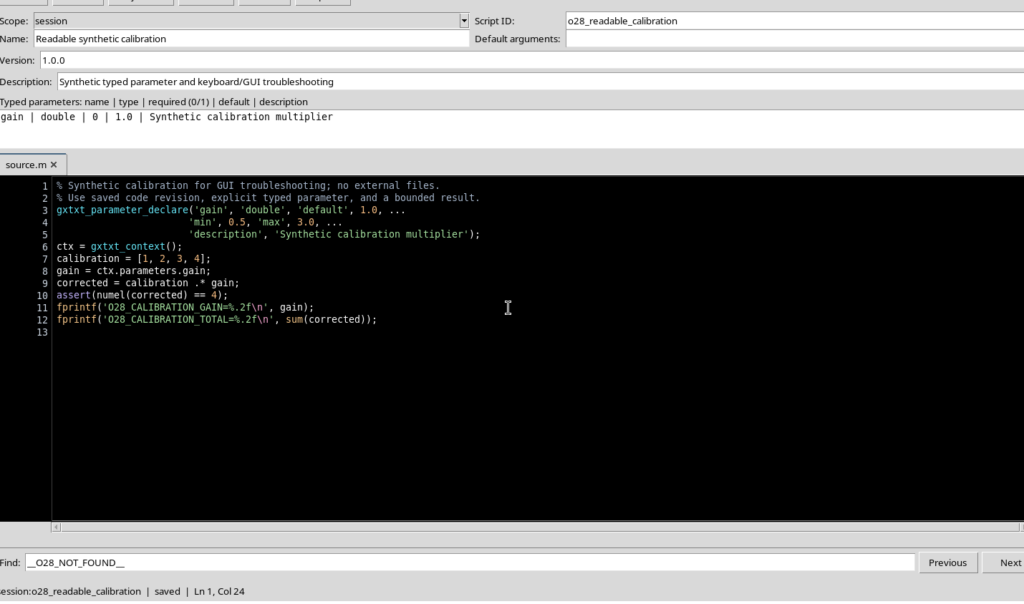
Press Esc in the Find field to return the focus to the program text. These operations are navigation only: they do not change the saved revision.
4. Moving to a Line and Handling Invalid Numbers
Press Ctrl+G or choose Edit → Go to line…. The window asks for a positive line number.
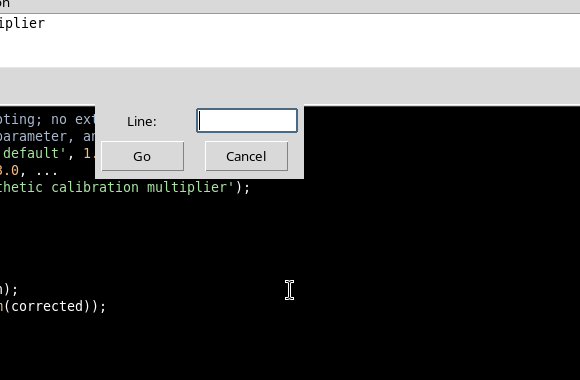
A non-numeric value or the number 0 produces no movement: the window stays open and the cursor remains in its previous position. A number greater than the last line, instead, is limited to the last existing line. The command does not add lines to the program.
5. Preparing a Calibration Example with a Typed Parameter
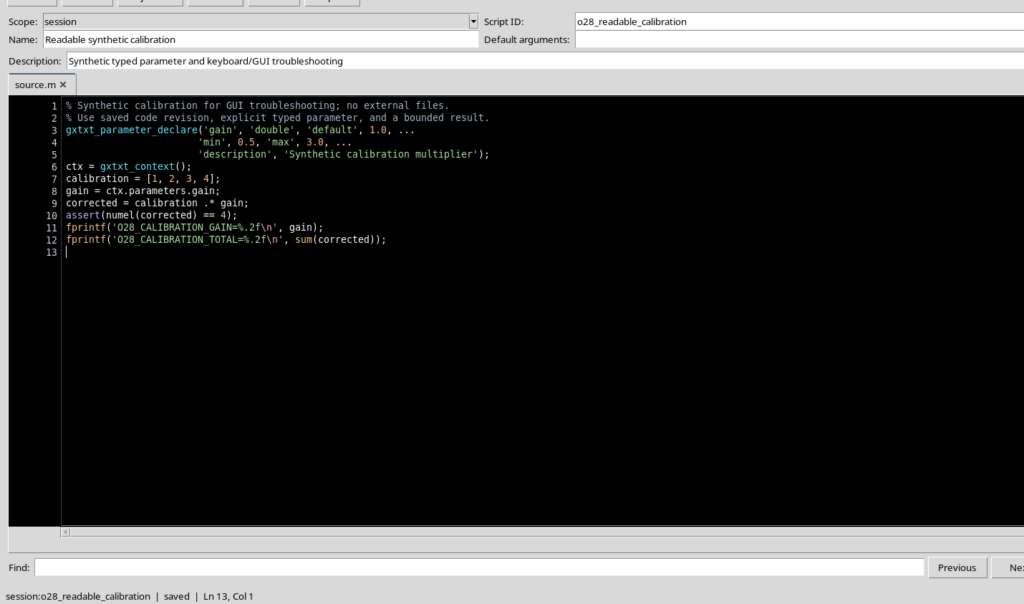
Open a working Session, choose File → New Script and save with File → Save this GNU Octave example, whose comments are in English:
% Synthetic calibration for GUI troubleshooting; no external files.
% Use saved code revision, explicit typed parameter, and a bounded result.
gxtxt_parameter_declare('gain', 'double', 'default', 1.0, ...
                       'min', 0.5, 'max', 3.0, ...
                       'description', 'Synthetic calibration multiplier');
ctx = gxtxt_context();
calibration = [1, 2, 3, 4];
gain = ctx.parameters.gain;
corrected = calibration .* gain;
assert(numel(corrected) == 4);
fprintf('O28_CALIBRATION_GAIN=%.2f\n', gain);
fprintf('O28_CALIBRATION_TOTAL=%.2f\n', sum(corrected));
gxtxt_parameter_declare declares the gain parameter to the Runner: type double, default value 1.0, minimum 0.5, maximum 3.0. gxtxt_context() returns the public context of the invocation and lets you read the validated value. The .* operator applies the gain to the four elements of the vector. assert checks the number of samples; fprintf sends the result to stdout.
Saving registers the source revision, but does not run the program. Starting it is a separate choice in the Runner.
6. Interpreting Validate Review Errors
Choose Run → Open Script Runner…. The gain field initially contains the value declared in the script. Before pressing Run Job, use Validate review to find any errors.
Entering text where a finite number is expected shows the message Review needs attention: Enter a finite number.
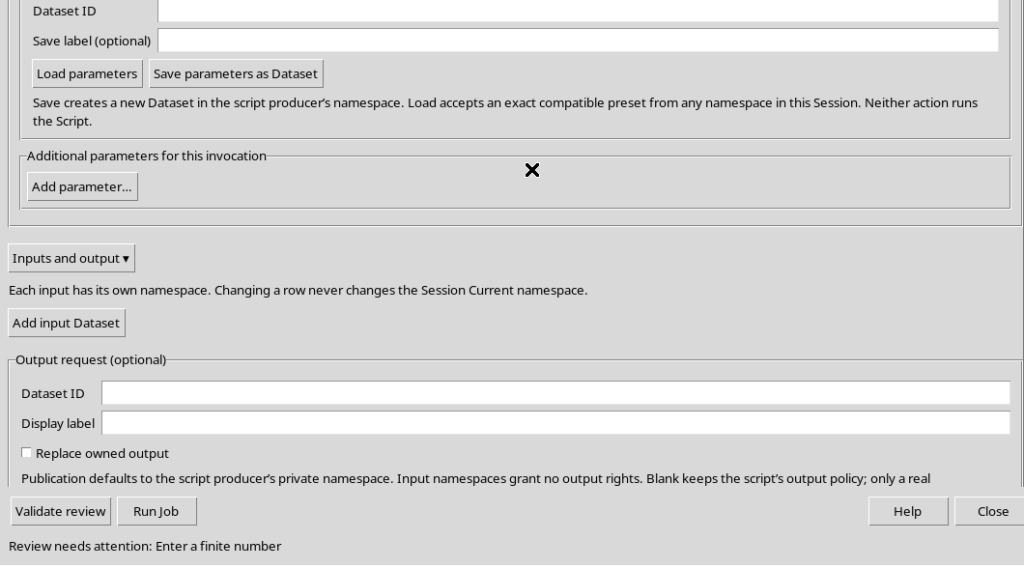
A value below 0.5 produces Value must be at least 0.5; one above 3.0 produces Value must be at most 3.0.
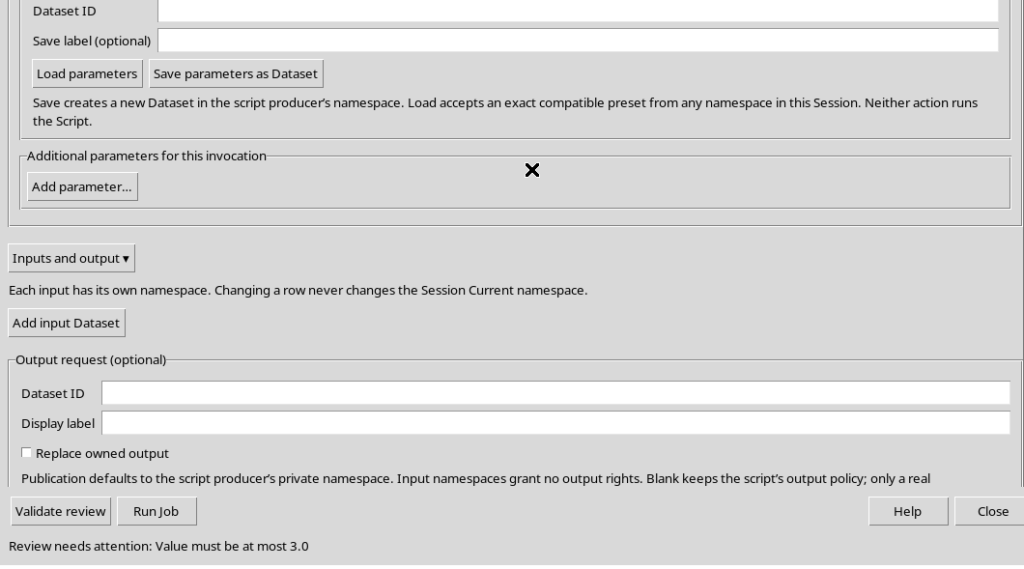
The messages come from the check of the typed values. Validate review does not create a Job, even when the request is not valid. Correct the field concerned first and repeat the check.
7. Using Tooltips to Distinguish Validation and Execution
Moving the pointer over the Validate review button shows an explanation: the command checks the script, the parameters and the input revisions without submitting the program for execution.
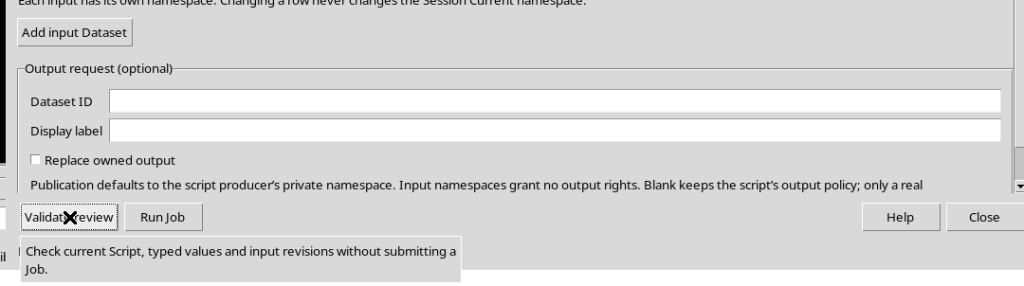
Tooltips do not replace Runner errors: they provide a description of the action before you perform it. If a tooltip does not appear or gets in the way of reading, the control names and the status indications remain the main reference. In the interface shown, tooltips are drawn with an opaque background.
8. Correcting the Parameter and Checking the Request Before Starting
Set gain = 1.5 and press Validate review. The answer becomes Review valid. No Job submitted; Run Job performs fresh admission checks.
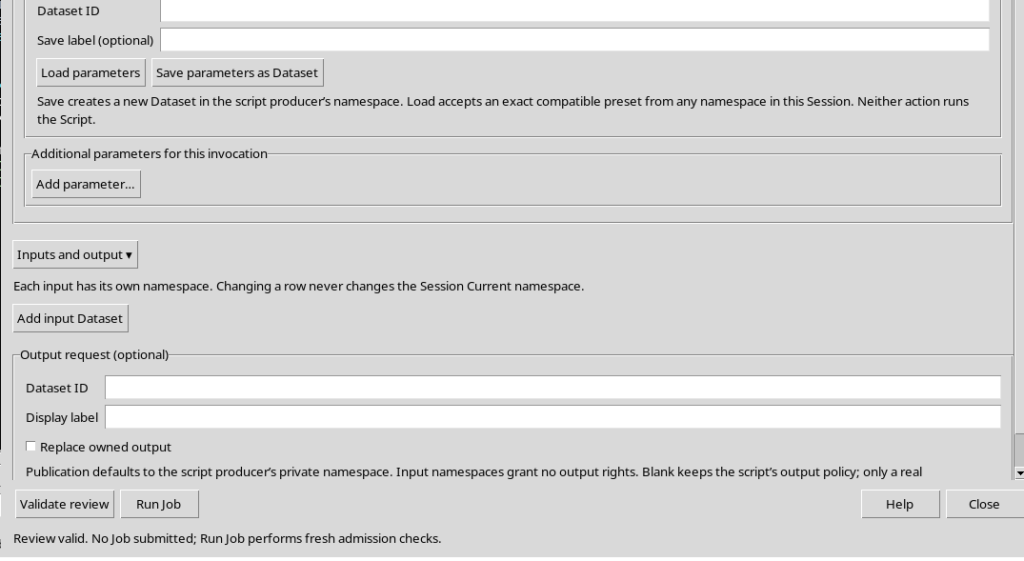
This sentence deserves attention: the request is ready but the program has not yet been run. You can review the source, the parameter value and the Session before proceeding.
9. Running Only Once and Consulting the Real Result
Press Run Job only once. The program passes to the Job supervisor and, after completion, can be found in Run → Script Jobs Manager… with state COMPLETED and exit code 0.
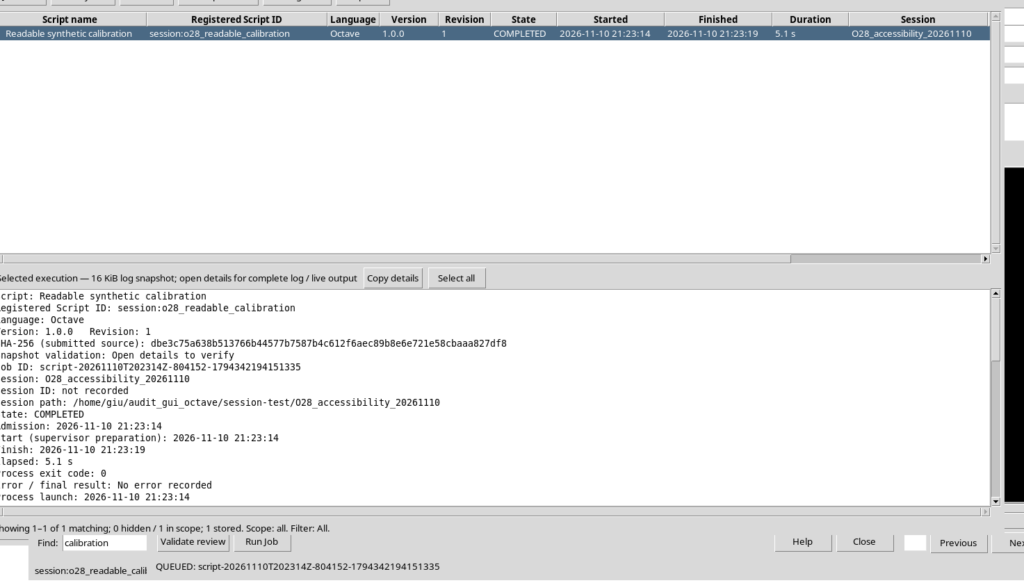
Select the row, then Jobs → Open execution details. In Program output you read the results actually printed by GNU Octave:
O28_CALIBRATION_GAIN=1.50
O28_CALIBRATION_TOTAL=15.00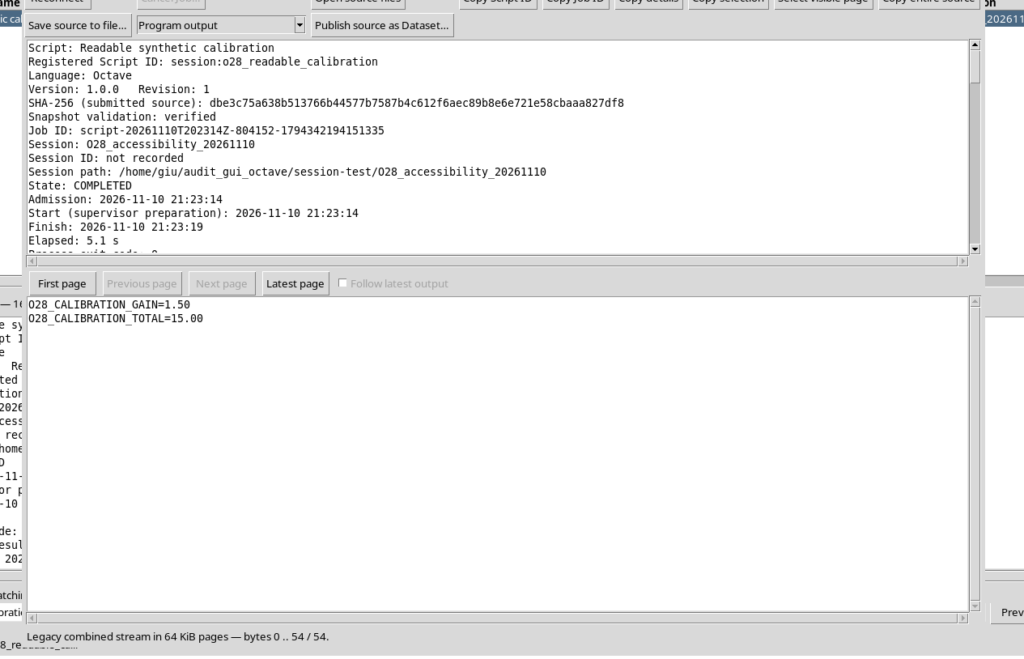
The original vector has a sum of 10; with gain 1.5 the corrected sum becomes 15. The result comes from a real execution of the saved revision. In this example no Dataset is published: stdout is a stream of the Job, not a canonical scientific table.
10. Opening and Searching the Built-in Manual with F1
The F1 key, or Help → Viewer manual / Debugger guide…, opens the local manual of Octave Script Workspace. There is no need to look for an online copy to consult it.
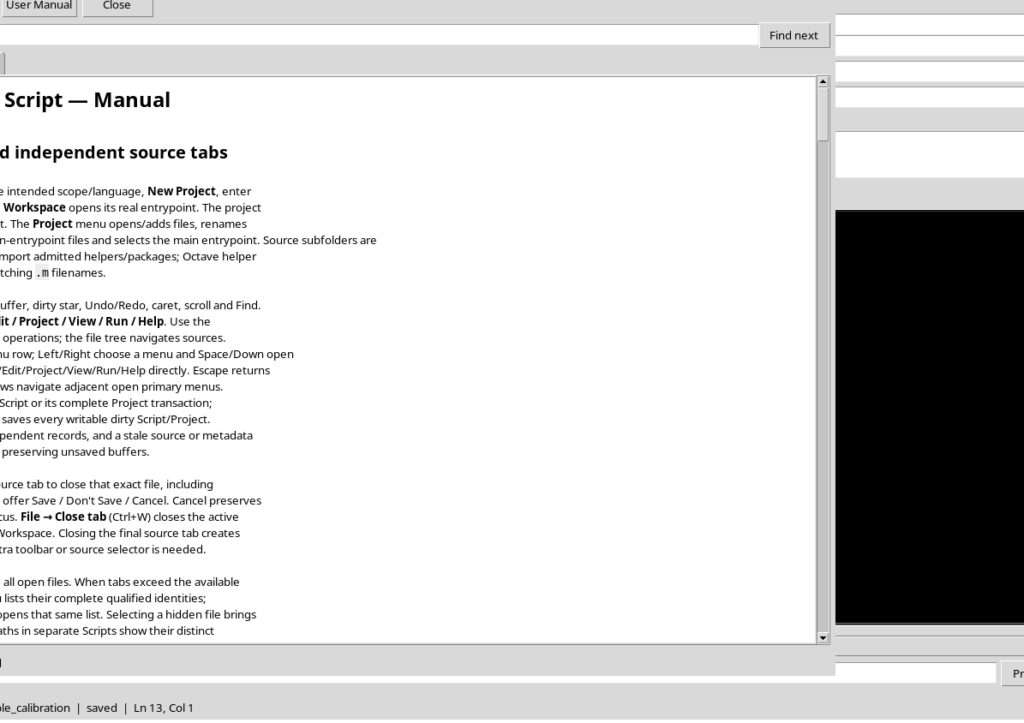
In the manual use Ctrl+F, type a phrase and choose Find next. A result that is present is signaled by Found, while a search with no results shows Text not found.
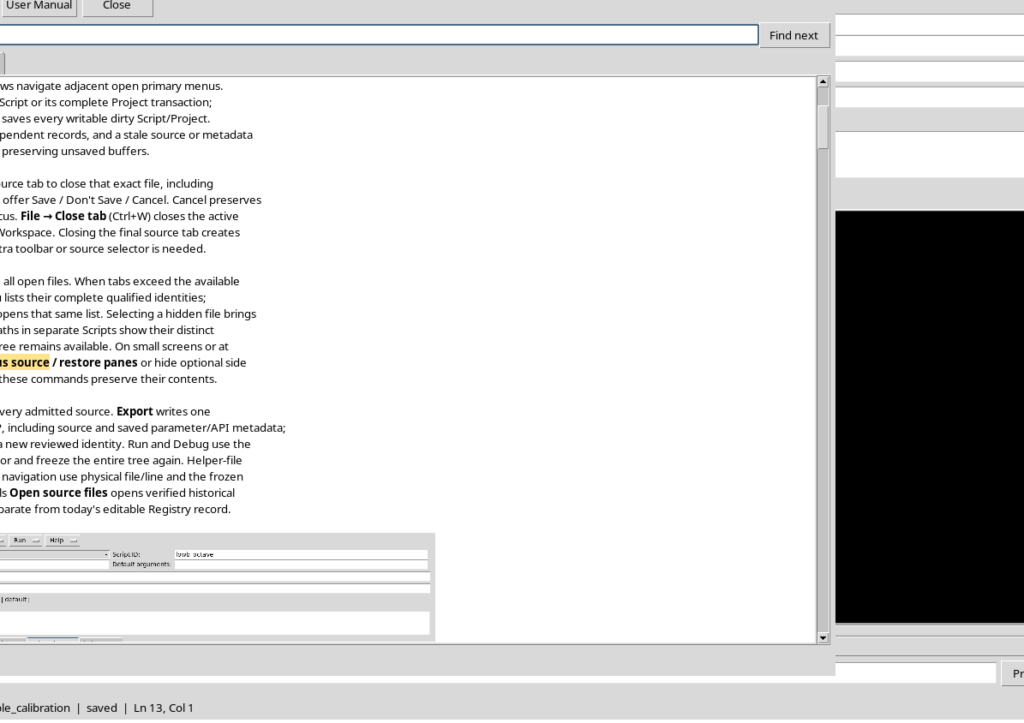
Documentation zoom depends on the format opened. In the Markdown manual the View → Zoom in command is not available: it is intended for an active HTML guide. Do not confuse this control with the font size of the Octave code.
11. Navigating the Main Menus Without the Mouse
Press F10 while Octave Script Workspace is active. The focus moves to the File menu. The right and left arrows let you move between the main menus; Esc returns the focus to the editor.
The command shortcuts are also available: Ctrl+F for Find, Ctrl+G for Go to line and F1 for the documentation. Before using a key combination on an editable source, check which widget has the focus.
12. Restoring a Crowded Layout
If the screen contains too many panes or the layout has become awkward, select View → Reset editor layout. The command returns the side panes to their initial arrangement.
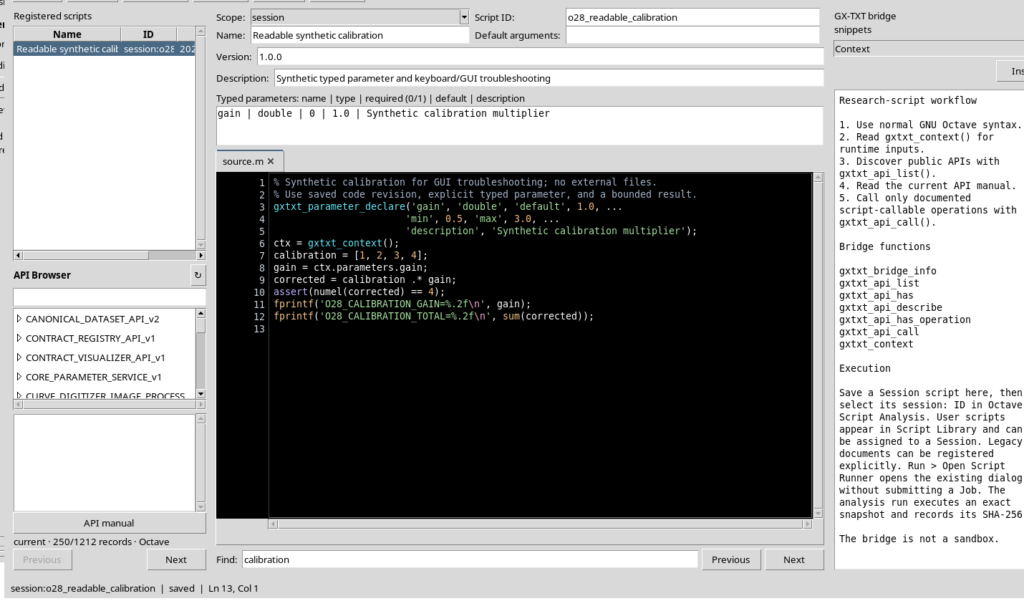
For normal use it is then best to go back to View → Focus source / restore panes. You can hide Parameters and Version when they are not needed and keep only the essential properties visible. The panes can be recovered from the same menu.
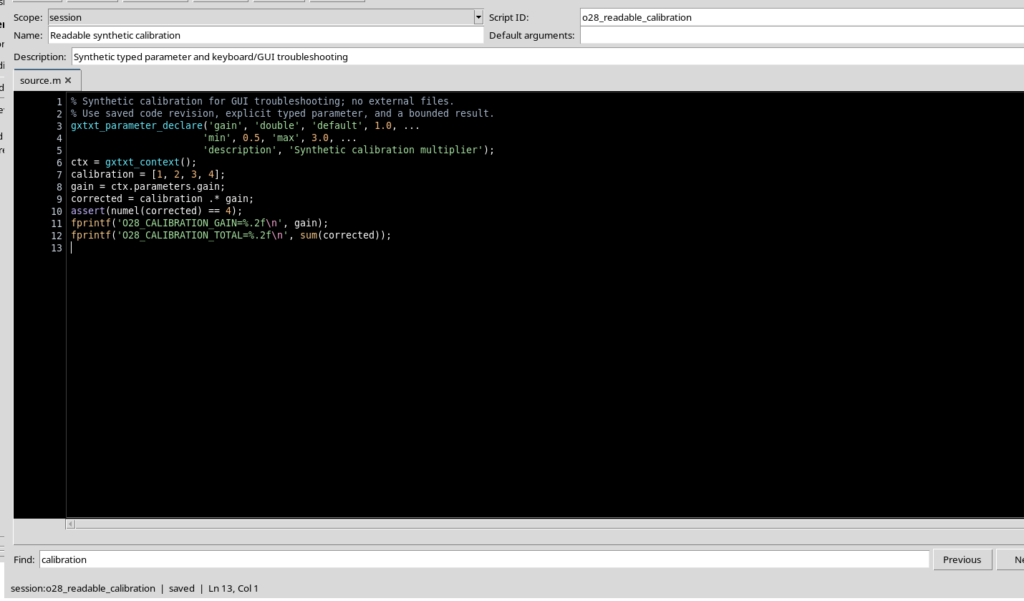
These commands change the presentation, not the script revision, the Session or the execution history.
13. Why an Unsaved Script Cannot Be Run
If you open File → New Script, write code and immediately try Run → Open Script Runner… without having registered the script, the application shows a warning asking you to explicitly save or register the document in the appropriate scope.
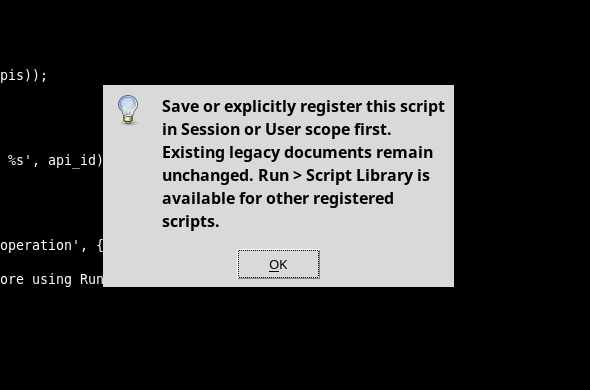
For this procedure it is enough to assign an identifier, choose the correct Scope and use File → Save in Octave Script Workspace. There is no need to open other Viewers. The refusal avoids submitting code without a registered identity and revision.
Closing a tab with unsaved changes shows Unsaved source with Yes, No and Cancel.
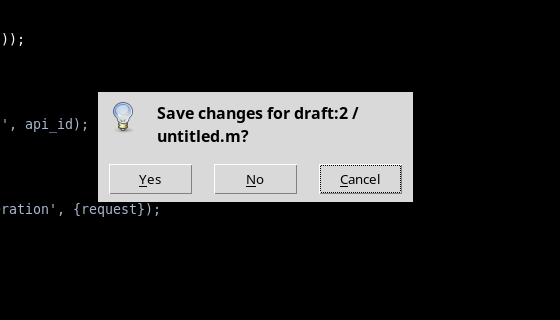
Yes requests the save, No discards only the local changes and Cancel keeps the tab open. Closing an anonymous draft must not delete an already registered script or a previously completed Job.
14. Solving Common Problems Without Losing Work
Some behaviors require distinguishing between code, visible tabs and saved data:
- I cannot find the script after closing a tab. Open Registered scripts and select the document by identifier. In this version a saved tab can also disappear from the bar in certain navigation sequences, without the registration having been deleted.
- Ctrl+O seems to modify the code or leaves the tab dirty after Cancel. In the version considered this behavior can occur because of the keyboard binding of the Text control. Prefer File → Import .m…; if an unintended line break has been inserted, undo it with Ctrl+Z before saving.
- The Runner reports a wrong value. Check the parameter type, the limits declared in the script and the difference between Validate review and Run Job.
- The computation seems to produce no results. Check the state of the Job and consult Program output, Program stderr and Diagnostic log separately; do not assume that the validation message alone represents an execution.
- The code is too narrow. Use Focus source and hide the unnecessary panes. If the font is still small, adjust the display settings without assuming that the documentation zoom applies to the editor.
- A buffer belongs to another Session. If Source owner changed appears, go back to the owning Session and reopen the source before saving or running again.
A reliable procedure follows this sequence: check the Session, save the revision, validate the parameters, run only once, read the Job state and finally consult the output. Contrast, keyboard and layout make the work easier, but they do not replace the checks on the scientific provenance of the results.