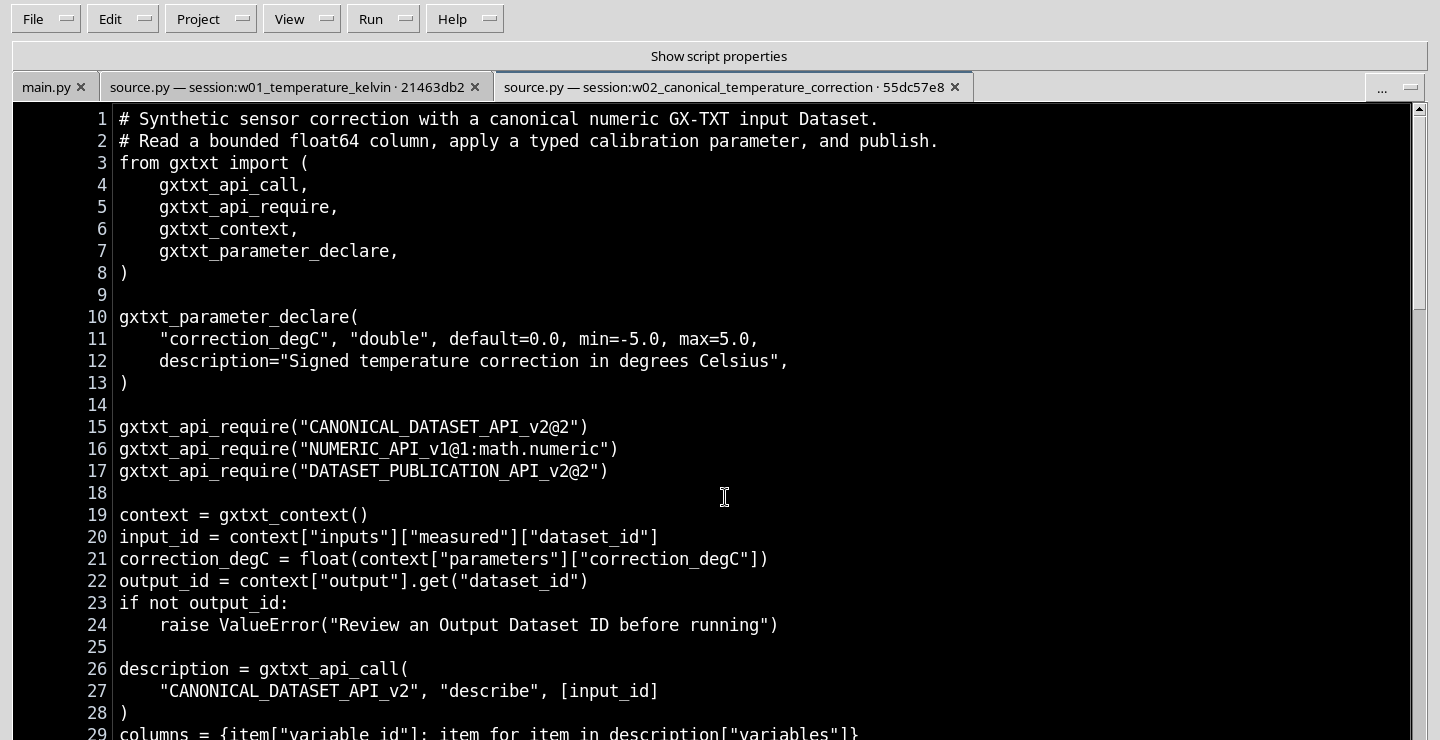
GX-TXT Python Script Workspace: canonical Datasets, calibration and numeric publication
A complete Python experiment with a temperature Dataset already registered in GX-TXT, a typed calibration parameter and three public APIs. The result is a new scientific Dataset with five rows, float64 variables, explicit units and verifiable provenance. No instruments or real measurements are needed.
1. Aim of the exercise
We will open a canonical Dataset of five synthetic temperatures, apply a correction of +0.75 °C through the public numeric service and publish a new canonical table without modifying the starting data. We will use Python Script Workspace, Script Runner, Validate review, Script Jobs Manager and Job Details. It is an example of traceable scientific processing: initial data, algorithm, parameters, source and result keep distinct identities.
2. The initial temperatures
The Dataset contains artificial values, not experimental measurements. The fifth digit is not an uncertainty estimate: this example does not attribute uncertainties to the correction.
| Sample | Original temperature (°C) | Correction (°C) | Corrected temperature (°C) |
|---|---|---|---|
| 0 | 18.00 | +0.75 | 18.75 |
| 1 | 20.00 | +0.75 | 20.75 |
| 2 | 22.50 | +0.75 | 23.25 |
| 3 | 21.00 | +0.75 | 21.75 |
| 4 | 19.00 | +0.75 | 19.75 |
| Mean | 20.10 | +0.75 | 20.85 |
The correction is an additive offset: T_corretta = T_originale + correzione_degC. Since it is a temperature difference, the numeric offset is expressed in °C, while the result remains a temperature in °C. We are not converting Celsius to kelvin.
3. Preparing the canonical Dataset
You need a table.generic Dataset with five rows and a variable temperature_c, float64, unit degC. In the example the Dataset is called p16_synthetic_temperature_series, created in the previous exercises. Its second column contains 18.0; 20.0; 22.5; 21.0; 19.0. There is no need to recreate or replace it: those following the guide can use their own equivalent Dataset, adapting the column identifiers in the code.
4. Identity, namespace and revision
A canonical Dataset is not just a CSV: it has a Dataset ID, namespace, contract, typed variables, units and a recognisable revision. Here the namespace is module/analysis.python_script. Script Runner records the selected revision; if the Dataset changes before the Job, the input must be revalidated. The alias used by the script will be measured, which does not coincide with the canonical ID.
5. Opening Python Script Workspace and creating a Script
Open your Session and choose Python Script Workspace. From the File → New Script menu, create a new Python source in the Session scope. As identifier you can use w02_canonical_temperature_correction; the descriptive name is Temperature correction from canonical Dataset.
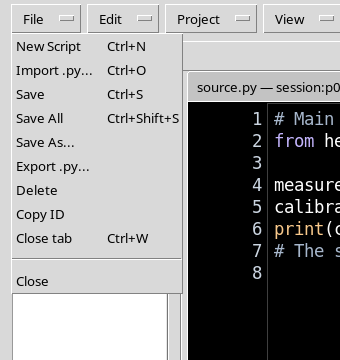
6. Version, description and working environment
Set Version to 1.0.0 and a short description: Typed calibration offset, canonical input and explicit numeric output. The semantic version must not be confused with the Registry revision. In the High Contrast Dark theme leave plenty of space for the code and close unneeded panels.
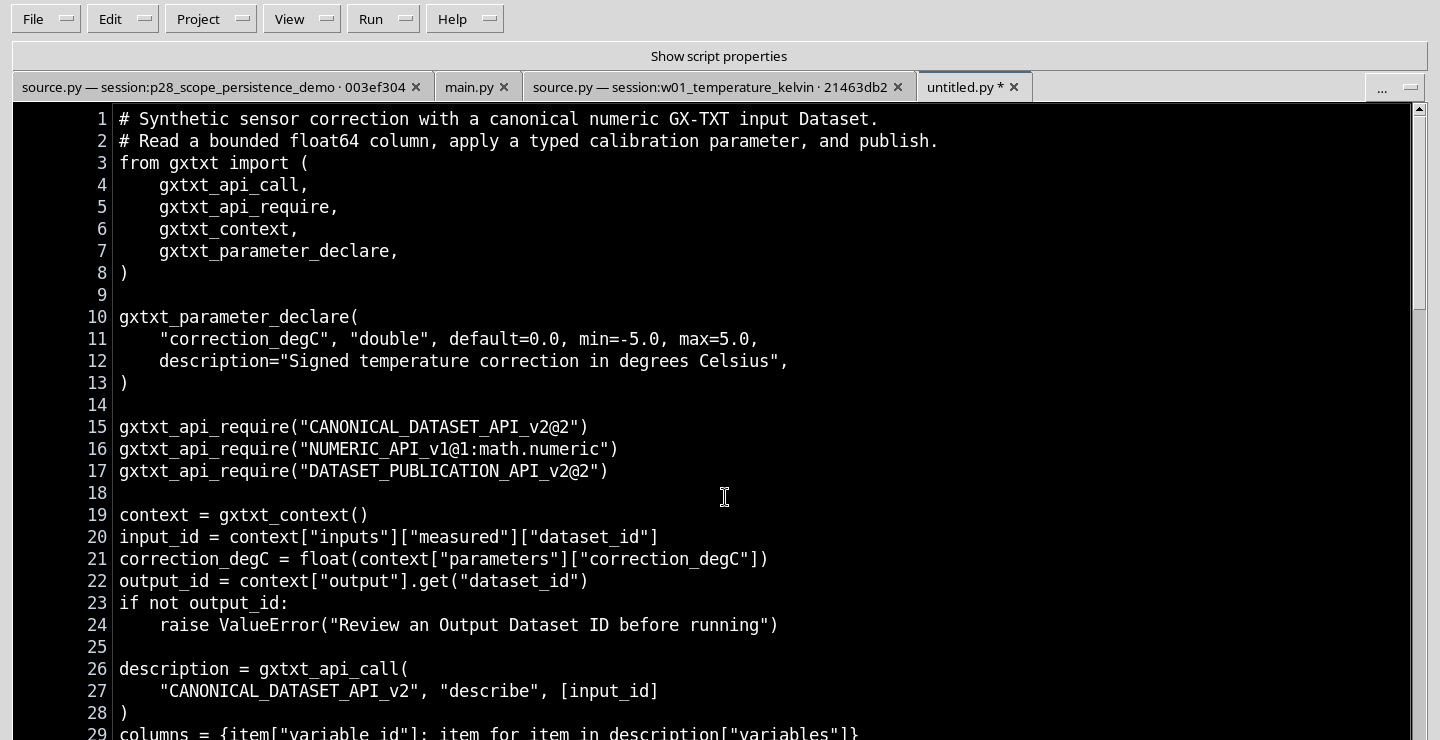
7. The complete Python program
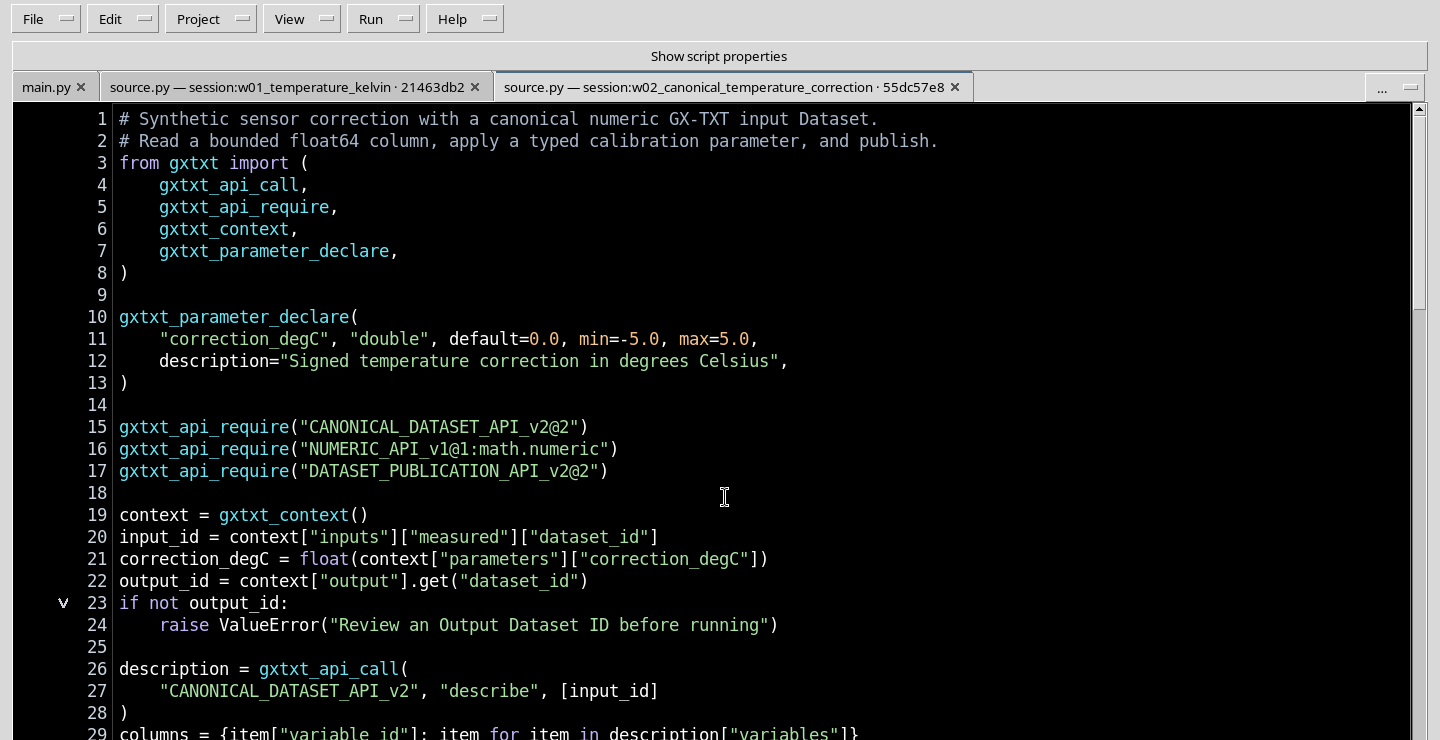
Copy the following program into the source. The comments are in English; the code uses exclusively the public gxtxt client and the APIs available in the managed runtime. It does not open framework files directly, does not resort to internal CORE functions and does not require additional libraries installed by the user.
# Synthetic sensor correction with a canonical numeric GX-TXT input Dataset.
# Read a bounded float64 column, apply a typed calibration parameter, and publish.
from gxtxt import (
    gxtxt_api_call,
    gxtxt_api_require,
    gxtxt_context,
    gxtxt_parameter_declare,
)

gxtxt_parameter_declare(
    "correction_degC", "double", default=0.0, min=-5.0, max=5.0,
    description="Signed temperature correction in degrees Celsius",
)

gxtxt_api_require("CANONICAL_DATASET_API_v2@2")
gxtxt_api_require("NUMERIC_API_v1@1:math.numeric")
gxtxt_api_require("DATASET_PUBLICATION_API_v2@2")

context = gxtxt_context()
input_id = context["inputs"]["measured"]["dataset_id"]
correction_degC = float(context["parameters"]["correction_degC"])
output_id = context["output"].get("dataset_id")
if not output_id:
    raise ValueError("Review an Output Dataset ID before running")

description = gxtxt_api_call(
    "CANONICAL_DATASET_API_v2", "describe", [input_id]
)
columns = {item["variable_id"]: item for item in description["variables"]}
if (
    "temperature_c" not in columns
    or columns["temperature_c"]["unit"] != "degC"
    or columns["temperature_c"]["dtype"] != "float64"
):
    raise ValueError("Expected a float64 temperature_c variable in degC")
count = int(description["row_count"])
if count != 5:
    raise ValueError("This tutorial expects exactly five samples")

block = gxtxt_api_call(
    "CANONICAL_DATASET_API_v2", "read_range",
    [input_id, ["temperature_c"], 0, count],
)
raw_c = [
    float(value.item() if hasattr(value, "item") else value)
    for value in block["temperature_c"]["values"]
]
if len(raw_c) != count:
    raise ValueError("The requested canonical range is incomplete")

response = gxtxt_api_call(
    "NUMERIC_API_v1", "array_binary",
    ["add", {"kind": "vector", "value": raw_c},
     {"kind": "scalar", "value": correction_degC}],
)
corrected_c = [
    float(value.item() if hasattr(value, "item") else value)
    for value in response["values"]
]
if len(corrected_c) != count:
    raise ValueError("The public numeric operation returned the wrong size")
mean_c = sum(corrected_c) / count

# Begin a new, create-only canonical numeric Dataset, preserving input lineage.
definition = {
    "dataset_id": output_id,
    "contract": "table.generic",
    "storage": "csv",
    "producer_version": "1.0.0",
    "source_dataset_ids": [input_id],
    "source_variable_ids": ["temperature_c"],
    "source": "Five synthetic Celsius observations",
    "provenance": f"Typed correction {correction_degC:.2f} degC",
    "structured_metadata": {"tutorial.synthetic": "true"},
}
writer = gxtxt_api_call("DATASET_PUBLICATION_API_v2", "begin", [definition])
try:
    gxtxt_api_call(
        "DATASET_PUBLICATION_API_v2", "declare_dimension",
        [writer, "row", 0, {"extendible": 1}],
    )
    for variable_id, name, role in (
        ("raw_c", "Original temperature", "observation"),
        ("corrected_c", "Corrected temperature", "derived"),
    ):
        gxtxt_api_call(
            "DATASET_PUBLICATION_API_v2", "declare_variable",
            [writer, variable_id, {
                "name": name,
                "dtype": "float64",
                "rank": 1,
                "dimension_ids": "row",
                "coordinate_role": "data",
                "semantic_role": role,
                "unit": "degC",
            }],
        )
    gxtxt_api_call(
        "DATASET_PUBLICATION_API_v2", "append",
        [writer, "row", {"raw_c": raw_c, "corrected_c": corrected_c}],
    )
    published = gxtxt_api_call(
        "DATASET_PUBLICATION_API_v2", "finalize", [writer],
    )
    writer = None
except Exception:
    if writer is not None:
        gxtxt_api_call("DATASET_PUBLICATION_API_v2", "abort", [writer])
    raise

for original, corrected in zip(raw_c, corrected_c):
    print(f"W02_SAMPLE {original:.2f} {corrected:.2f}")
print(f"W02_CORRECTION_DEGC {correction_degC:.2f}")
print(f"W02_MEAN_DEGC {mean_c:.2f}")
print("W02_DATASET_COMMITTED", published["dataset_id"])
8. The public Python client
gxtxt_context() returns the context of the Job: linked inputs, effective parameters and output request. gxtxt_api_require() declares the dependency on a specific API/version; it does not install packages. gxtxt_api_call(api_id, operation, args) calls a registered operation with an ordered list of arguments and can report provider errors. Dependencies are part of the contract that GX-TXT checks before execution.
9. Three distinct services and their purpose
CANONICAL_DATASET_API_v2@2 lets you describe and read canonical data; NUMERIC_API_v1@1:math.numeric performs the vector numeric operation; DATASET_PUBLICATION_API_v2@2 builds and registers a new structured Dataset. The owner math.numeric in the numeric requirement identifies the responsible module. The three APIs operate on different responsibilities: reading, computation, publication.
10. Declaring a typed parameter
The declaration gxtxt_parameter_declare("correction_degC", "double", default=0.0, min=-5.0, max=5.0, ...) makes a real value editable at execution time recognisable to the Runner. The initial value is zero; in the exercise we will set it to 0.75. The allowed range is from −5 to +5. The name includes the unit for teaching clarity, but the double declaration does not automatically assign any physical semantics to the number.
11. Saving the source in the Registry
From the File → Save menu register the Script. Saving checks the literal declarations and the available dependencies, without running the code. Before the Job there must be a saved, unmodified source. Version, revision and SHA of the content make it possible to trace the exact version that was run.
12. Opening Script Runner
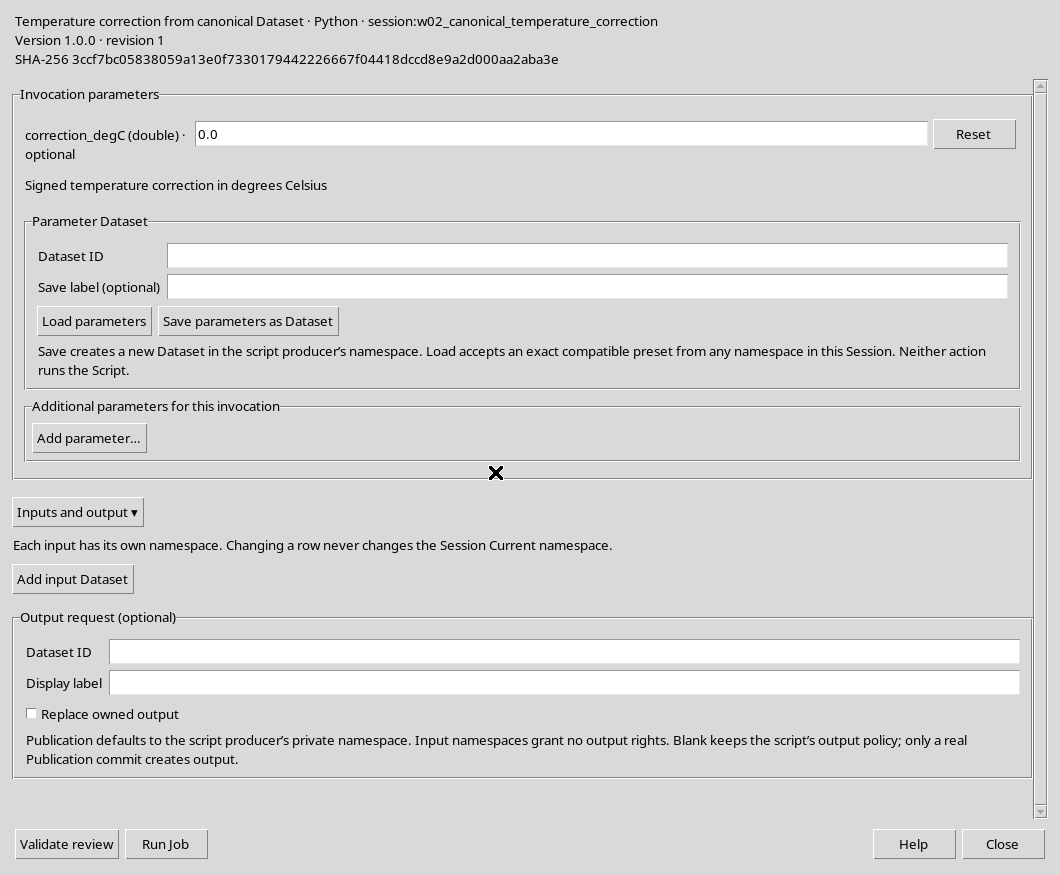
Choose Run → Open Script Runner…. The window reports the identity of the program, the revision and the execution options. Expand, if necessary, Inputs and output: these fields are useful here, but must not remain open in the editor screenshots dedicated to the code alone.
13. Linking the input with Add input Dataset
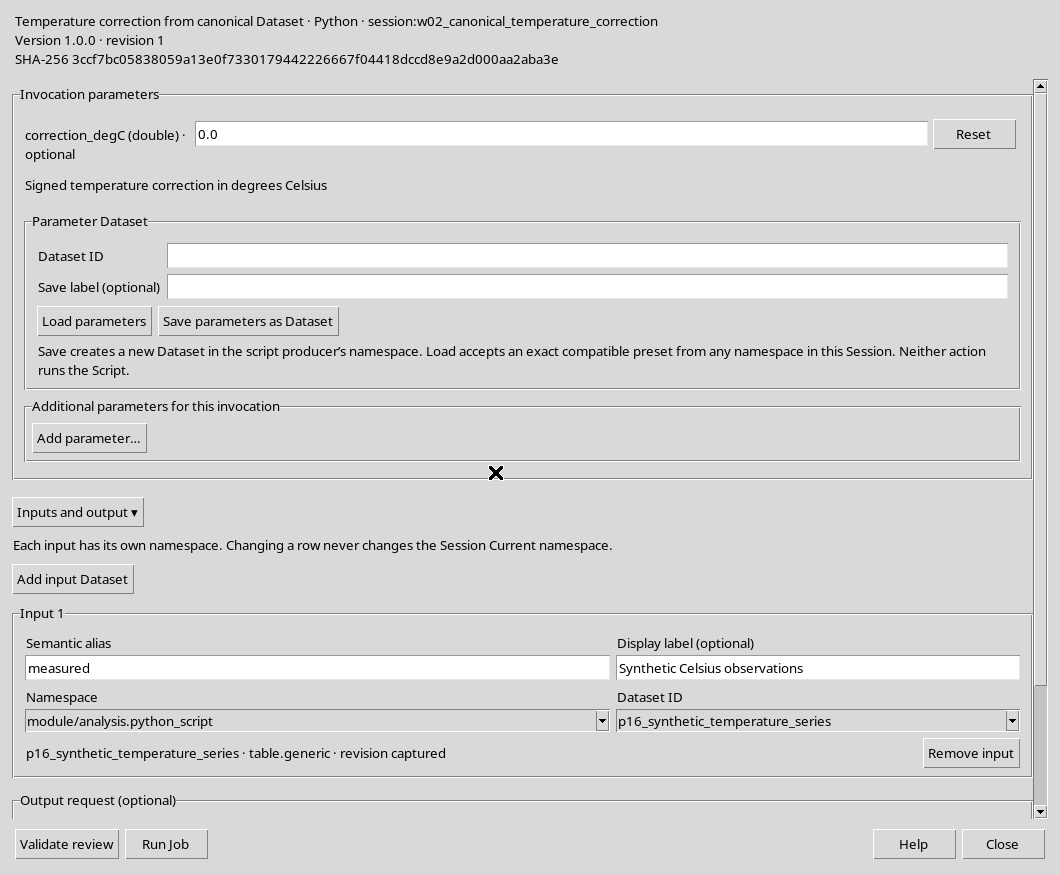
Press Add input Dataset, select the namespace module/analysis.python_script and the Dataset p16_synthetic_temperature_series. Set the semantic alias measured; a readable label can be Synthetic Celsius observations. Choosing the Dataset entry also records the current revision of the content.
14. Script alias and canonical identifier
In the source context["inputs"]["measured"]["dataset_id"] retrieves the canonical ID from the link in the Runner window. You must not write the example ID directly into the program: the alias measured lets you reuse the code with other compatible Datasets. If the GUI alias is different, the access in the code must also be adjusted.
15. Checking schema and units with describe
The call gxtxt_api_call("CANONICAL_DATASET_API_v2", "describe", [input_id]) returns metadata, including row_count and the description of the variables. We check that temperature_c, type float64, unit degC and five rows exist. This check is scientifically significant: a column without units or in kelvin would not automatically be compatible with the correction specified in °C.
16. Reading a range with read_range
read_range receives four positional arguments: Dataset ID, list of requested variables, zero-based start index, number of rows. Here we read [input_id, ["temperature_c"], 0, count]. The result is indexed by Variable ID: block["temperature_c"]["values"]. The reading is limited to the five rows needed; it does not require physical paths to the canonical file.
17. Handling the transported numbers correctly
The Bridge can return Python values or NumPy elements. The expression value.item() if hasattr(value, "item") else value extracts the scalar from a single container before converting it to float. It avoids treating an array as if it were already a number. The cardinality checks prevent silently publishing a table with fewer or more rows than expected.
18. Applying the offset with NUMERIC_API_v1
The array_binary operation uses ["add", {"kind": "vector", "value": raw_c}, {"kind": "scalar", "value": correction_degC}]. For an addition, the scalar is applied to the five elements of the vector. The service performs the arithmetic; it does not automatically know the meaning of degC: this is why we have already checked the input units.
19. Defining the Dataset to publish
The requested result is w02_temperature_corrected, with contract table.generic, storage csv, five rows and two variables: raw_c and corrected_c. Both are float64, rank 1, unit degC; the second carries the semantic role derived. The definition also includes source_dataset_ids and source_variable_ids: these are the provenance identifiers of the data we started from.
20. The transactional publication cycle
DATASET_PUBLICATION_API_v2/begin starts a writer for the new ID. declare_dimension defines an extendable row dimension; declare_variable describes each column; append adds the five values of the two variables; finalize completes the registration. If a phase fails before completion, abort releases the unfinalised writer. This path is different from print(), which writes only to the log.
21. Setting correction and Output Dataset ID
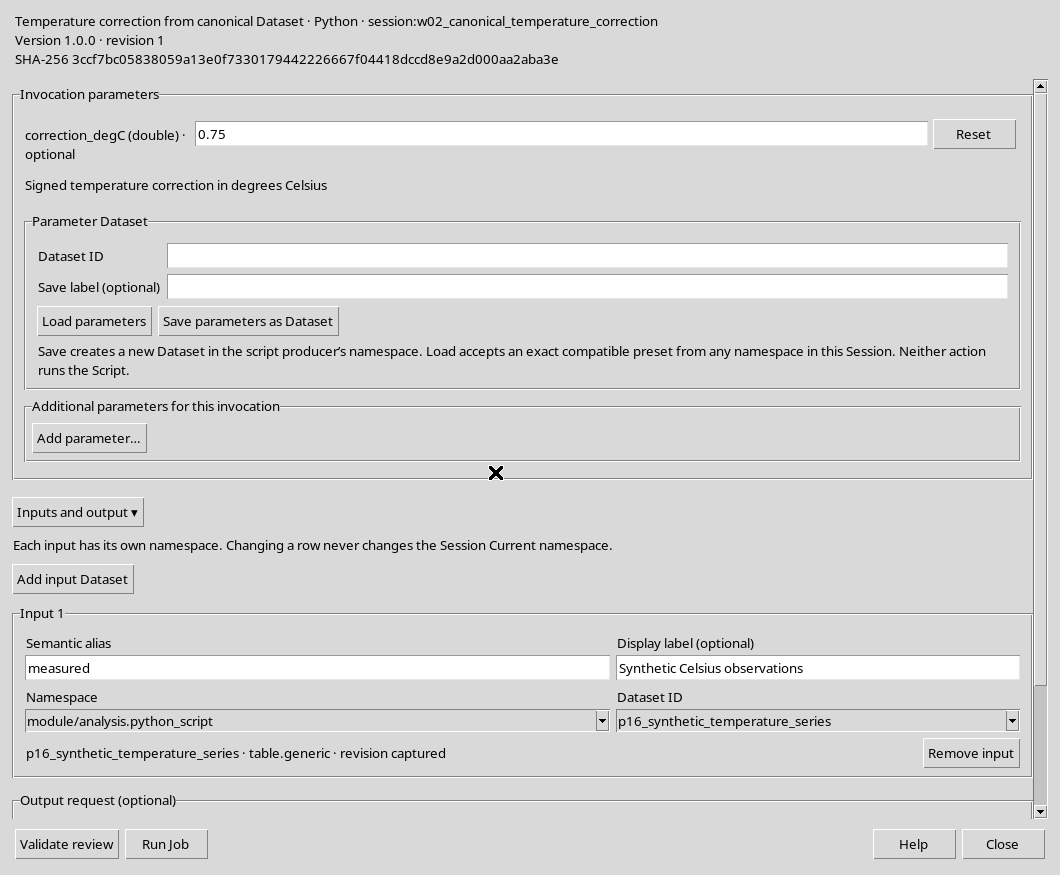
In the Runner set the parameter correction_degC to 0.75, fill in Output Dataset ID with w02_temperature_corrected and keep Replace existing Dataset disabled. This way the new publication is create-only: it does not overwrite any previous results. The output field does not, by itself, create the Dataset; it is the program that performs finalize.
22. Validating before submitting a Job
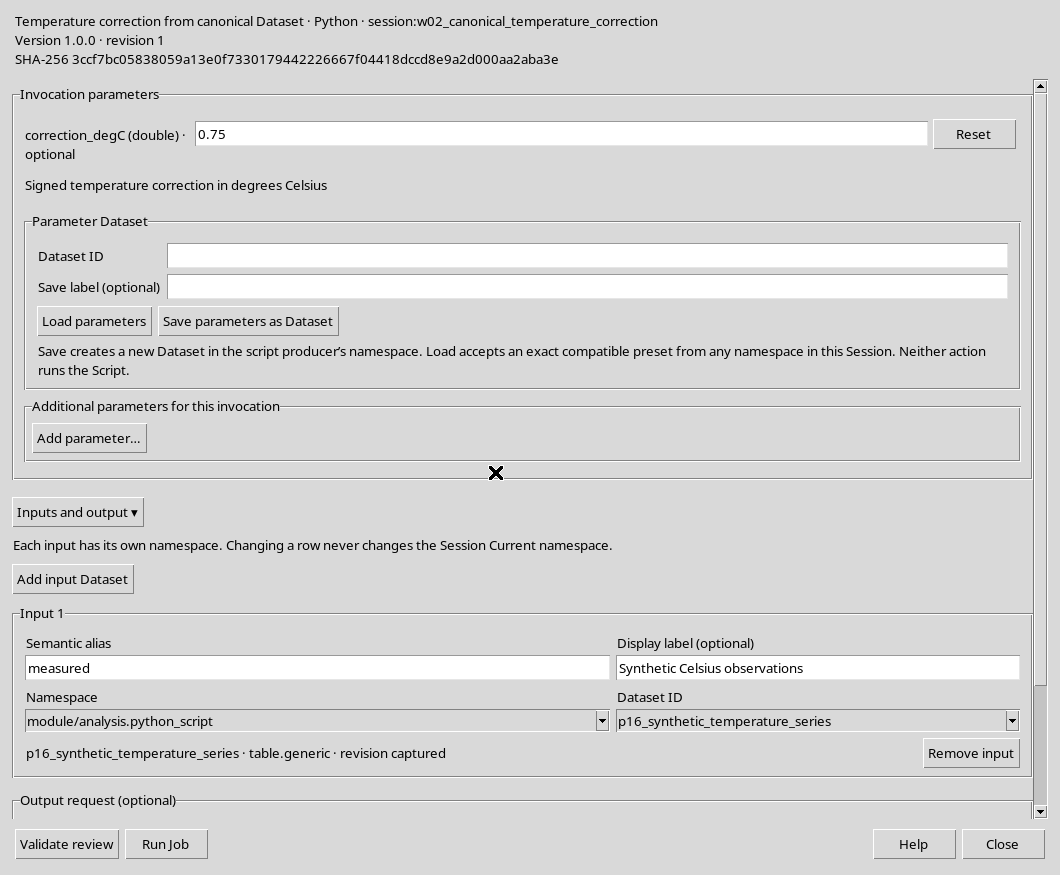
Press Validate review. The message Review valid. No Job submitted confirms that the configuration is admissible but no computation has yet been performed. Check again input and revision, parameter 0.75, new ID and Replace disabled. Only after this review press Run Job.
23. Running and checking Script Jobs Manager
Pressing Run Job starts a new managed execution. In Script Jobs Manager check that your Job reaches the COMPLETED state with exit code 0. The queued state does not prove success, and scientific publication requires the actual completion of the transaction.
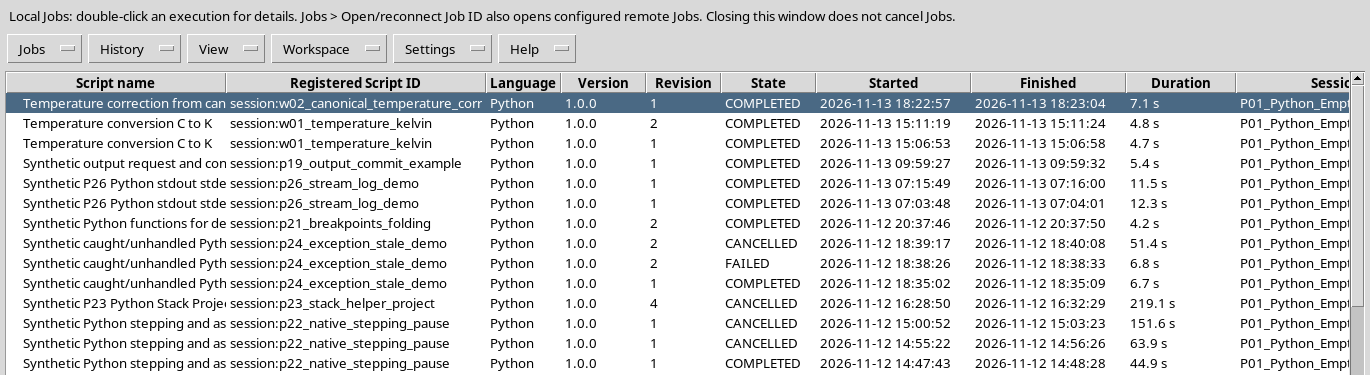
24. Interpreting Program output
In Job Details, select Program output. There are five W02_SAMPLE lines, the value W02_CORRECTION_DEGC 0.75, the mean W02_MEAN_DEGC 20.85 and the confirmation W02_DATASET_COMMITTED w02_temperature_corrected. These are check messages readable by the user; to prove that the Dataset exists you also need to read it from the canonical catalogue.
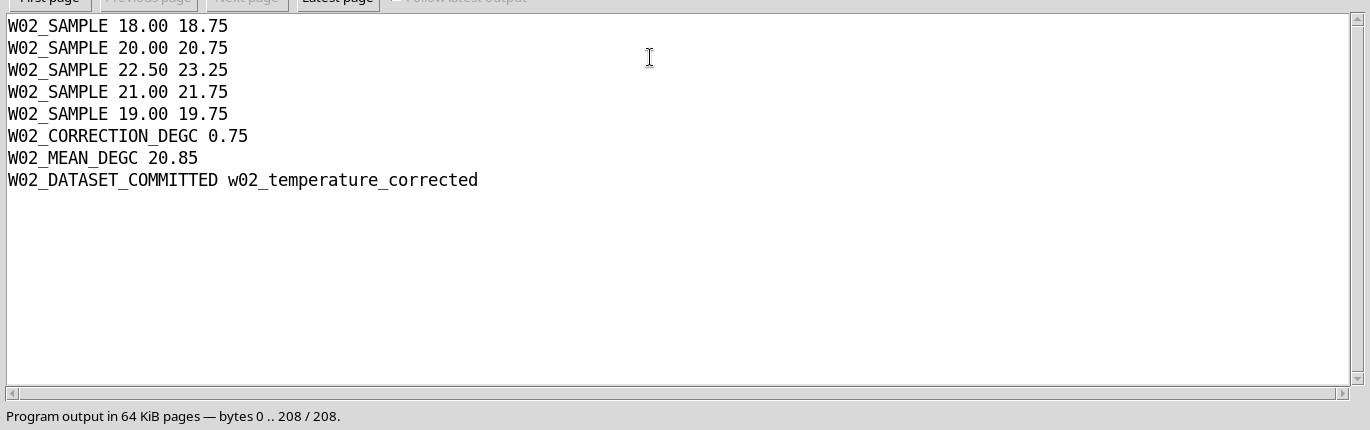
W02_SAMPLE 18.00 18.75
W02_SAMPLE 20.00 20.75
W02_SAMPLE 22.50 23.25
W02_SAMPLE 21.00 21.75
W02_SAMPLE 19.00 19.75
W02_CORRECTION_DEGC 0.75
W02_MEAN_DEGC 20.85
W02_DATASET_COMMITTED w02_temperature_corrected
25. Checking the canonical Dataset, not just the log
The published Dataset really contains five rows, two float64 numeric columns, unit degC for both and role derived for corrected_c. Canonical Dataset API v2 returns exactly the originals [18, 20, 22.5, 21, 19] and the corrected values [18.75, 20.75, 23.25, 21.75, 19.75]. The mean computed independently on the canonical values is 20.85 °C. The result keeps the reference to the source Dataset and to its variable temperature_c. The Script Registry and the immutable snapshot of the Job make it possible to link this product to the version of the program and to the parameter used.
26. Closing, reopening and reusing
First close Job Details and the Runner, then the tab of the saved source; reopen it from the Registry to check that the content has not been lost. The new Dataset remains in the Session, while the original input is not replaced. To repeat the process with other data, change the link of the alias measured, validate the schema and choose a new Output Dataset ID. This exercise does not use the Script Library and does not require the Debugger: the next tutorial dedicated to Projects will cover that path separately.