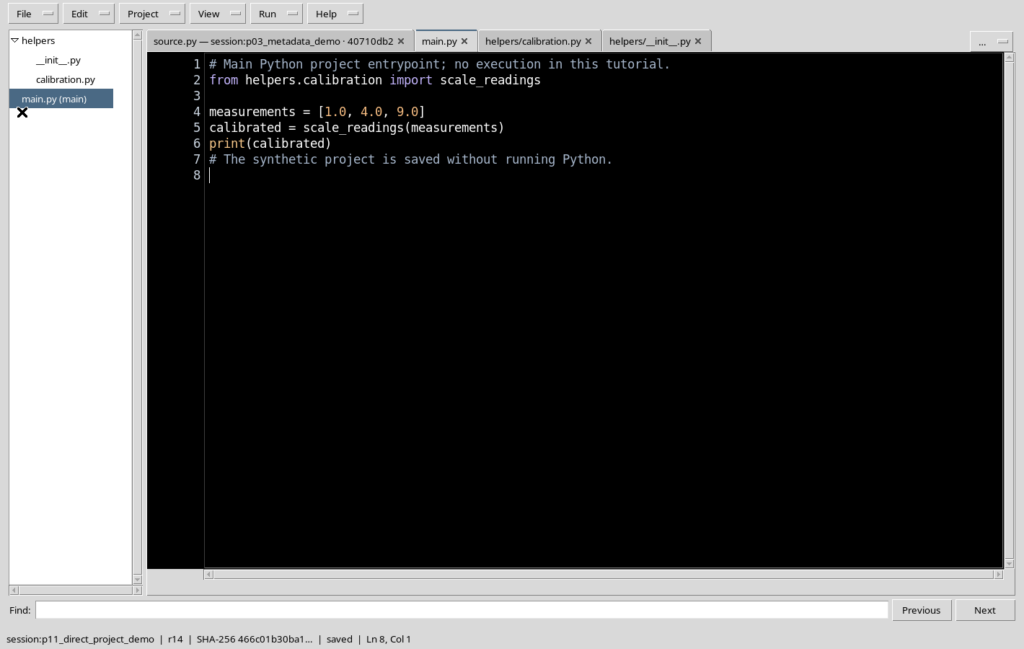
GX-TXT Python Script Workspace: running a Script from the Analysis tab
A Python Script registered in the Session can also be run from the normal GX-TXT Analysis interface, without opening the Script Runner. In this path you configure Script source mode, Session registered script, Working directory, Required GX-TXT APIs and any input Datasets, then start the computation from the Run tab. The guide illustrates a synthetic experiment with five temperatures, two revisions of the Script and the original execution reports.
1. When to use the Python Script module in Analysis
Python Script Workspace is used for writing, registering and maintaining code. The Python Script module in Analysis, instead, lets you run a Session Script through the normal GX-TXT computation cycle. It is the same registered code, but with a different selection mode and presentation: the module uses the scientific configuration of the experiment and produces an execution report.
2. Enabling Python Script in the configuration
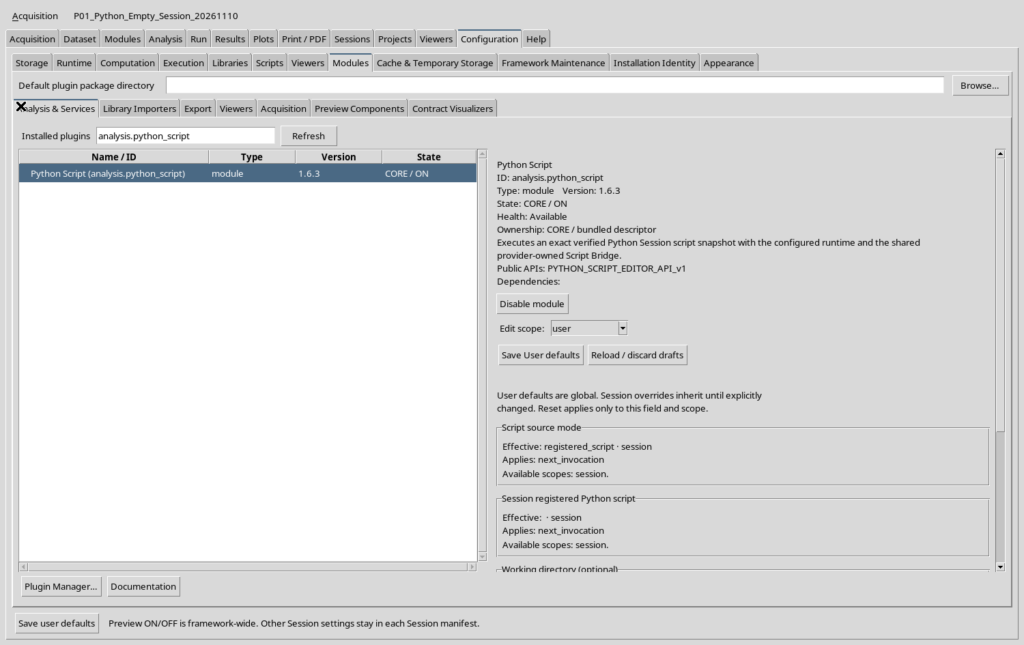
If the module is not active, open Configuration → Modules, look for Python Script and choose Enable module. In the list the entry shows its state, for example CORE / ON, and the installed version. Enabling makes the module available to the Session; it does not run Python and does not create Datasets. Check the Run / recalculate now selection separately.
3. The Session must be the correct one
Before selecting the program, check which Session is open. The Analysis Script must have a valid Session registration, not an arbitrary file path. The Datasets to be used must also belong to the current Session. The qualified identifier of the Script allows GX-TXT to find source, version, revision and required APIs.
4. Creating a demonstration Script in the editor
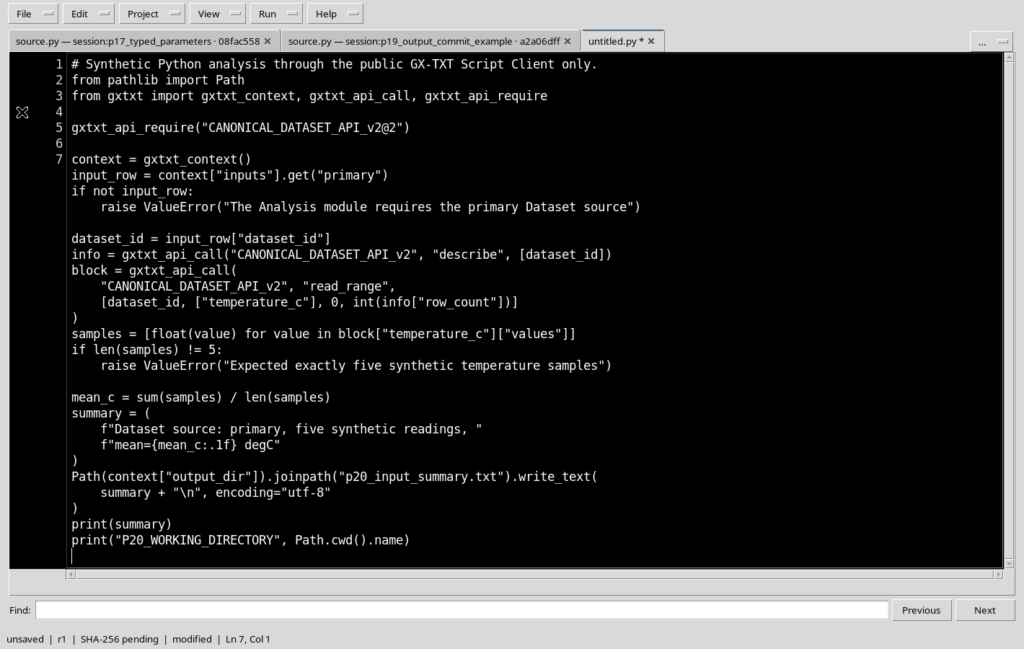
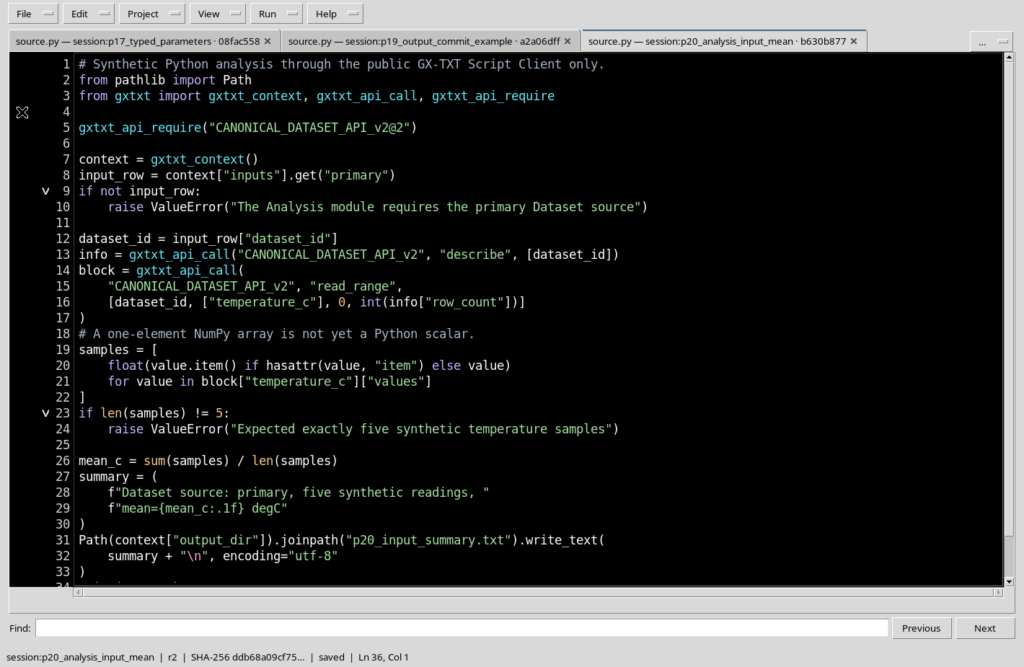
Open Python Script Workspace and use File → New Script. The example reads five synthetic temperatures from a canonical Dataset: 18.0, 20.0, 22.5, 21.0 and 19.0 °C. The measurements are not experimental data, but values chosen for the tutorial. The program computes the arithmetic mean, which in this case is 20.1 °C.
5. Declaring the numeric Dataset access API
The Script relies on the public Python Script Client and uses CANONICAL_DATASET_API_v2, without calling private framework functions. An explicit declaration of the required APIs allows the Registry to recognise the Script’s prerequisites before execution:
from gxtxt import gxtxt_context, gxtxt_api_call, gxtxt_api_require

gxtxt_api_require("CANONICAL_DATASET_API_v2@2")
The declaration is recognised statically by GX-TXT: it does not start the computation and does not open the Dataset.
6. Saving and registering the Session Script
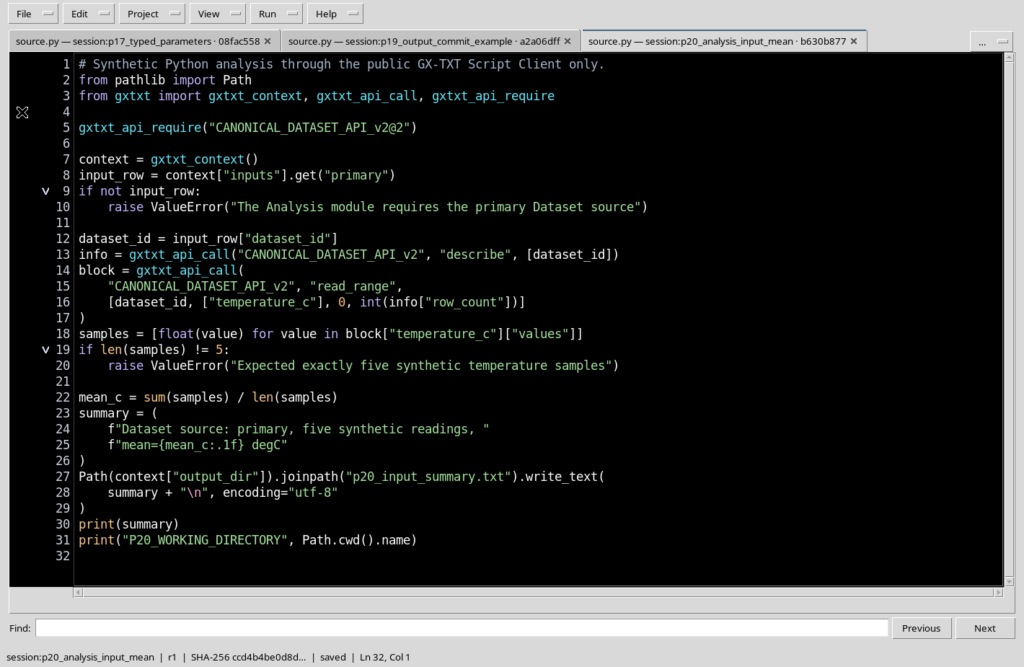
Enter appropriate Script ID, Name, Version and Scope, then choose File → Save. The Registry keeps the Python source, the revision, the SHA-256 and the required APIs. The editor tab indicates that the file has been saved. Later, if you change the code, the normal save registers a new revision of the same Script.
7. Selecting the module from the Analysis tab
Open Analysis and locate the Python Script panel. The module has its own Run / recalculate now checkbox and a Calculation configuration section. In a Session with many modules you can temporarily hide irrelevant panels from the Modules tab, without disabling their services or deleting previous results.
8. Choosing Script source mode
The Script source mode field indicates how GX-TXT locates the program. In the installed Python module the registered_script mode is used, that is, a source already present in the Session Registry. Do not replace the registered reference with an external file path: the path and the identity of the Script are not equivalent.
9. The Session registered script choice
The Session registered script combobox lists the Python sources registered in the Session. When you select the intended Script, the description shows language, ID, name, version, revision and SHA-256. Check these data before proceeding: the visible identity lets you distinguish two revisions of the same program and prevents confusing an editor tab with the selected executable source.

10. Required GX-TXT APIs is synchronised
Selecting the Script can automatically fill in Required GX-TXT APIs (semicolon-separated) using the declarations saved in the Registry. For our example CANONICAL_DATASET_API_v2@2 appears. There is no need to manually copy a list of APIs already declared in the source; the effective contract must be checked against the current registered revision.
11. Working directory: an execution directory
Working directory (optional) sets the working directory of the procedure. If specified, it must be an allowed location consistent with the Session and with the analysis tools. Do not confuse it with the source folder, with the canonical Dataset or with the output_dir managed by the Job. The output_dir is the supervised destination where the execution writes its report and temporary files.
12. The Dataset sources table
The Dataset sources (Analysis Source Map API v1) section associates a semantic identifier with a canonical Dataset. In the example the input uses Source ID: primary, selecting a numeric Dataset already registered. The choice is made through the original combobox, not by writing physical CSV paths directly. The Dataset can be in the namespace of a module different from the current namespace of the Session.

13. Source ID and Dataset ID are not interchangeable
primary is the logical name assigned to the program’s input. The Dataset ID instead identifies the canonical content of the Session. In our case the variables sample_index and temperature_c are present. The link makes a controlled reference to the Dataset available to the Job, without changing its producer, its content or the namespace of the Session.
14. Retrieving the input through gxtxt_context
During the actual execution the public Python context exposes the Dataset associated with the alias:
context = gxtxt_context()
primary = context["inputs"]["primary"]
dataset_id = primary["dataset_id"]

info = gxtxt_api_call(
    "CANONICAL_DATASET_API_v2", "describe", [dataset_id]
)
The code uses the identifier received from the CORE and does not assume a file name or a location on disk. It is the Session that controls which Dataset corresponds to that ID.
15. Reading the temperatures with Canonical Dataset API v2
To acquire the required scientific variable you can use the public read_range operation. You specify Dataset ID, Variable ID and row range:
block = gxtxt_api_call(
    "CANONICAL_DATASET_API_v2",
    "read_range",
    [dataset_id, ["temperature_c"], 0, int(info["row_count"])]
)
The result exposes values and type of the variable according to the canonical contract. There is no need to use the CSV parser directly or to interpret the Session metadata by hand.
16. Handling NumPy scalars correctly
Some values coming from the scientific transport can be represented by NumPy arrays with a single element. Directly converting a non-scalar array with float(array) can generate deprecation warnings. An explicit conversion lets you use Python numeric values while keeping a clear behaviour:
samples = [
    float(value.item() if hasattr(value, "item") else value)
    for value in block["temperature_c"]["values"]
]
if len(samples) != 5:
    raise ValueError("Expected five synthetic samples")

mean_c = sum(samples) / len(samples)
print(f"Synthetic mean: {mean_c:.1f} degC")
The example also checks the number of samples, instead of assuming that the selection always has the desired shape.
17. The report and the Job’s output_dir
The context also contains output_dir, the directory managed by the framework for the files of the single execution. You can write a summary text to it:
from pathlib import Path

Path(context["output_dir"]).joinpath("summary.txt").write_text(
    f"Mean: {mean_c:.1f} degC\n", encoding="utf-8"
)
A file written in the Job is not automatically a canonical Dataset. Scientific publication requires a dedicated registration API, illustrated in the chapters on outputs.
18. Preparing the command in the Run tab
After checking Script and Dataset, open Run. The main command is Run enabled analyses. The page also contains Execution plan, which should summarise the selected modules and inputs. Do not use Run indiscriminately: make sure that the required modules are the only ones selected and that the Session is the correct one.
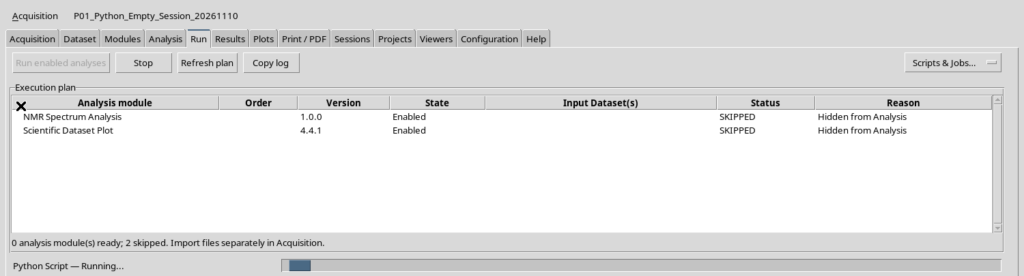
19. A limitation of the Execution plan
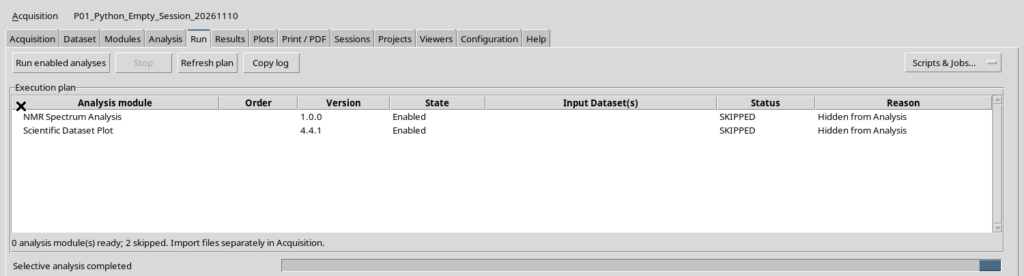
In the version described, the Execution plan summary may not list Python Script even when the module is enabled, visible and selected for processing. It may therefore wrongly indicate that no module is ready. This is a discrepancy in the presentation of the plan: the Run enabled analyses action keeps its own execution path. Before using it, check the choices directly in the Analysis tab and do not interpret the zero in the summary as proof that the Script is inactive.
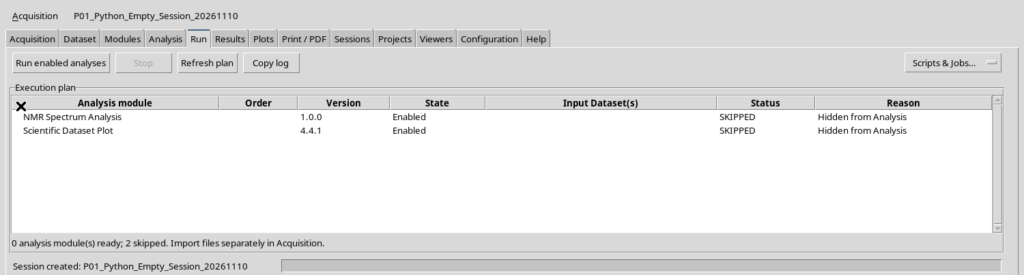
20. Starting the Python analysis
Press Run enabled analyses after checking the configuration. GX-TXT prepares the module’s runtime and starts the procedure through its supervisor. During execution the Run page shows the active module and a state such as Python Script — Running…. There is no need to open the Python Script Runner and no need to go through the Script Library.
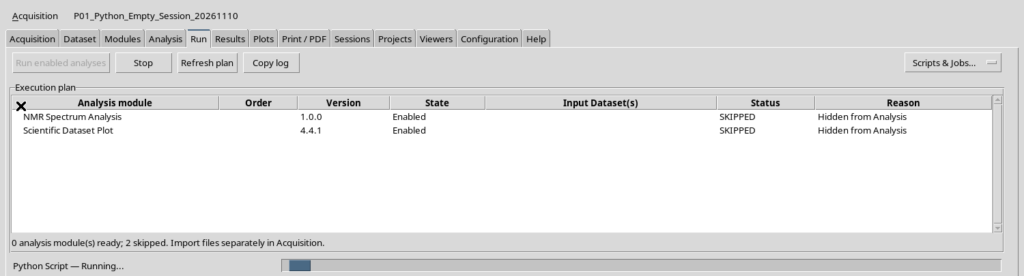
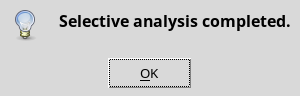
21. Completion is confirmed by GX-TXT
When the computation ends correctly, the state of the Run page and an information window indicate that the selective analysis is complete. This information attests the closure of the Analysis path, but the scientific check must also examine the report, the source and the content of the output.
22. Reading the result of the example
The program read the five temperatures from the canonical Dataset and printed the mean 20.1 °C, consistent with the synthetic input values. It also confirmed the configured working directory. No new numeric Dataset was published by this procedure: the computation was recorded as a Job with report and runtime output files.
23. The python_script_run_report.txt file
The module produces a Python report containing information such as PASS state, language, module, version, registered_script mode, Script reference and revision, expected and verified SHA-256, Python runtime, required APIs and identifier of the single execution. These fields help establish that the Job used the intended source.
24. executed_script.py is a frozen copy
The executed_script.py copy keeps the code actually run. It must not be confused with the source currently open in the editor, which may have been modified afterwards. A later revision of the Script keeps the previous Job and its execution copy: the scientific provenance remains distinct and verifiable.
25. Correcting a conversion without changing the data
If the program generates a warning related to the representation of a NumPy scalar, change its conversion in the Python editor, leaving the source Dataset, the required APIs and the mean algorithm unchanged. Use the normal File → Save to register the corrected source. Do not manually alter the content of the frozen copies in previous Jobs.
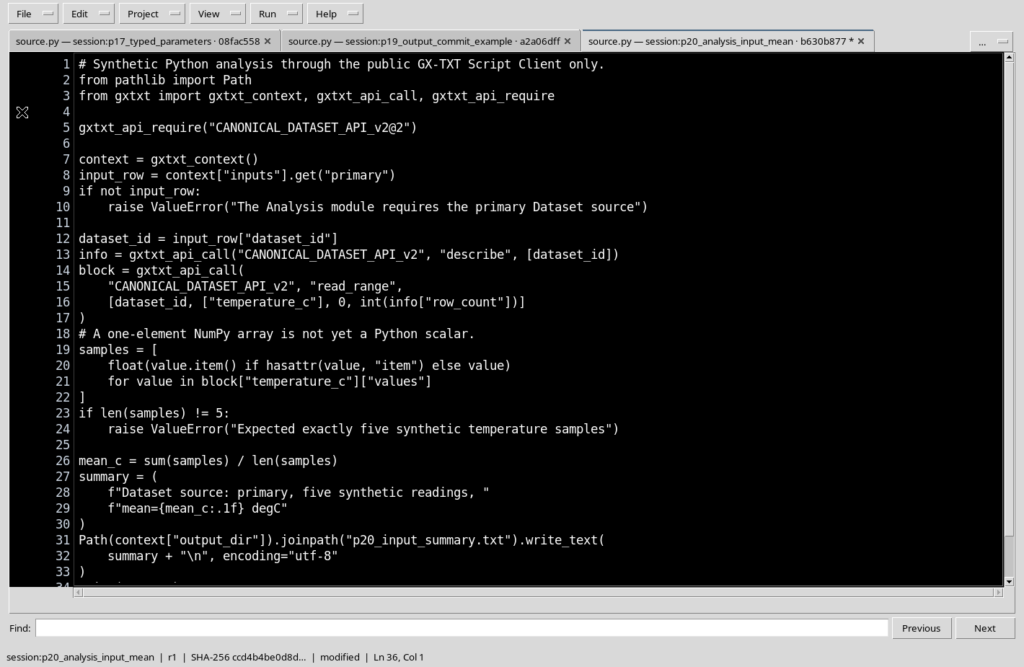
26. Revision 2 keeps the provenance of revision 1
When the corrected code is saved, the Registry assigns a new revision and a new SHA-256 to the same Script. The first Job keeps the previous revision, while the new execution will use the updated source. This is the advantage of working with registered Scripts: revisions are explicit and do not erase the history of the experiment.
27. Repeating the computation from the Run page
With the updated Script, return to the Run tab and repeat the selective execution of the Python module. The new Job uses revision 2, reads the same Dataset and again returns 20.1 °C, without the previous warning. The original report records the new revision and the new SHA-256. The Execution plan summary may continue to omit the module, although the final state reports Selective analysis completed.
28. Returning to the Workspace and checking the Session
After examining report, data and provenance, close any execution windows and return to Python Script Workspace. In High Contrast Dark you can resume editing the sources. The Analysis module and the Runner remain distinct tools, based on the same Registry and on the public scientific APIs; the next development will concern the debugging tools, with new autonomous procedures.